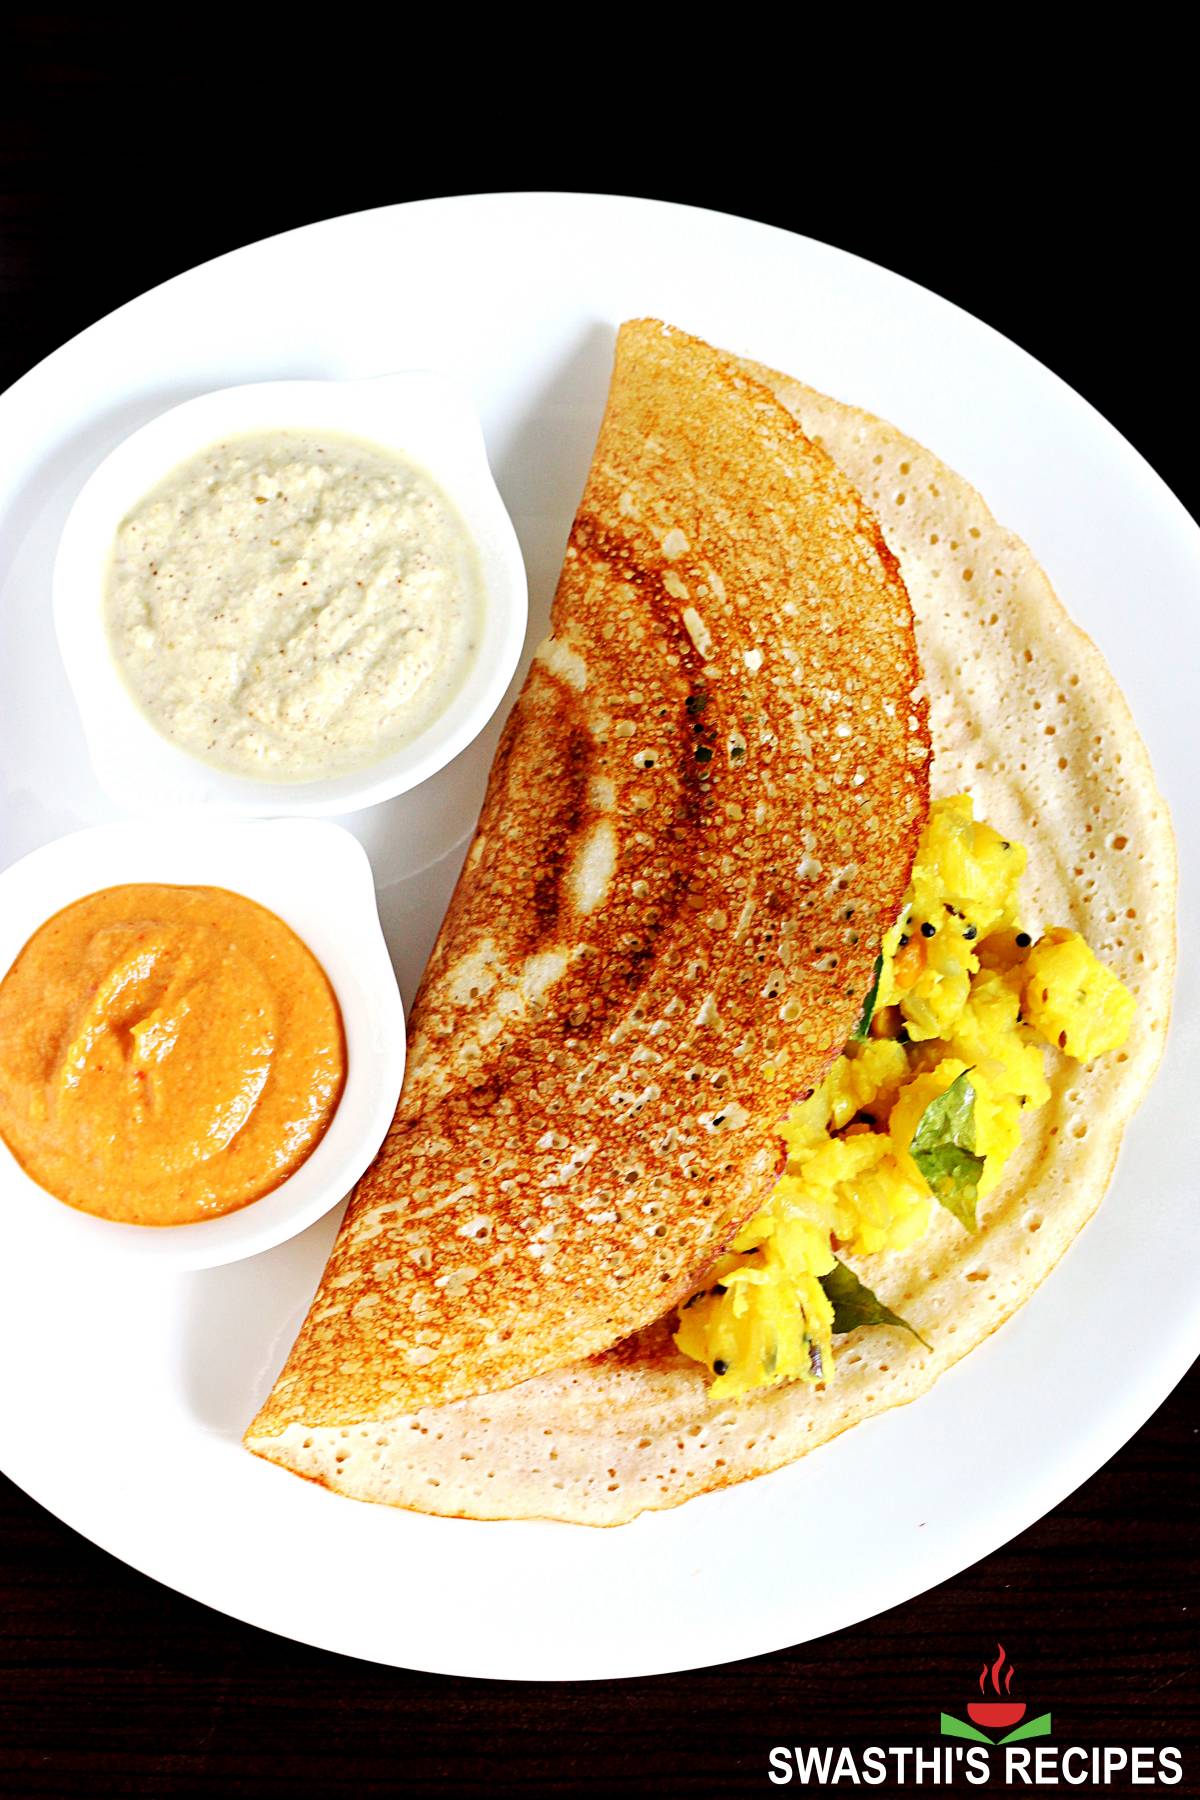
Dosa Recipe with homemade Dosa Batter
Updated: May 7, 2026, By Swasthi Shreekanth
My time-tested Dosa Recipe with step-by-step photos & video will help you master the technique of making delicious and perfect golden crispy dosas every single time. Whether you are looking for a homemade dosa batter recipe or want to replicate a restaurant meal, I’ve you covered with every detail in this post.
Ever since I first posted this recipe 10 years ago, millions of crispy dosas have been made successfully by my readers.
What is Dosa?
Dosa is a classic South Indian savory crepe made with a fermented batter of lentils, rice and fenugreek seeds. The ingredients are soaked for several hours, ground to a thick batter and left to naturally ferment overnight in a warm place.
Later the batter is seasoned with salt and spread like a crepe on a hot pan known as tawa or dose kallu. The batter gets cooked on the hot surface along with a drizzle of oil, ghee or butter and results in a delicious crisp Dosa. It can be rolled up to a log, cone or simply folded half-way or to a triangle.
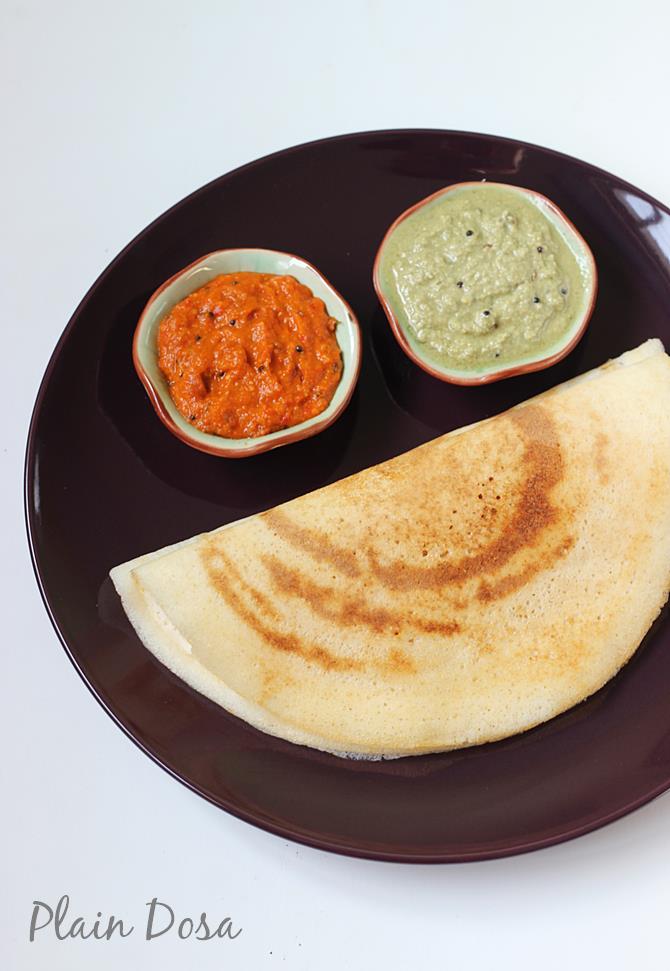
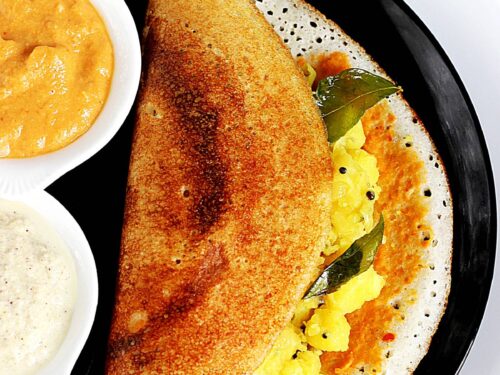
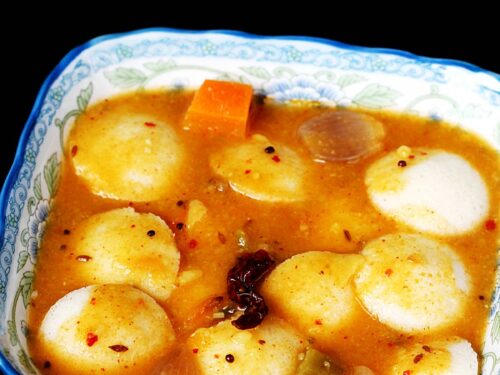
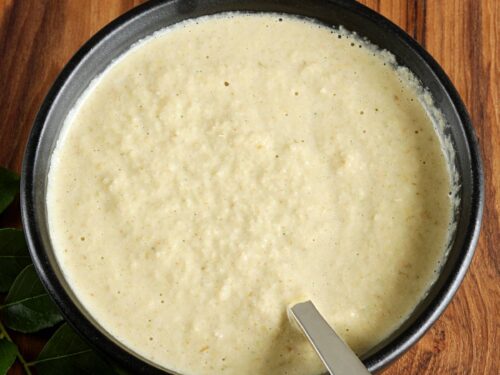
Traditionally these are eaten hot with a spicy chutney, curry, kurma or sambar. Restaurants often serve them with staples like Coconut Chutney, Onion Tomato Chutney, Tiffin Sambar & Potato Masala (in case of a Masala dosa).
My Recipe
I’ve grown-up eating my Mom’s crispy Dosas & soft Idlis every single day of my life. I’ve cooked many thousands of dosas for my family & friends because these are a staple in my home, making up 5 to 6 meals every week.
Traditional dosai were much thicker than they are today, in the modern days. Udupi restaurants (like MTR) from Karnataka popularized the crispier, golden and thinner versions we make today.
I come from Karnataka/ Bangalore where these are a staple so my recipe uses chana dal and poha to achieve similar results. They are a gamechanger in this restaurant version.
So my perfected recipe will help you make restaurant style delicious, golden and crispy dosa. You can use the same batter to make uttapam, punugulu, paniyaram and sweet paniyaram.
I have a variations section below where I tell you about adjusting the ratios of rice to dal to suit your dietary needs or texture preferences. I also have a 2-in-one idli-dosa batter.

What you need
Ingredients
Basically, Dosas can be made with only 2 ingredients – urad dal and rice. But using other ingredients like chana dal, fenugreek seeds and flattened rice improve their texture, flavor and color.
If you need an upgrade from basic to restaurant style, you have to use these.
- White urad dal also known as skinned black gram is the key ingredient & it’s available in 2 forms – whole and split. You may use any but I prefer whole.
- Chana dal (Bengal gram) imparts a nutty flavor and golden color to the dosa. You may sub them with toor dal – split pigeon peas, but you won’t get the same flavor and taste, it works in a pinch.
- Short grain raw rice like sona masuri is the best choice for the most perfect crisp golden restaurant dosas. Raw ponni, basmati rice (not sella) or 50/50 raw rice and short grain parboiled rice work but they will be lighter in color. If you are new to understanding raw rice and parboiled rice, read my faqs below.
- Methi seeds (dried fenugreek seeds) help in fermentation, improves the color, flavor and texture of dosa. Though used in small quantities, many believe there are health benefits of using them.
- Poha (flattened rice) enhances the golden color & crisp texture while making lighter dosas.
- Filtered water – Using de-chlorinated water is highly recommended for better fermentation. Though your kitchen tap water is safe, may still contain chlorine (within the safe limits). I learnt the harder way that even small amounts of chlorine in water can inhibit the fermentation process, keeping your batter flat without a rise.
- Non-iodized salt helps with better fermentation if you add before fermenting. Iodized salts hinder the fermentation so avoid it unless you are adding it after the fermentation.
Equipment
- Blender, grinder or a wet grinder – You need a good blender with at least 750 watts capacity to grind your soaked lentils and rice. To make smaller batches like this recipe, you don’t necessarily need a high speed blender like Vitamix or Blendtec. Something like a Nutribullet (900 W) works too.
- A wet grinder or an Indian mixer grinder is ideal & best if you are making larger batches and more often. These have steel containers which are plastic-free, so no or reduced microplastics in your batter.
- Dosa tawa/ griddle/ pan is available in different sizes and come in 4 types – cast iron, non-stick, granite and ceramic. If you are a beginner you may start learning to make dosa on a non-stick tawa (avoid teflon). Traditionally a cast iron tawa (ex: like a lodge 10.5”griddle) is used & it needs maintenance.
Top FAQs
When to add salt?
The most debated topic in South Indian Cuisine is “when to add salt to idli dosa batter?” Every South Indian home has a different answer to this, based on their experience. So experimenting is essential to know what works for you.
Adding salt before fermentation:
Pro – It is ideal to add sea salt/ Indian rock salt (or non-iodized salt) before fermentation during winters as these natural unrefined salts helps with the fermentation process. However you should avoid using table salt and iodized salt as they inhibit the growth of yeast required for fermentation.
If you use an equipment (instant pot/oven/) to ferment your batter, adding salt early before fermentation is not required.
Con – By adding salt to the entire batter, you lose the chance to store it longer. Salted batter often turns too sour within a week while unsalted batter keeps good for 2 to 3 weeks.
Can I soak dal & rice together?
This is the next most FAQ. Traditionally they are always soaked separately because the lentils are supposed to be ground to a fluffy and smooth texture while the rice is ground to a slightly coarse texture. It is believed the fluffy texture of the dal helps make dosas lighter and the coarse texture of rice gives the required crispiness to the dosa.
Secondly, blending time for dal and rice is different. Dal finishes faster while rice takes longer. By grinding these 2 together you may need to blend longer. This is an extra load to your blender, which can eventually break down or heat up the batter. I have heard this from many people.
However I know people soaking and grinding them together, so you may do the same if you want. It should taste the same.
Photo Guide
How to make Dosa Batter (Stepwise Photos)
Soak Lentils & Rice
Recipe 1
If you want to soak all the ingredients together, you may do that but first read my faq section to know the difference.
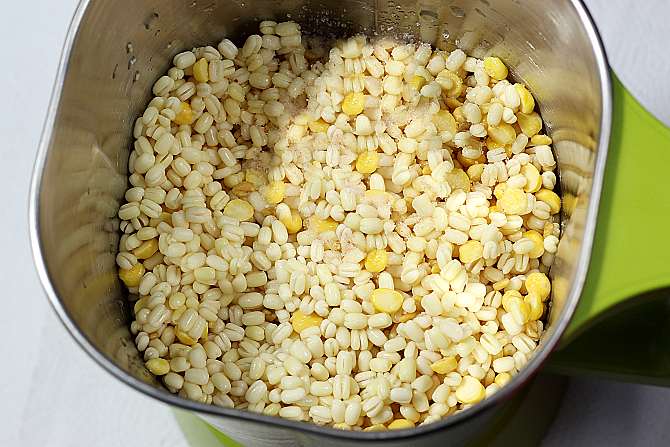
1. Add ½ cup urad dal (skinned black whole lentils), 2 tablespoon chana dal (Bengal gram) and ½ teaspoon methi seeds to a large bowl/pot. Add 1½ cups raw rice to another bowl.
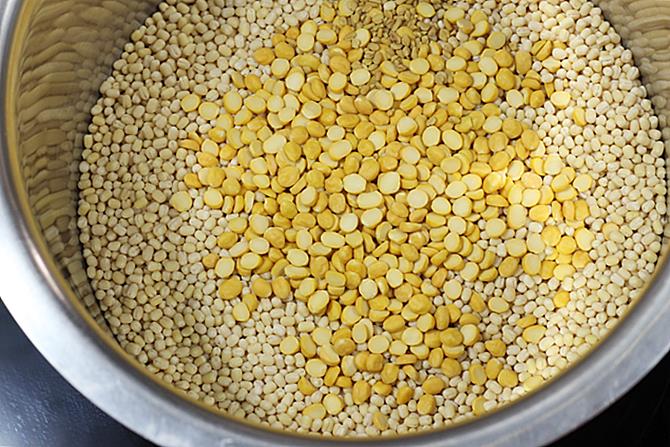
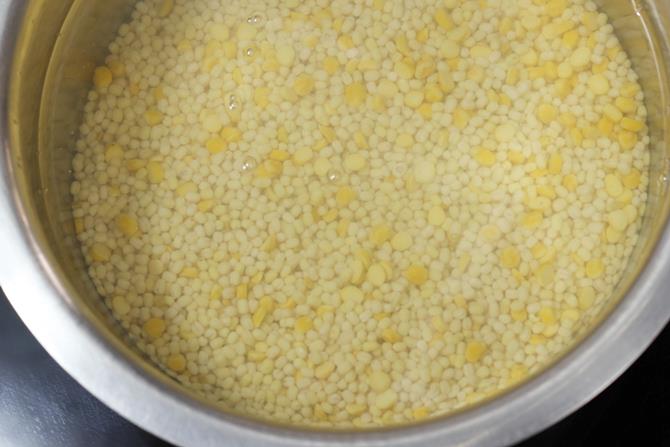
2. Rinse dal thoroughly a few times and soak in 3 cups filtered water for 5 to 6 hours. During cold weather they can be soaked even overnight.
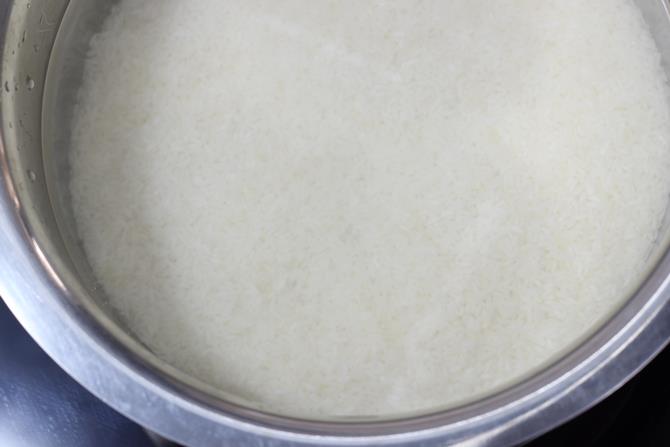
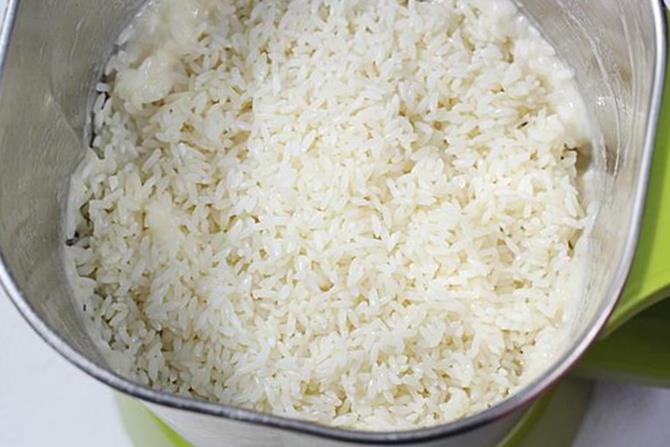
3. Rinse rice thrice or until the water runs a bit clear. Soak in 3 cups filtered water for 5 to 6 hours. Same here as well, during cold weather they can be soaked even overnight.
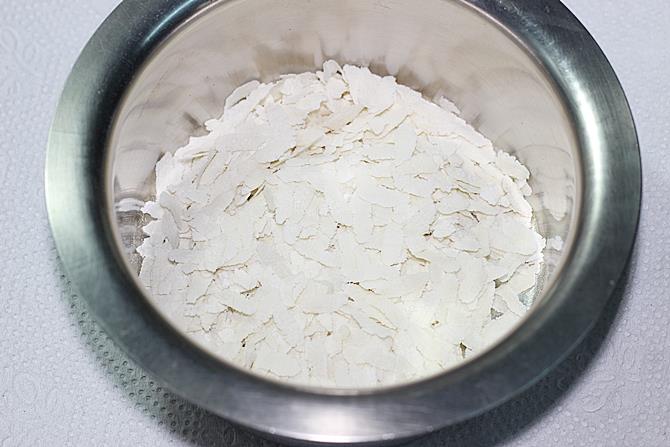
4. About 30 mins before blending the batter, rinse and soak 2 tablespoons poha (beaten rice) with ¼ cup filtered water.
Make Dosa Batter
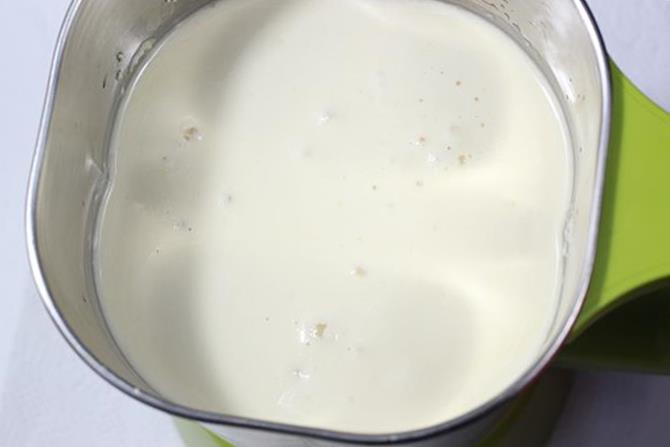
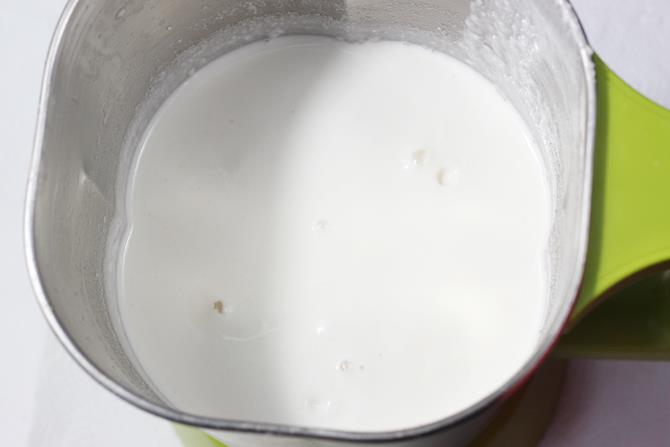
5. Add soaked poha to the grinder jar or instant pot steel insert first. Drain the water completely from dal and pour ¾ cup cold filtered water.
6. Blend until smooth, frothy and bubbly. If needed add more water. I add another 2 to 4 tablespoons water. But do not make it thin or runny. It must be a thick batter yet of pouring consistency. (Check video for consistency)
7. Transfer the batter to a a large bowl. Drain rice completely and add to the blender jar. Pour ½ cup water.
8. Blend to a slightly coarse batter.(not as coarse as semolina/suji)
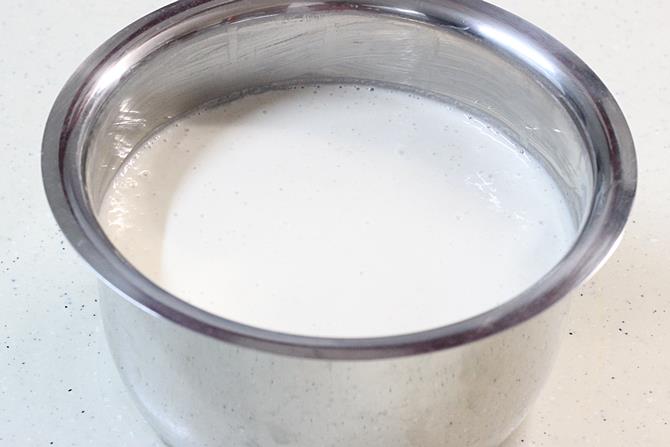
9. Add the rice batter to the urad dal batter. During winters you may add half teaspoon sea salt (non-iodized) & mix at this stage to help with fermentation. Mix well. The warmth in your hand is said to help in fermentation if want you may use your hand but I don’t.
The prepared batter must be of pouring consistency yet thick and not runny. Very thick or runny batter won’t ferment well, so right consistency is important. (check video for consistency)
When I make 2x & 3x recipe, I use 2 glass or ceramic/steel bowls to ferment and refrigerate the dosa batter. I divide and distribute the batter to 2 bowls. Undisturbed batter stays good in refrigerator for longer without going sour.
How to ferment Dosa Batter
10. Cover and ferment it in a warm place until the batter rises and turns bubbly. If you live in a warm region, you can leave it on the counter overnight. It may take anywhere from 8 to 16 hours depending on the temperature.
To ferment in winter, place the bowl in a oven turned ON at 100 F / 40 C for atleast 2 to 3 hours & let ferment overnight with the oven turned off or oven light ON. Or Alternately, place the batter bowl in your instant pot steel insert, press yogurt settings with a timer set to 8 hours (12 to 14 hours during colder days). Use an external lid and not the IP lid.
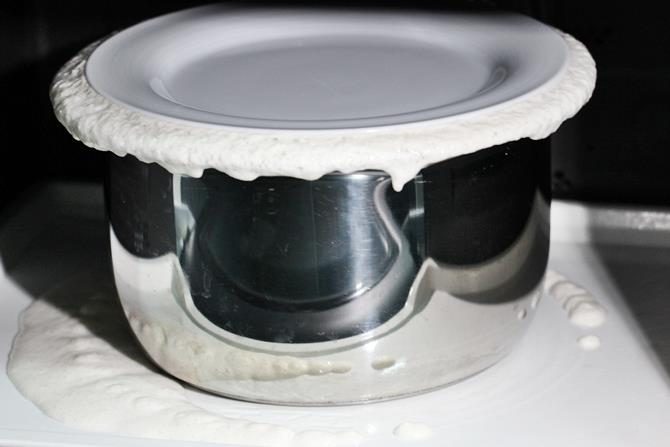
11. When I made this, I had to ferment for 16 hours in a closed kitchen cabinet. When properly fermented, the batter rises and turns light, fluffy with lots of pores & bubbles. The batter was half of the bowl before fermentation. It rose a little over ¾.
Fermentation test: To check, drop half a spoon of this batter into a bowl of water. Well fermented batter floats.
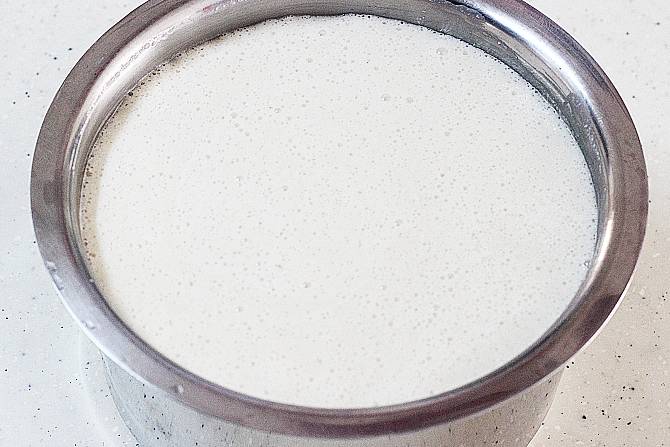
12. This is a closeup shot of how the batter looks after fermentation.
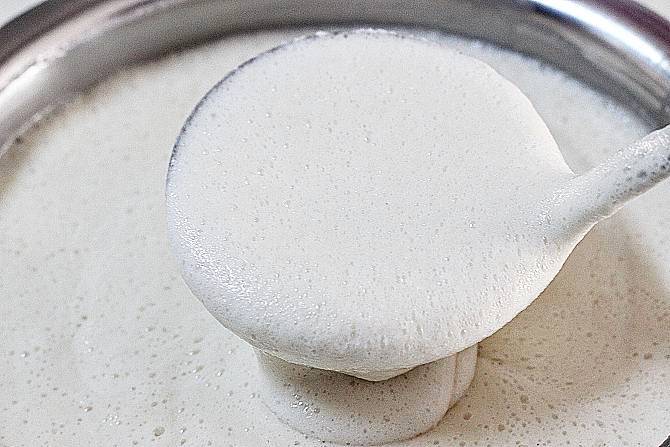
13. Do not over ferment the dosa batter as it turns sour and the batter is not so good to spread on the griddle. This is a picture of over fermented batter just for your reference.
Make Dosa
14. Once your dosa batter is well fermented, stir it gently and take a required portion to a small bowl. Keep the rest of the batter in the refrigerator for 2 weeks. The batter will be thick after fermentation. Add salt if you did not add earlier and may pour 1 to 2 tbsps little water only if required, to bring it to a pourable and spreading consistency. (only to the portion you are going to use now). (check video for consistency).
16. Heat a dosa griddle/ tawa on a medium heat. When it is slightly hot, add a few drops of oil and spread it with a kitchen paper or a half cut onion (pierced with a fork/ butter knife on the rounded side to hold).This prevents the dosas from sticking to the pan. It is important not to leave excess oil on the griddle, so wipe down if required.
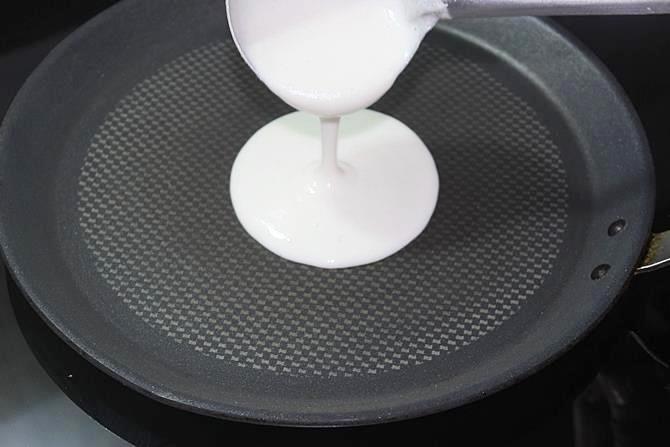
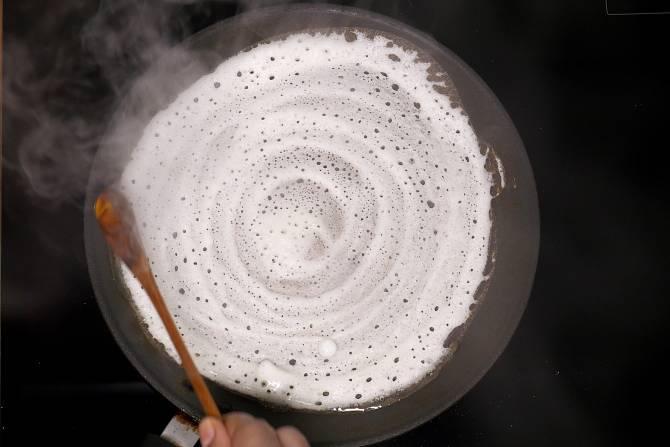
17. To check if the pan is hot enough, sprinkle a few drops of water over the pan. If it is ready, it should sizzle. Reduce the heat to low or medium, stir the batter with a ladle and take a ladle (¼ cup) of dosa batter & pour in the center of the hot griddle/ tawa.
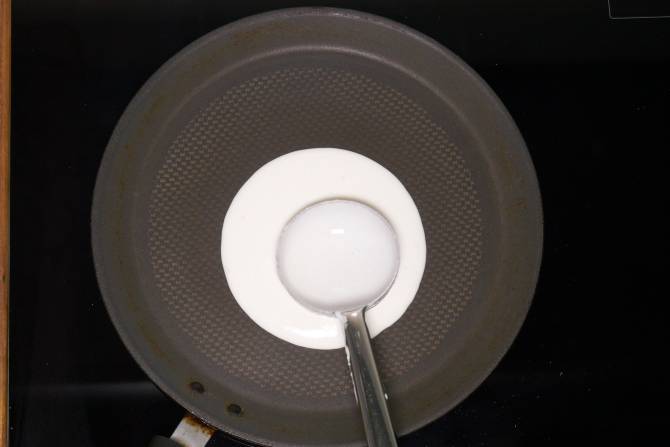
18. Immediately begin to spread it evenly with the base of the ladle – starting from the center, in an outward circular motion in a clockwise direction. (Check photos or video in the post)
Troubleshooting tip: If you are unable to spread the batter because it got stuck to the pan, it means either the pan is too hot or the batter is too thick. Reduce the flame and cool down the pan slightly. If that doesn’t work then pour little more water to your batter to bring to right consistency. Also too much oil on the empty pan won’t let you spread the batter well.
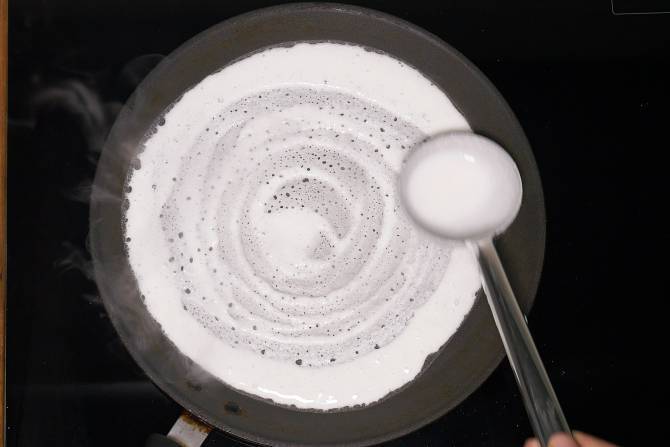
19. This is how your dosa should look.
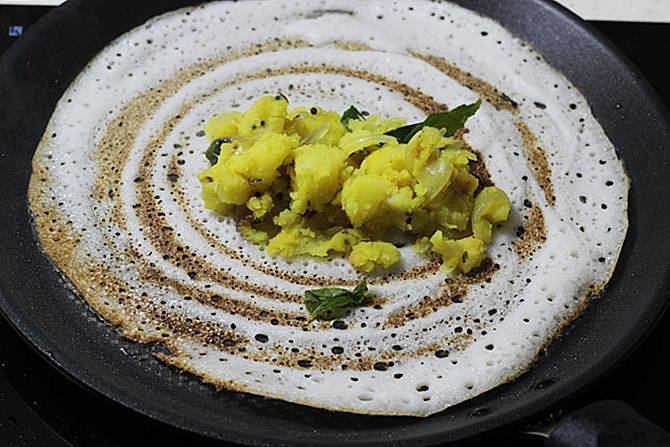
20. Increase the heat to medium high or high and drizzle 1 tsp oil/ghee/ butter across the edges & on the dosa. The edges of the dosa will begin to leave/ come off the pan when done.
22. Cook until the base turns golden & crisp. Run a thin wooden turner/spatula across the base of the dosa, starting from the edges to the center. Optional – If you want you may cook on the other side – turn it to the other side and cook for a minute. Turn again and cook the base for 30 seconds to crisp it.
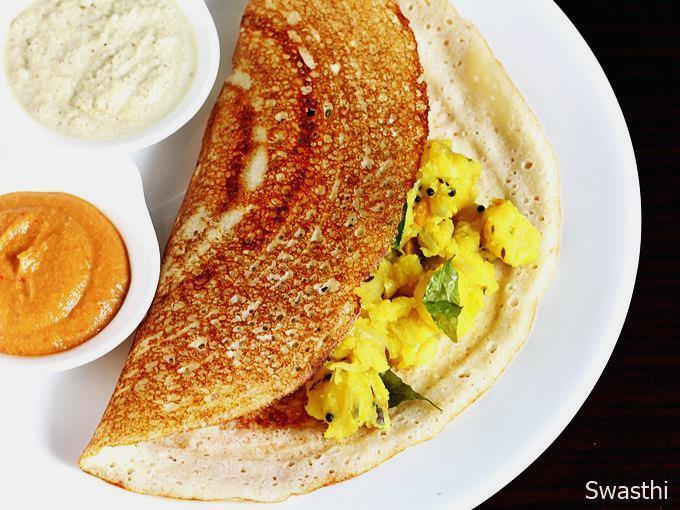
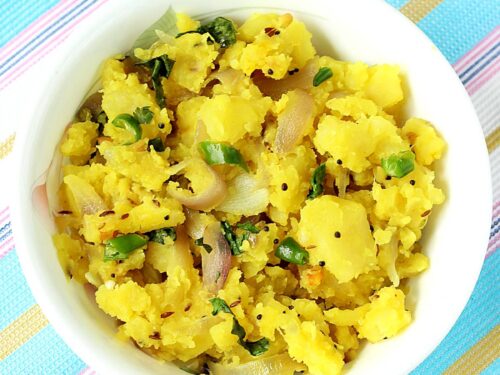
22. Since I made the masala dosa, I used this potato masala for filling. Plain dosa is most commonly served with coconut chutney. Fold the dosa and remove to a serving plate. Before making the next dosa, reduce the heat to low. You can also rub the cut onion and then pour the batter. Make sure there is no excess oil on the pan.
Serve the dosa right away when it is hot. They begin to soften as they cool down.
Troubleshooting Expert Tips
- Unable to grind batter well, remains very coarse – soak the rice and lentils separately and for slightly longer.
- Batter turns extremely light and bubbly or dosas are extremely light – whisk the batter well to collapse some of the bubbles and make sure you are using only raw rice like sona masuri.
- Batter clumps while spreading either on the pan or to the back of the ladle – batter too thick, thin it down slightly. Sometimes a very hot pan can also hold back your batter on the pan, not letting you spread.
- Batter remains undercooked even after cooking the dosa long enough – wrong kind of rice, mostly parboiled rice causes this. Also if the pan is not hot enough or the batter is too cold, the batter remains flat, undercooked and turns dry.
- Dosas are not golden and crisp – keep the batter thick yet of spreading consistency, make sure the pan is really hot and cook on a medium high heat. Golden color comes from using chana dal, poha, methi seeds and high amount of starchy rice – i.e raw sona masuri rice.
Faqs
Every restaurant and household has a different ratio. In Karnataka a 1:3 ratio, in Andhra Pradesh 1:2 ratio and in Tamilnadu and Kerala 1:4 ratios of urad dal & rice are used respectively. These vary again to achieve individual specific goals like color, texture and thickness.
Yes dosa is considered a healthy gut-friendly breakfast & meal with all essential nutrients like prebiotics, protein, carbs, vitamins and essential minerals. Cooking them in lesser fats and keeping the ratio of rice lesser makes them healthier. To make them high protein and low-carb they can be made with lesser or zero amount of rice.
Dosa tastes savory with a slight tang from the fermentation process. If they are too sour, it means the batter has gone far from being well fermented, meaning it is overfermented or stale.
Perfectly fermented batter, a hot tawa, thick yet spreading consistency of the batter and cooking on a medium high heat are the secrets to a perfect golden crispy dosa every single time.
Cold water prevents your batter and the grinder/mixer/blender from heating up unnecessarily. Warm batter may kill the yeast that got activated during soaking and the batter may not rise at all. If you live in a cold region you may use room temperature water.
Raw rice comes directly by milling paddy after harvesting and drying. Whereas parboiled rice comes from milling paddy that has been boiled with the husk/bran intact which preserves some of the nutrients like fiber and minerals. This kind of rice is low in starch, meaning lesser carbs than raw rice. Idli rice is a kind of parboiled rice.
Variations
2-in-1 Idli-dosa batter
1. Combo 2-in-1 Idli-dosa batter is great when you don’t want to make 2 different kinds of batter, one for idli and the other for dosa. These ratios will give you soft idlis and crisp dosas but they won’t be golden because there is no chana dal used.
½ cup urad dal
1½ cup raw rice (or ¾ cup raw rice + ¾ cup idli rice)
½ teaspoon of methi seeds
2 tablespoons of thick poha
Andhra style dosas
2. This traditional version has higher amount of urad dal and lesser rice. They are a staple in the Telugu speaking homes and are considered as a great food for all because they have higher amounts of calcium from the dal.
Urad dal is one of the most calcium-rich lentils so traditionally these were also served to toddlers, kids, breastfeeding mothers and anyone recovering from illness. These dosas are best served right out of the pan as they begin to soften quickly. (Cook the dosas on both the sides to cut down the flavor of urad dal)
1 cup urad dal
2 cups raw rice
High protein dosa recipe (new)
3. These are my new favorite and I make them when we want to eat lesser rice. They come out super light, crisp and nice but you need to spread them very thin and cook on both sides else you will taste the urad dal because there is little rice in this.
Don’t under ferment or over ferment the batter. Under fermentation will retain the flavor of dal and over fermentation will make the batter too airy.
1 cup urad dal
½ cup chana dal
1½ cup raw rice
1 teaspoon methi seeds
Quick Fix: If you don’t like it after trying, you may mix in 1 cup rice flour (from a South Indian brand) with little water to make a thick paste. Later mix it with the batter. It will give you regular dosas and they will be crispier.
Related Recipes


Recipe Card
This post was first published in March 2016, updated in May 2026
Dosa Recipe with homemade Dosa Batter
Ingredients
- ½ cup (100 grams) urad dal (whole or split skinned black gram)
- 2 tablespoons (25 grams) chana dal (Bengal gram)
- 1½ cups (315 grams) raw rice (sona masuri sub with ponni/ basmati rice, refer notes)
- 2 tablespoons (15 grams) poha (flattened rice)
- ½ teaspoon (2.5 grams) methi seeds (fenugreek seeds)
- 1¼ cups (300 ml) cold filtered water (+ ¼ cup more as needed, divided – ¾ to 1 cup + ½ cup)
- ½ teaspoon sea salt (non iodized salt if using before fermentation)
Method
- Rinse together urad dal, chana dal and methi seeds thrice, draining out the water after each rinse. Soak in 3 cups water for 5 to 6 hours.
- Rinse rice thrice and soak in 3 cups water for 5 to 6 hours. (If you have a high speed blender you may rinse and soak them together, read faqs)
- Rinse and soak poha in ¼ cup water for 30 mins, before blending the batter.
- Drain water from dal & transfer to a blender jar. Also add soaked poha and ¾ to 1 cup water (start with lesser). Grind to a smooth & bubbly batter. Transfer this to a large bowl or an instant pot steel insert.
- Drain water from rice & add it to the jar. Pour ½ cup water and blend to a smooth or slightly coarse batter.
- Transfer to the dal batter bowl and mix well. (Check video to see the final consistency). During winters you may add sea salt & mix at this stage to help with fermentation.
- Cover the bowl loosely and ferment the batter in a warm place overnight, up to 12 hours until it rises, turns light & bubbly.
- During colder season, ferment the batter in oven at 100 F/ 40 C for 3 hours & leave it overnight there with the oven light ON. Alternately, place the bowl in the IP or the instant pot steel insert, press yogurt settings with a timer set to 8 hours (12 to 14 hours during colder days). Use an external lid and not the IP lid.
- Optional Fermentation test: Well fermented dosa batter rises & increases in volume. It looks airy, with plenty of tiny bubbles. To test, drop half a spoon of this into a bowl of water. Well fermented batter floats. If it has not reached this stage, ferment longer.
- Stir the dosa batter once. Transfer the required portion to a small bowl and add salt as required. Refrigerate the rest for up to 2 weeks.
- The fermented batter usually becomes thick, pour little water to thin down only needed & bring it to a spreadable consistency. (Check video or photos in the post)
- Heat a dosa tawa on a medium heat. When it is slightly hot, add a few drops of oil and spread it with a kitchen paper or a half cut onion (pierced with a fork/ butter knife on the rounded side to hold).This prevents the dosas from sticking to the pan.
- To check if the pan is hot enough, sprinkle a few drops of water over the pan. If it is ready, it should sizzle.
- Reduce the heat to medium, stir the batter with a ladle and take a ladle (¼ cup) of dosa batter & pour in the center of the hot tawa.
- Immediately begin to spread it evenly with the base of the ladle – starting from the center, in an outward circular motion in a clockwise direction. (Check photos or video in the post)
- Increase the heat to medium high or high and drizzle oil/ghee/ butter across the edges.
- Cook until the base turns golden & crisp. Run a thin wooden turner/spatula across the base of the dosa, starting from the edges to the center.
- Optional – If you want you may cook on the other side – turn it to the other side and cook for a minute. Turn again and cook the base for 30 seconds to crisp it.
- Fold the dosa and remove from pan. Before making the next dosa, reduce the heat to low. You can also rub the cut onion and then pour the batter.
- Serve dosa with coconut chutney, potato masala & tiffin sambar.
Notes
- It is essential to use cold water while blending else the batter can heat up.
- Blend dal to a smooth & fluffy consistency and the rice to slightly coarse texture, this makes the best crispy dosas.
- The amount of water mentioned in the recipe is for whole skinned urad dal & raw rice with 4 to 5 hours of soaking. If you soak them longer or use another kind of rice or urad dal, you may need more or less water.
- To get the best golden and crispiest dosas consistently use raw sona masuri rice. Basmati rice, ponni and 50/50 raw & parboiled/idli rice work in a pinch but the results vary.
- To make the batter in wet grinder, triple the recipe. Soak the methi seeds separately. First add the soaked methi seeds to the wet grinder container. Begin to grind sprinkling water little by little. After sometime it will become fluffy, thick and frothy. Then add the urad dal and poha blend until fluffy. Followed by rice. If your wet grinder does a very good job, then you can also add dal, rice and poha together.
Private Notes
Tried this recipe?
Mention @SwasthisRecipes or tag #swasthisrecipes!About Swasthi
I’m Swasthi Shreekanth, the recipe developer, food photographer & food writer behind Swasthi’s Recipes. My aim is to help you cook great Indian food with my time-tested recipes. After 2 decades of experience in practical Indian cooking I started this blog to help people cook better & more often at home. Whether you are a novice or an experienced cook I am sure Swasthi’s Recipes will assist you to enhance your cooking skills. More about me
Follow Swasthi’s Recipes
Comments
your website is good informative i learnt so much from the site link text
Thank you for the excellent dosa recipes. I’ve been using since last year and they turn out amazing. Love all those little tips that really work.
You are most welcome Meera.
Will your dosa recipe work with rice flour? Please reply. I’ve a large bag of rice flour which I mistakenly picked up for atta.
Yes you can use if it is raw rice flour and most Indian brands sell that. 1 cup of urad dal, 1/4 cup chana dal, use 3 heaped cups of rice flour, 1 tsp methi and 1/4 cup thick poha will work. Mix the rice flour with 1 cup water to a smooth batter. Grind the other ingredients and mix. This usually takes slightly longer than the rice dosa. I use my oven at 40c / 100F for 2 hours & let ferment overnight. Hope this helps.
Been using the recipe for restaurant style crispy dosa (option 1) for many months. My dosa turns out excellent! Thanks so much for the recipe and detailed instructions. Appreciate it.
So glad you like it Sharmeen. Thanks for letting me know.
Good recipe. I tried many years ago. Came back for a remake today
Thank you so much Sadia. Happy to read that!
I’m a beginner and use your recipes often because I live away from family. I made dosa following your instructions and they came out really well. My mom makes with 2 cups rice and 1 cup dal so this was a welcoming change for me. Thank you
Happy to know Varunavi
Beautitul dosa recipe. I’ve tried 2 of them from this post and they were excellent. I’ve known people say dosas turn out golden only on cast iron but contrary to that, I was able to make brown golden and crispy dosas on a non-stick using your recipes. Thank you for sharing the clear pictures. They really helped me with batter consistency and fermentation.
So happy to know the recipes worked well. It’s not true that you can make golden dosas only on cast iron. Golden color comes from the ratio of rice to dal. Chana dal and poha also contribute to the color. Temperature of the batter and the pan is also crucial for crisp and golden dosas. Thanks for letting me know how the recipe worked for you
Super
I always use this recipe, perfect!
Thank you Shalvi
Swasthi, thank you for all the great recipes. I use your dosa recipes a lot and they come out really good a lot of times. However sometimes due to the kind of rice the outcome is different. Please can you share how to select rice for dosa and idli. Also tell us which rice does or does not work out well. I live outside India and finding the same kind of rice is not possible everytime. Your tips will help a lot of people like me. TIA
Hi Janvi,
Short grain Indian raw rice is best for dosas. But 1 part parboiled rice/ idli rice and 2 parts raw rice also works well. It could be that you are using only idli rice to make dosas, but that won’t work. If you can’t find the same brand or type of rice eveytime, use raw basmati rice. Hope this helps.
Can I freeze cooked dosa, please.
I want to try your recipe but as I live on my own. Recipe far too much. Can I freeze the cooked dosa to have later. I do like your recipes.
Hi Diana,
I wouldn’t suggest freezing them. This recipe does not make a lot of dosa batter. You can refrigerate it for 1 to 2 weeks and cook the dosas whenever you want. Making dosa takes very less time, on an average each dosa takes less than 2 mins. Hope this helps
Does it matter if it is thick poha or thin poha? I used thin poha.
Thick poha are dense. if you are using thin poha, you can use a little more.
This was so good! I’ve been trying to make dosa at home for the last year and following your recipe to the letter is what did it (that and ordering a tawa).
Thank you so much Kirty for letting me know. Glad you got to make good dosas at home.
Tried your 2 in 1 idli dosa batter and it was a big success. Crispy dosas and fluffy idli is what I’ve been trying to learn for a long time. This post really helped me achieve that. Do you think cooked rice works and how much should I use?
Glad to know Chandrika. Yes you can use the same amount of cooked rice but the batter won’t keep good for many days. Batter made with cooked rice is more likely to spoil faster especially during summers. But you may give it a try and see how that works for you
Followed the recipe to the T and got excellent results. Managed to make the softest and delicious idlis. Even the husband who is a pure Tamilian was impressed. Thank you
So happy to read that Amy. Thanks a lot for sharing back your experience
Hi Swasthi!
I have prepared the dosa batter as per your recipe and enjoyed preparing as well as eating them! I’ve stored the remaining in refrigerator but now when I use this batter for dosa making I’m unable to spread it out with the ladle and it breaks off. Can you please share your thoughts on what went wrong? I was so happy at my first attempt that I almost felt like I’m a pro but now disappointed as I can’t make the dosa as first attempt. Thank you so much for your guidance in advance!
Hi Wellishia,
You won’t be able to spread if the batter is very thick or cold or overfermented.
1. Let it come close to room temperature before making. Leave it on the counter for 30 to 60 mins before making the dosas.
2. Also sometimes the batter turns thicker and the rice settles at the bottom of the bowl after refrigeration (happens with underfermented batter). Give a good mix before scooping out a bit.
3. If your batter is too airy, you won’t be able to spread. Whisk the batter well with a ladle to reduce air in the batter.
4. If the pan is not hot enough, dosa batter sticks to the ladle or clumps up on the pan.
If none of these work out for you, simply add more water to make a runny batter. Pour the batter and spread only a little. You will get soft, fluffy and light dosas
Hi there! I have never made dosa before, but I soaked rice overnight last night for my hair and want to use the soaked rice for something. I was trying to choose a recipe and the last protein one interests me, but it seems like it’s incomplete? Is the rest included somewhere I’m not seeing? Also wondering if poha is absolutely necessary or if I can substitute it since i don’t have any on hand. Sorry if you mention that somewhere already!
Hi Angelie,
The last/ 4th recipe in the post uses only rice and dal. You don’t need poha for that. The instructions are the same as for other dosa recipes in the stepwise pictures and recipe card. Hope you get to try
Hello! I might have ground the rice for too long so it’s not very grainy and now my dosa is white and hard. How can I fix it?
Hello Tani,
White dosas may mean you used the wrong kind of rice. Usually parboiled rice and idli rice makes white dosa.
Hard dosas mean the batter isn’t fermented yet. Try fermenting longer if you think it is underfermented. I can help you better if you let me know the kind of rice you used.
Swathi’s Recipe is so good. She explains everything in such detail. I am trying to prepare the dosa tonight. Thank you so much for the lovely recipes. I had tried the vada recipe too and it’s just so perfect. With love ❤️ and thanks from New Zealand 🇳🇿 ❤️ 💕 ♥️ 💖 😘
So happy to read that Anjum. Thank you for sharing back!
Hi Swasthi, I made the crispy dosa recipe, but my batter never achieved the slightly sour taste that I crave. In fact, you never mention anything about a hint of sour, nor do any other dosa recipe that I’ve found online. And yet, my very favorite restaurant dosa has that hint of sourness from fermentation. I assume I didn’t let my batter ferment long enough, but it was fermented well in every other respect. So two questions: 1. Do you have any tips for achieving a sourness without over-fermenting? 2. Why do you not mention sourness? Are traditional dosas not supposed to have that sour hit? For me, without the sour, the flavor is lacking. It’s like sourdough bread without sourness – not my thing. Any help would be appreciated.
Hi Sherri,
The batter should rise and ferment but not turn sour. It should have a faint sour smell but not taste strongly sour. We don’t target to achieve the sour flavor and the best dosas are not sour. Usually restaurants make batter in bulk and use it for several weeks to months so it continues to ferment and turns sour, even after refrigeration. Most of the flavor in a dosa comes from lentils and butter, the faint sour smell only enhances it but your dosa should not have a strong smell and taste of sourness. Try soaking the rice with yogurt or Indian buttermilk. Use some of the same liquid to blend. Poha also does the same job. Actually fermenting longer also works. Hope this works.