Chicken 65 Recipe
Updated: May 7, 2022, By Swasthi
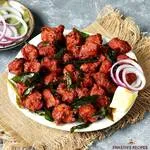
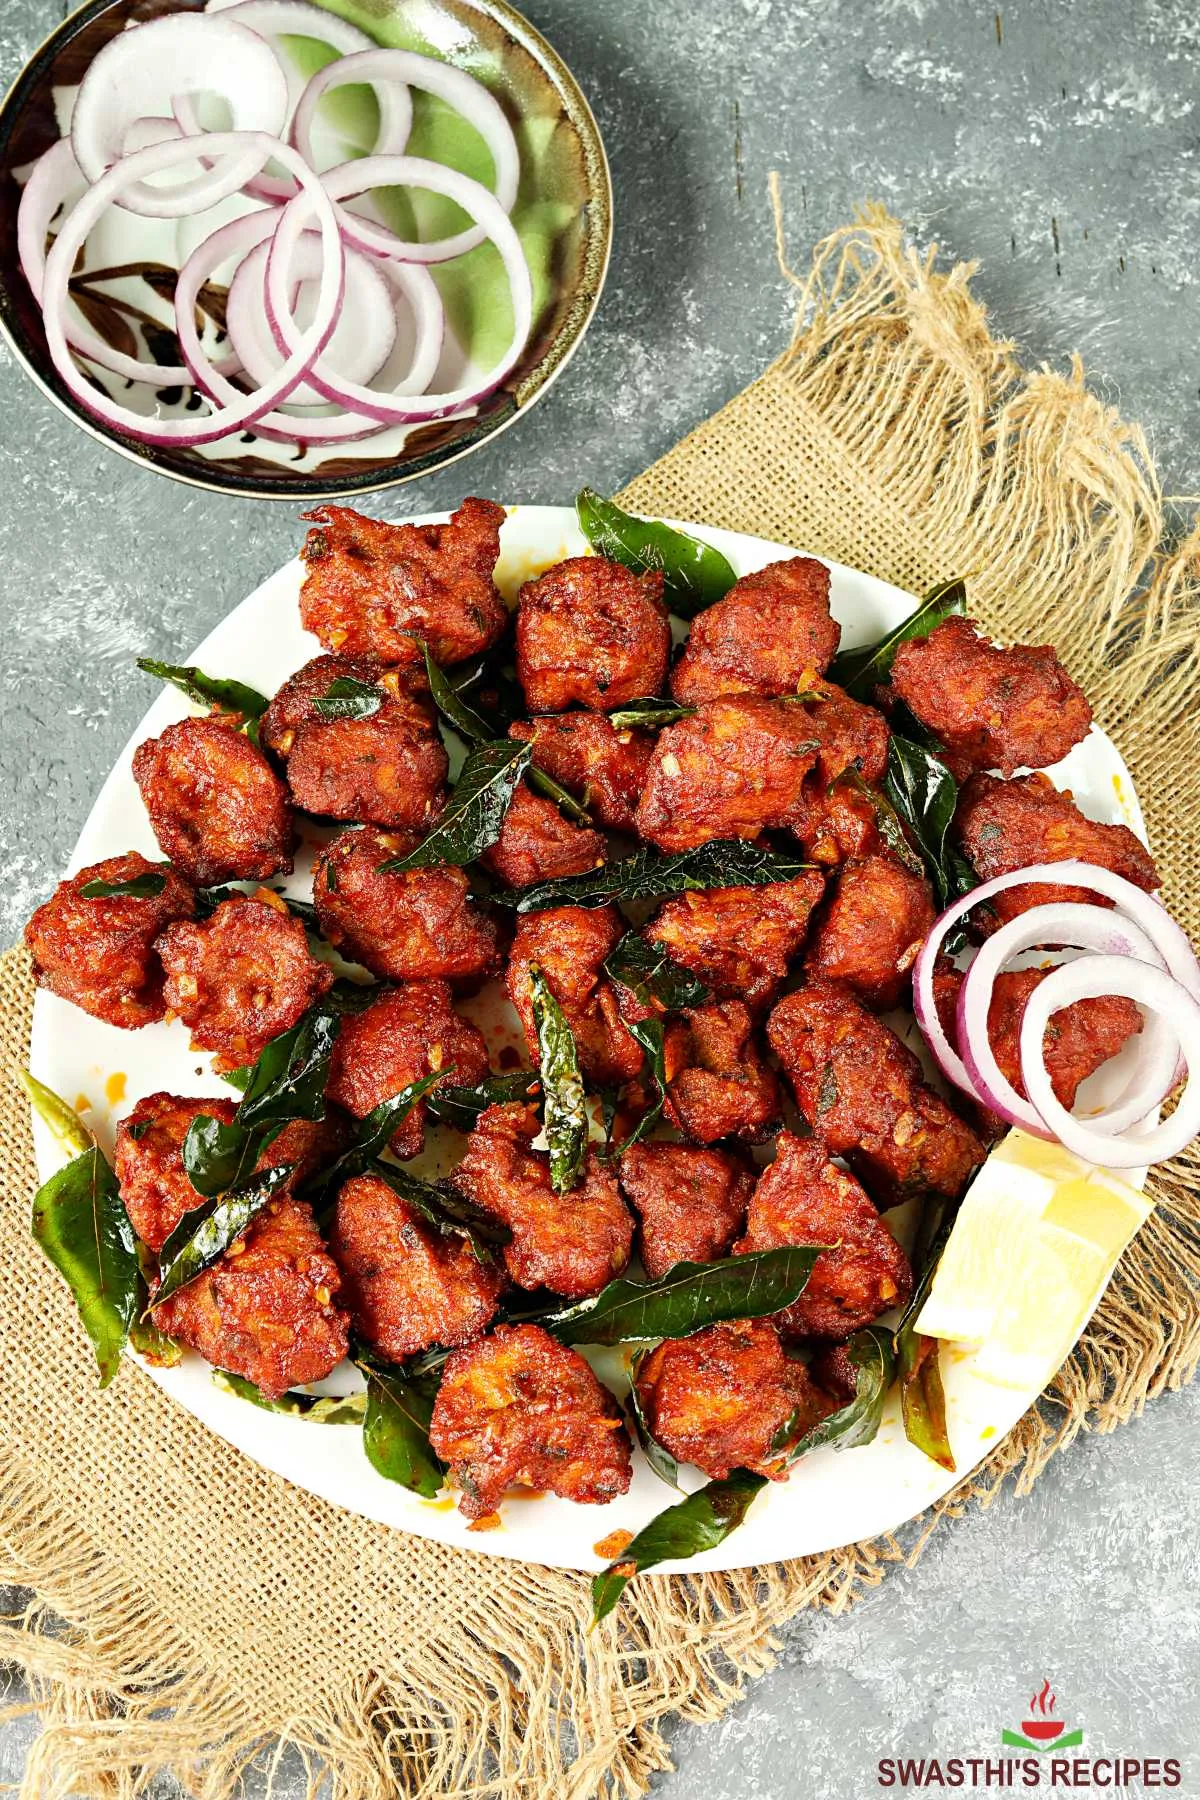
This delicious Chicken 65 will soon become your new favorite appetizer! Chicken 65 is a universal favorite of the South Indians and this is what we all have been eating in the restaurants for years. Be it an upscale restaurant or a budget eatery, chicken 65 is a crowd-pleaser and has found a top place on the menus & orders. Apart from being eaten as an appetizer, it is also eaten as a side with a South Indian meal in restaurants & households alike. It goes fantastic with Rasam & rice, Sambar & rice etc.
In this post I show you how to make restaurant style chicken 65 that’s really addictive, flavorful, crispy and super delicious. Instructions to air fry & bake in oven included.
Are you curious to know ..
What is Chicken 65?
Chicken 65 is a South Indian deep fried chicken appetizer, originated in Hotel Buhari in Chennai. Chicken pieces are marinated with flour, spices, yogurt, egg, and curry leaves. These are later fried to perfection until golden and crisp. Apart from being super flavorful, Chicken 65 is crisp on the outside, Juicy & tender inside.
If you ever ask people what is ‘65’ here or why is it called “chicken 65”? You are sure to hear bizarre answers! However according to Wikipedia, the dish was invented in the year 1965 by Mr. A. M. Buhari, who was the then former Sheriff of Madras, now Chennai. The dish was first made and served at Hotel Buhari, Chennai as Chicken 65, since it was invented in the year 1965.
Several other dishes like chicken 78, chicken 82 etc. were also invented in the same place, where each dish was named after the year. Among all these, chicken 65 has been a classic hit for the amazing flavors and the texture of fried chicken.
However, you will find numerous versions of chicken 65 all over South India, with varying spice levels, texture and flavors. A few restaurants even name them after the place as Hyderabadi, Madurai style, Andhra style, Tamil Nadu style etc. You will be surprised to find that chicken 65 tastes so different in every restaurant.
About the Recipe
I have shared the authentic Chicken 65 recipe along with a few variations which we personally love at home. In restaurants Chicken is deep fried but you can always bake or air fry it for a healthier option.
The authentic dish is quite simple and straight forward, we marinate the chicken and then deep fry similar to Chicken Pakora. The dish is ready to serve & no extra tempering/ tadka is made.
One of the variations I have shared here is to make a tempering with curry leaves, garlic, green chilies and red chilli powder. This step adds another layer of flavors, especially garlic adds a punch. You can always skip it but this helps to adjust the seasonings in case your chicken is not spiced well.
The Hyderabadi version is similar to the above, but little yogurt is added to the tempering. This imparts a slight tang to the dish. This has to be served immediately as the chicken begins to lose its crispness as it sits.
You will also find versions made with soya sauce etc and I am yet to experiment this.
More Chicken Recipes
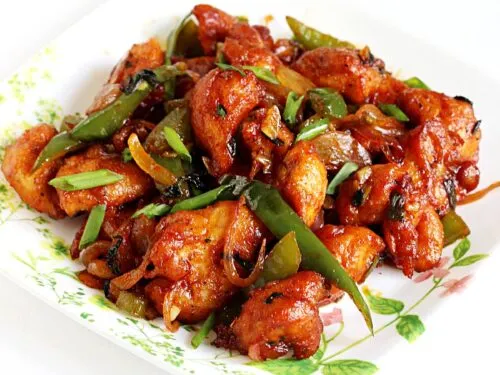
Indo chinese chilli chicken
Chicken pakoda
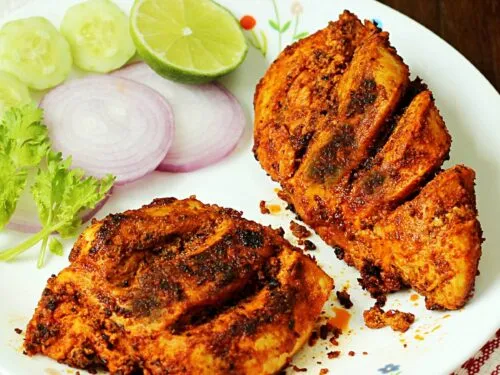
Tandoori chicken
Hot garlic chicken
Chicken majestic
Chicken tikka
Photo Guide
How to Make Chicken 65 (Stepwise Photos)
Marinate & Prepare
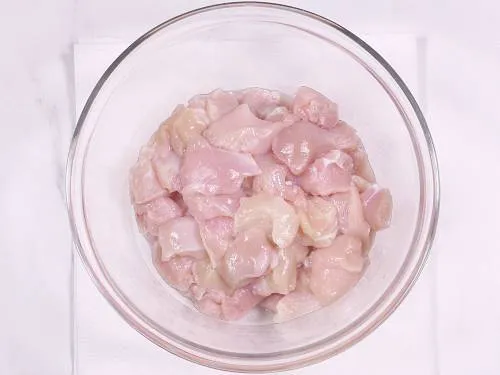
1.Cube chicken to approximately ¾ inch pieces. If using bone-in chicken you may keep them bigger. But make sure the pieces are almost of the same size as this helps them to fry or cook evenly. This recipe needs 600 grams (1.3 lb) boneless chicken or 1 kg (2.2 lbs) bone-in chicken.
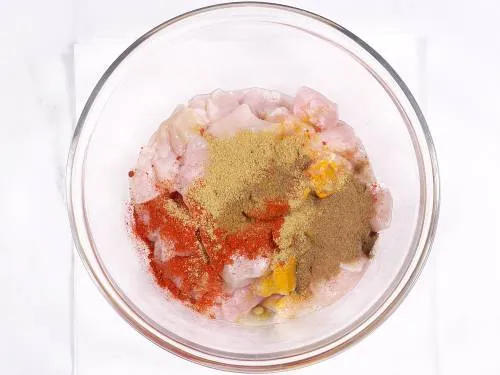
2. To the chicken. Add
- 1/3 teaspoon salt
- 1½ teaspoon red chili powder (reduce for low heat)
- ¼ teaspoon turmeric
- 1 teaspoon garam masala (or ½ tsp garam masala, ¾ tsp coriander powder, ¼ tsp cumin powder)
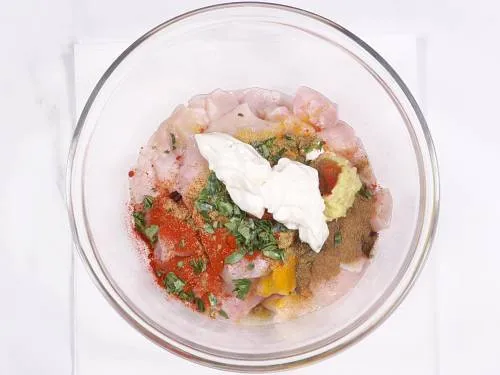
3. Add the rest of the ingredients
- 1 tablespoon ginger garlic paste
- 2 sprigs curry leaves (finely chopped)
- 4 tablespoons curd (plain yogurt, refer notes)
- 1 teaspoon lemon juice
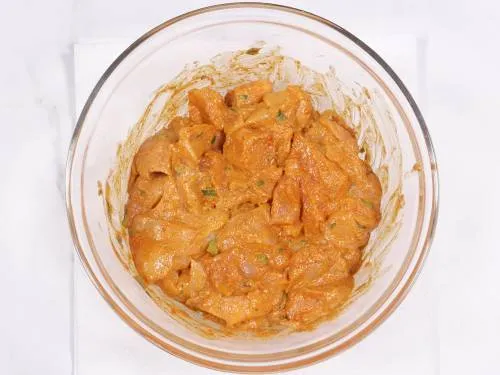
4. Marinate the chicken. Cover and marinate for at least 1 hour to a maximum of 36 hours in the refrigerator.
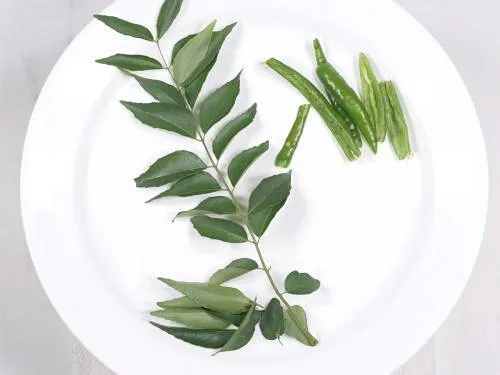
5. Rinse 2 sprigs curry leaves and 4 to 6 green chilies. Pat them dry with a kitchen tissue. Slit the green chilies and deseed them. Any moisture on the curry leaves and green chilies will splatter oil while frying. Also the chili seeds will burst.
Prepare Tempering Ingredients
6. Before frying the chicken prepare the tempering ingredients if you intend to make my spicy tempering. You can also skip this if you want to simply make the Chennai style Chicken 65. But this spicy tempering adds a punch to the dish. Set aside 1 tablespoon garlic chopped (2 large cloves).
To a small bowl, add
- 2 teaspoons red chilli powder (Kashmiri/ byadgi)
- ½ to 1 tablespoon garlic paste (or crushed, read my notes)
- ¼ to ½ teaspoon sugar (optional but recommended for crispness)
- ¼ teaspoon salt (adjust to taste)
- 1 teaspoon lemon juice or vinegar (or ¼ cup thick yogurt, optional, cuts down the pungent flavor)
- 2 tablespoons water (leave out if using yogurt)
Mix all of the ingredients and keep the bowl aside.
Coat the Chicken
7. When you are ready to fry, pour oil to a heavy bottom deep pot and begin to heat it on a medium flame. Add 4 tablespoons corn starch and 2 tablespoons rice flour.
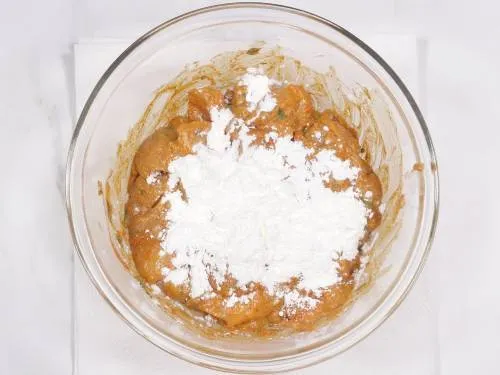
8. Mix together to coat the chicken well with the flour. It will be dry. Pour 1 egg white or 2 ½ tablespoons curd and mix well.
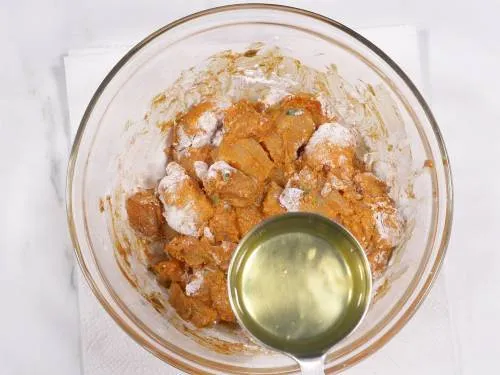
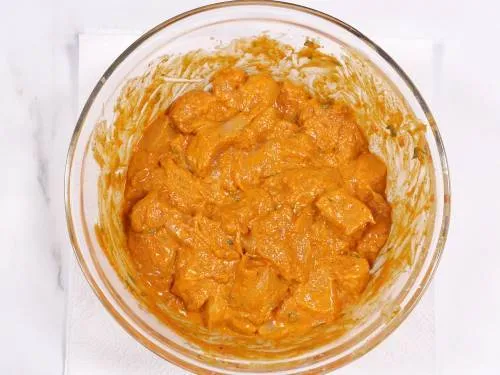
9. You must have a fairly moist coated chicken, not runny coating or too dry. If it is too dry, sprinkle some water. If you go wrong with the proportion of flour & curd/ egg, the coating from your fried chicken is more likely to come off while frying. So be cautious here.
Fry Chicken 65
9. Test if the oil is hot enough by dropping a small portion of the batter to the hot oil. It should come up to the surface without turning brown. If the batter sinks and remains there, it means the oil is not hot yet.
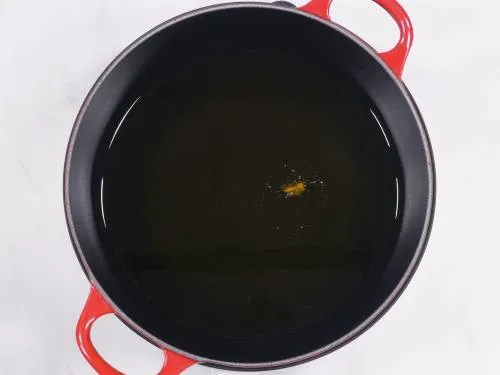
10. Gently drop the chicken pieces one by one to the oil. Do not disturb them meaning do not touch them for at least 2 minutes. This helps the coating to remain on the chicken without coming off.
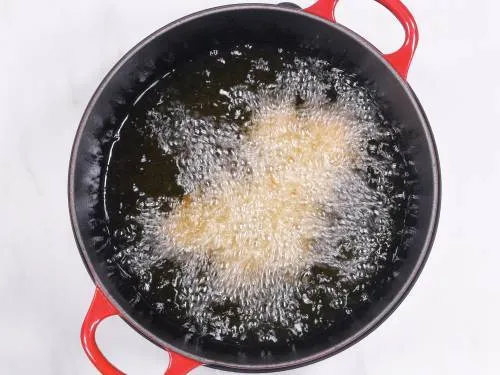
11. Later stir them and continue to fry on the medium heat until crisp and golden. Mine took about 4 ½ to 5 minutes. This is just to let you know an approximate time but it may vary depending on the intensity of heat, source of heat and the kind of pan used.
12. The last 1 minute I prefer to fry mine on a low heat and this helps to crisp up a little more. Remove them to a steel colander. This way continue to fry all of the chicken in batches.
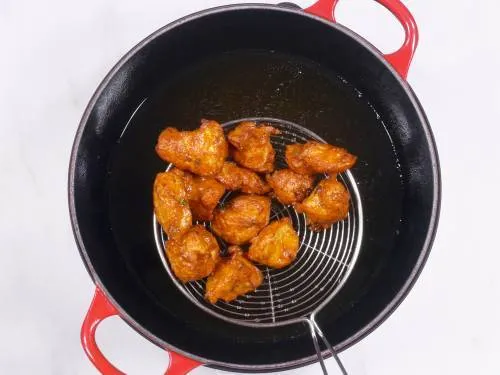
13. Reduce the flame to low. Place the curry leaves on the strainer ladle and gently lower it to the oil. Let them fry until crisp. Remove to the fried chicken. Do not forget to pat dry your curry leaves before frying to avoid oil splatters.
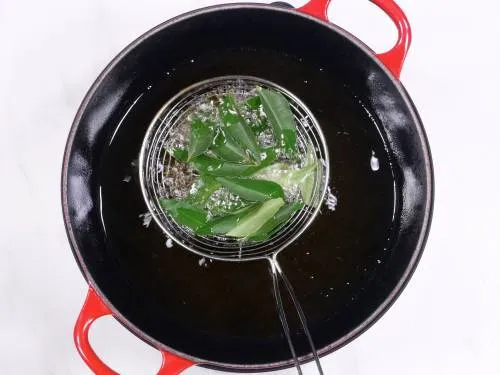
14. Place the slit and deseeded green chilies in the strainer and lower to the hot oil. Fry until they blister lightly. Do not forget to deseed them first.
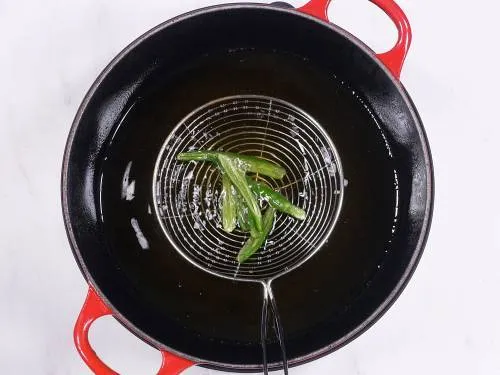
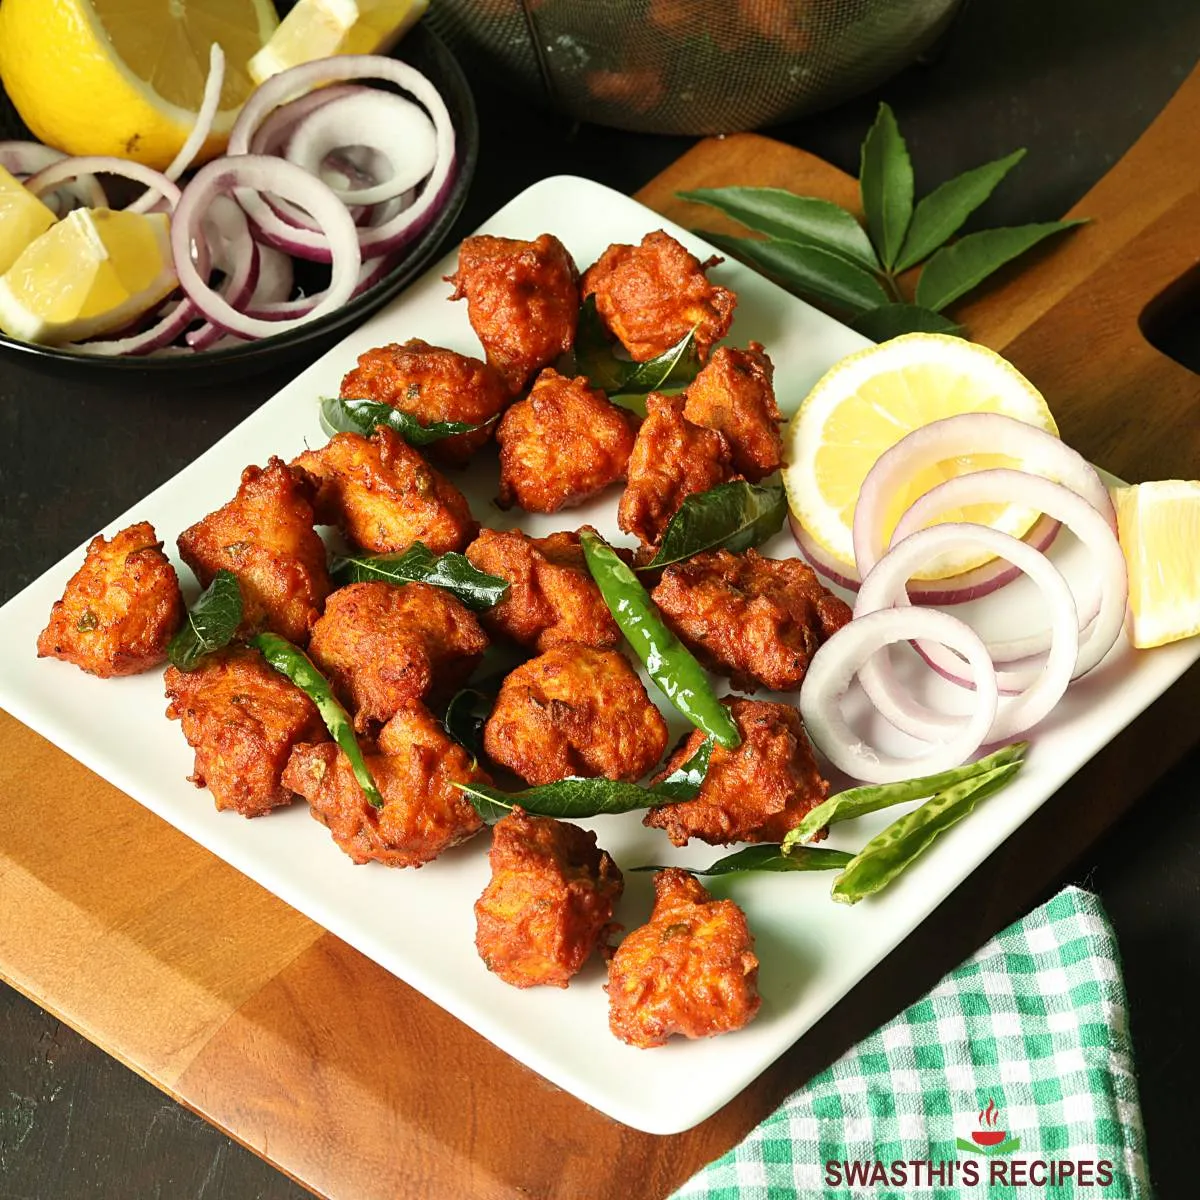
Transfer them to the fried chicken and serve immediately. This Tamil Nadu / Chennai restaurant style version is not tempered and is served this way. But it is mostly made with bone-in chicken.
Make the Spicy Tempering
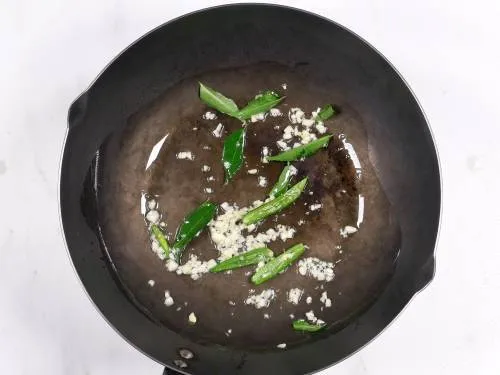
15. To a wok, pour 2 tablespoons oil, fresh or fried chicken oil. When it turns hot, add garlic, 2 slit green chilies and 5 to 6 curry leaves. Fry until the leaves turn crisp.
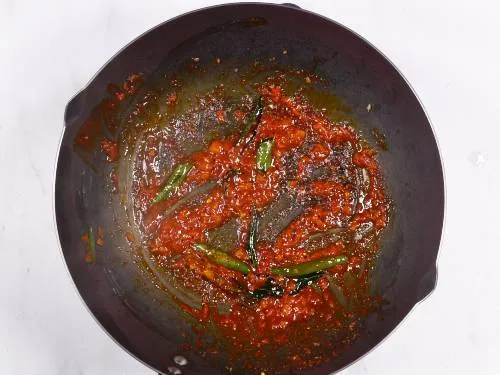
16. Slide the curry leaves, garlic and chilies to a side in the wok, lower the heat completely (or turn off the heat). Pour the chilli garlic paste, ¼ teaspoon salt, 2 tablespoons water. Make sure the heat is low else your yogurt can split.
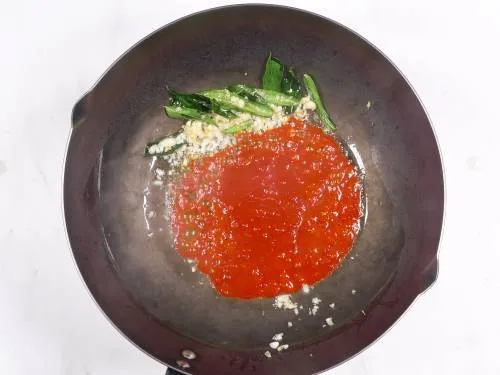
17. Taste test the fried chicken and the sauce in the pan. Adjust salt and chili powder accordingly. Stir and let cook until thick and the water has almost evaporated. You should be left with a thick paste in the wok. This is very important else you will be left with soft chicken.
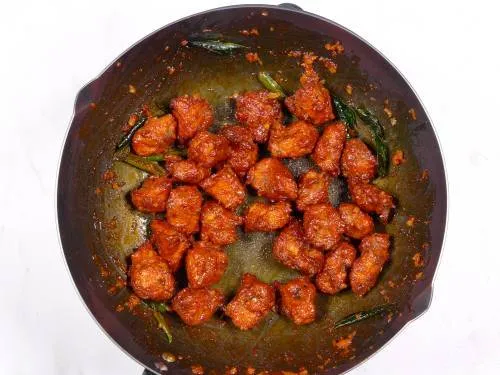
18. Turn off and add chicken. Toss well to coat the spices. I forgot to sprinkle black pepper but this is the right stage to add in.
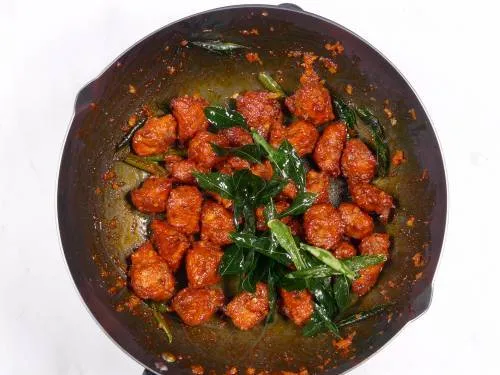
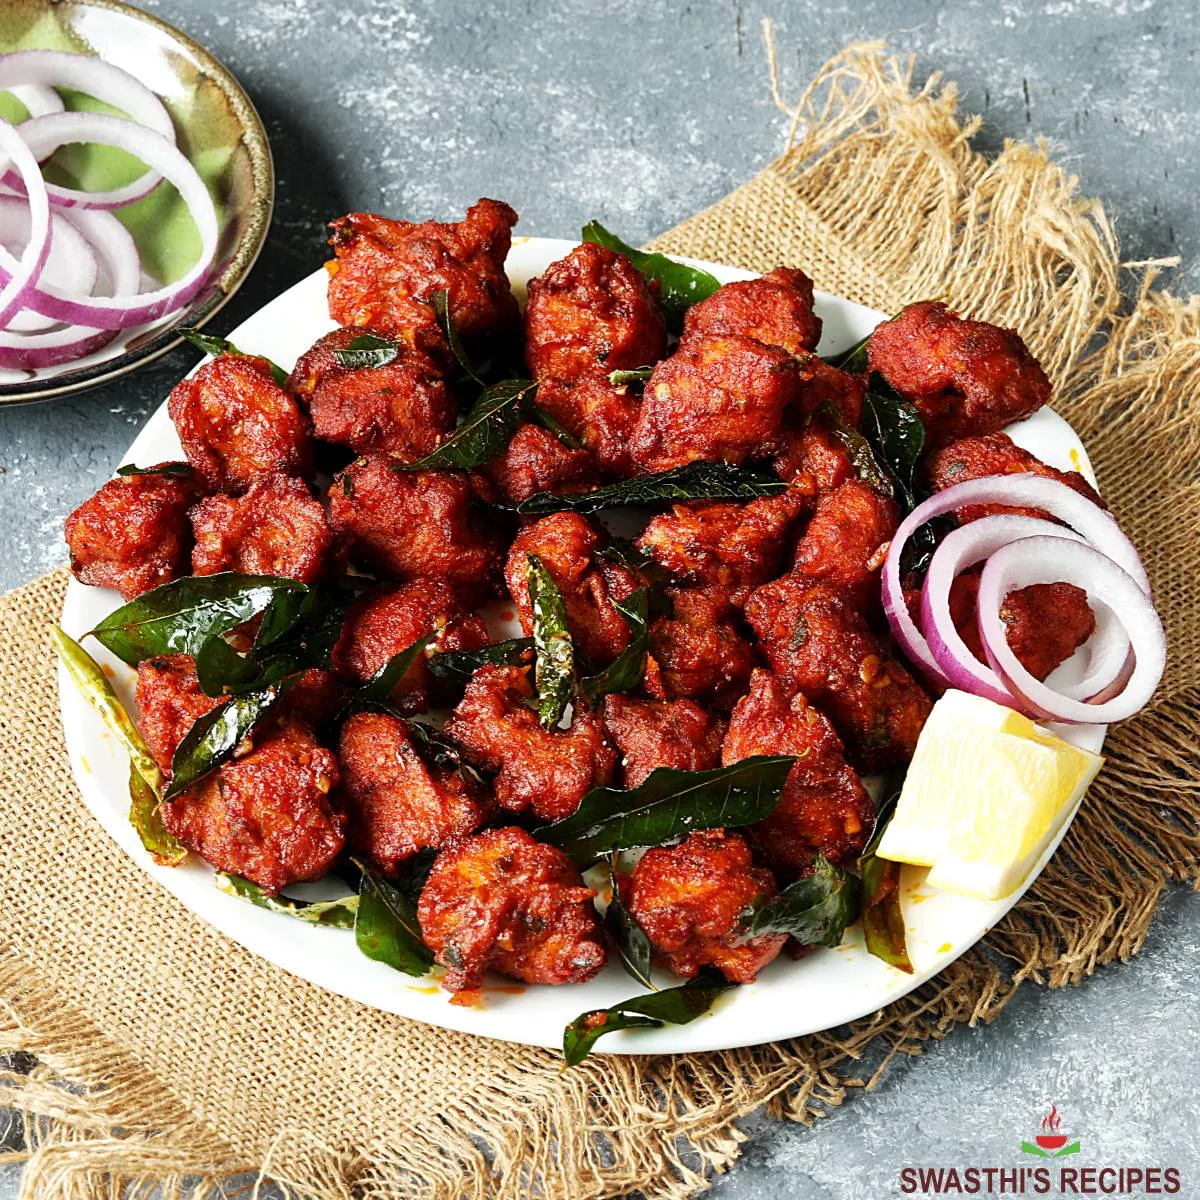
Transfer to a serving plate and garnish with curry leaves and green chilies. Serve chicken 65 with lemon and fresh cut onions.
Serve as an appetizer or as a side in a South Indian Meal. It also goes well with Chinese fried rice, South Indian style Ghee rice, Andhra style Coconut milk pulao or South Indian coconut rice.
Pro Tips
Choosing Chicken: Bhuhari Chicken 65 is made with bone-in chicken. However in the restaurants boneless version is more popular. You may choose chicken breast or thigh, whatever you prefer.
Chicken thigh is higher in fats so it won’t dry out even if you cut down the marinating time. Chicken breasts work well if you marinate it for a minimum of 4 to 6 hours. The yogurt in the marinade will incorporate some fats so they won’t dry out. If you skip this step the fried chicken may get overcooked and dry out & become chewy.
Spices: Using only garam masala works well. But if it is too strong, then use it in combination with cumin powder and coriander powder. Using a very strong garam masala or using a lot of it, sometimes leaves a bitter taste.
Red chilli powder: Restaurants use food color for a deep red color. I suggest not to aim for the color and simply use a moderate amount of Kashmiri red chili powder. Also note that using a lot of chilli powder in the marinade is going to alter the flavor of your chicken 65 and sometimes also gives a bitter taste. If you love the deep extra color make the spicy tempering.
Tempering: Tamil Nadu restaurant chicken 65 is made without a tempering. This was in the past and I don’t know in the recent years. But in Bangalore & Hyderabad restaurants you find both versions even now. I highly recommend making the spicy tempering as it really adds layers and layers of flavors.
We think this chilli garlic tempering was the invention of the popular South Indian Chef, Sanjay Thumma. I loosely adapted this from his version where he uses the store bought chilli garlic sauce. It took me a while to get to the similar taste with pantry ingredients. We absolutely love this tempering and I can say this makes the best Chicken 65!
Related Recipes
Recipe Card
Chicken 65 Recipe
For best results follow the step-by-step photos above the recipe card
Ingredients (US cup = 240ml )
Marination
- 600 grams (1.3 lbs) chicken (or 1 kg (2 lbs) bone-in chicken)
- 1 tablespoon ginger garlic paste
- ⅓ teaspoon salt
- 1½ teaspoon Kashmiri red chili powder (reduce for low heat)
- ¼ teaspoon turmeric
- 1 teaspoon garam masala (or ½ tsp garam masala, ¾ tsp coriander powder, ¼ tsp cumin powder)
- 2 sprigs curry leaves (finely chopped)
- 4 tablespoons curd (plain yogurt, refer notes)
- 1 teaspoon lemon juice
To coat
- 4 tablespoons cornstarch (white corn flour)
- 2 tablespoons rice flour (or all-purpose flour)
- 1 egg white (or 2 ½ tablespoons curd, refer notes)
Other ingredients
- 1½ cups Oil (for deep frying)
- 2 sprigs Curry leaves (rinse & pat dry completely)
- 4 to 6 green chilies (slit, seeded & pat dry)
- 1 tablespoon chopped garlic (2 large cloves)
- ½ to 1 tablespoon garlic paste (or crushed, read my notes)
- 2 teaspoons Kashmiri red chili powder
- ½ teaspoon sugar
- 1 teaspoon lemon juice or vinegar (optional, or 4 tablespoons thick yogurt) (avoid sour curd)
- 2 tablespoons water (leave out if using yogurt to temper)
- ¼ teaspoon salt (adjust to taste)
- ½ teaspoons ground black pepper (optional, for extra heat)
Instructions
Preparation
- Cut the chicken to approximately 1 by 1 inch pieces. Try to keep the sizes as uniform as possible, this helps in getting all the pieces fried evenly.
- To a large mixing bowl, add chicken, salt, turmeric, red chilli powder, garam masala, ginger garlic paste, lemon juice, yogurt and finely chopped curry leaves.
- Mix well and cover. Marinate for a minimum of 1 hour. You can refrigerate for upto to 36 hours.
- Prepare all the ingredients to temper before frying the chicken. Pat dry the curry leaves and deseeded green chilies. Keep them aside.
- To a small bowl add the crushed garlic paste, red chili powder, sugar & lemon/ vinegar/ yogurt (optional). If not using yogurt pour water. Mix together to get a thick paste. Keep this aside.½ to 1 tablespoon garlic paste, 2 teaspoons Kashmiri red chili powder, ½ teaspoon sugar, 1 teaspoon lemon juice or vinegar (optional, or 4 tablespoons thick yogurt), 2 tablespoons water (leave out if using yogurt to temper)
Fry chicken
- On a medium flame, heat oi in a heavy bottom deep pan for frying. While the oil heats up, add cornstarch, rice flour and egg white to the marinated chicken.
- Mix well to coat the chicken well with flour and eggs or yogurt. The coating should be moist and not runny or too dry. If it is too dry, you may splash some water and mix well.
- Test if the oil is hot enough by dropping a pinch of batter in the hot oil. It must come up immediately without becoming brown. If it sinks and remains there, it means the oil is not hot enough yet.
- When the oil is hot enough, gently drop the chicken pieces into the oil. Do not crowd the pan.
- Do not disturb the chicken pieces for 2 minutes. Stir and let them cook on a medium heat until crisp and golden. Reduce the heat slightly and let them fry the last 1 minute until deep golden & really crisp.
- Remove them to a steel colander and continue to fry them in batches.
- Once you are done with the chicken, reduce the flame to lowest and place 2 sprigs of curry leaves on a skimmer or strainer ladle and gently lower to the hot oil. Fry the curry leaves until crisp. Remove to the colander.
- Place your slit and deseeded green chilies on the strainer ladle and lower it to the hot oil. Fry them until blistered. Turn off the heat. Toss all of these and serve this Chennai style Chicken 65 immediately or go ahead with the tempering below.
To Bake in Oven
- To Bake in the oven, preheat the oven to 200 C or 390 F for at least 15 mins. Place the chicken pieces on a tray lined with parchment paper or foil. Bake for 35 to 40 mins, flipping after 20 mins. When the chicken is almost done, Place the curry leaves and slit green chilies. Broil for 2 mins. Adjust the baking time as every oven is different.
To Air fry
- Place the chicken on an air fryer parchment paper (perforated parchment paper). Air fry at 375 F or 180 C for 8 minutes, flip them and air fry for another 3 to 4 mins depending on how dry or crispy you want it. Place the sprig of curry leaves and slit green chilies and air fry for 2 more mins. Adjust the timings a bit as every air fryer is different.
Temper Chicken 65
- Pour 2 tablespoons oil to wok. You can use fresh oil or use the same fried chicken oil. When the oil turns hot, add chopped garlic, 5 to 6 curry leaves and 2 slit green chilies. Stir fry until the curry leaves turn crisp, do not brown the garlic.
- Slide the curry leaves and the chilies to a side in the wok. Lower the heat completely and pour the chilli garlic paste, 2 tablespoons water and salt. Mix well and let it cook on a medium heat until all of the water evaporates.
- Taste test the fried chicken and the sauce too. Adjust your sauce to your liking, by adding more salt or red chilli to your taste.
- Once it is done, you should have a thick oily chilli sauce in the wok. Add the fried chicken (set aside the previously deep fried curry leaves and green chilies for garnish).
- Turn off and Toss well to coat the chicken with the tempering. Garnish chicken 65 with crunchy curry leaves and green chilies. Squeeze some lemon juice and serve with fresh cut raw onions.
Notes
- Please note you have to 2x & 3x the substitutes mentioned in the brackets if you are trying to make 2x & 3x.
- If using yogurt to temper, begin to cook at a low heat after adding the chilli garlic paste. We don’t want the yogurt to split.
- Avoid using sour yogurt
- To make it kids’ friendly simply skip the tempering for the kids portion. You can also reduce the red chilli powder from the marinade.
- You may use bone-in chicken or boneless chicken thighs or breasts. If using bone-in chicken or breasts, it is essential to rest the marinated chicken for a minimum of 4 to 6 hours else they will dry out and turn chewy.
- Egg white can be replaced with curd.
- The proportion of yogurt, egg and flour is very important. If you alter this, the coating from the chicken may fall off.
- If using a strong garam masala, use it in combination with other spices like cumin and coriander. The coating may taste bitter if you add a lot of garam masala or red chilli powder.
- Sugar in the tempering cuts down the pungent flavor from garlic. It also helps to keep the chicken crisp after tempering. Vinegar or lemon juice also cuts down the pungent flavor from garlic.
- Chili Garlic paste: My family loves this with 1 tablespoon garlic paste in the chilli garlic paste, you may cut down if you don’t prefer pungent taste or flavor.
Video
NUTRITION INFO (estimation only)
© Swasthi’s Recipes
Chicken 65 Recipe first published in Feb 2013. Updated & Republished in May 2022.
About Swasthi
I’m Swasthi Shreekanth, the recipe developer, food photographer & food writer behind Swasthi’s Recipes. My aim is to help you cook great Indian food with my time-tested recipes. After 2 decades of experience in practical Indian cooking I started this blog to help people cook better & more often at home. Whether you are a novice or an experienced cook I am sure Swasthi’s Recipes will assist you to enhance your cooking skills. More about me
Follow Swasthi’s Recipes



Comments
I can only find dried curry leaves here – how would one go about using the curry leaves for this fantastic recipe!
Hi Steve,
you can use 1 teaspoon crushed dried leaves in the marinade and another tsp in the tempering. Hope you get to try!
If I had to make ahead how would I go about that ?
If you make it ahead chicken won’t remain crisp. However the dish can be made ahead and stores well for 2 days. You can simply reheat in a pan. Alternately you may fry the chicken and store. Make the sauce fresh and add to it at the time of serving
Very good and easy to make
Thank you
absolutely delicious!!
Thanks Jace
Okay, that might be one of the best recipes i have ever made and my husband agrees. I was dreaming about it again, so I ate it for lunch but now I want to make it again tonight for dinner 😅
The flavors were so complex and delicious without feeling overly heavy. As an experiment I friend half and airfried the other half— while the stir-fried one’s batter didn’t stay on as well, once I put it in the tempering it tasted pretty much the same as the fried one.
So delicious and definitely a keeper.
The print recipe link is broken on this recipe 🙁
Hi Eric,
Please try on a different browser. It could be a temporary issue and works for me.
Love your website. Is there need to temper the Chicken 65 if it is baked?
If yes, is it the same process as mentioned in the recipe or is there a different method to avoid the oil?
Hi Neville,
Thank you. It can be served with out tempering but it won’t taste special. The tempering process is the same for the baked chicken. But you can cut down the oil in the tempering. Hope you like it
The chili garlic sauce in the tempering is amazing. I think everyone should try it. Best Chicken 65!
Thank you such details with lots of tips to take extra care so that the end result to be delicious and tasty.
Excellent recipe!!! Tried this out and the outcome was great!!!
PURE PROFESIONAL HOTEL QUITE AUTHENTIC FORMULA IS PRESENTED BETTER TRY AND SEE THE DIFFERENCE
Thank you so much Swasthi for this amazing recipe. It brings back fond memories of my life in Bangalore as an international student. Fell in love with curry leaves shennI tasted this dish! I made it today and it turned out so well! ❤️
So glad you like it Rajani. Thank you!
Hello Swati,
We have been following your recipes and my family is a big fan of your Chicken 65 recipe, in particular.
The recipe is clearly explained and tastes so good. As a busy mum – I love that the recipe is so simple and can be made in my very own kitchen. ?
But we noticed that about a year ago- the old recipe has been replaced with a new one.
We tried the new recipe Swati – but we prefer and miss the previous recipe Swati.
Could you please send us the old / previous Chicken 65 recipe Swati?
The sauce especially was too good.
Thank you in advance dear Swati.
Hello,
Glad to know! I can update the post with that as well. Basically this is not much different from the previous one except for the spice levels & leaving out curd in the sauce. It may take about 3 to 4 days to update. Hope this helps
Sure Swati.
Waiting for the recipe.
Thanks in advance
This is one of my favorite Indian dishes, thanks for sharing. I like to eat it with rice and raita.
Happy to know Ryan! Thank you!
This is one of my favorite Indian dishes, thank you for the recipe. I prefer to eat my 65 with rice and raita.
Hi Swathi, thankyou so much for this recipe. I tried it with a few twists and it was just like my local restaurant’s chicken65. Your recipe is so convenient as I marinated the chicken and kept it in the fridge and took out portions according to need. I also added some white and black pepper and half a teaspoon of sugar in the marinade. Before frying the pieces I added the corn flour and rice flour but no egg. The result was equally good. Thanks again.
Hi Tasneem,
So glad it turned out good. Yes I too feel this is so convenient to marinate and use as needed. Thanks for your time to share back how it turned out for you.
🙂
Hi. Thank you for the baked version. I’ve been making this for several years from your old recipe. I prefer the tempering with yogurt as in your old version. Now I can’t seem to find it. Please add the option of tempering with yogurt as my family finds that very good. Thanks.
Hi Sonia ji,
Nice to know! I have updated the recipe to include yogurt in the tempering. Hope that helps.
Hi,
Your recipes comes out really good. Have been following for a whole. For Thai chixken65 can I use chicken breast. Would it become chewy?
Hi Kay,
Thank you! Yes I use chicken breast a lot of times but rest in the marinade overnight. Yogurt makes it soft and not dry out & chewy.
Thank you!
Hi,
Is there a way to make it dairy and egg free? I am allergic!
Hi,
You can use 2 tsps vinegar for dairy. Make sure you rest the chicken for at least 4 hours. Replace egg with water.
You are my favorite Indian food blogger. Following you ever since I moved to the US, 8 years ago. All my dishes are from here. This chicken 65 is our family favorite. Love it any time! Thank you.
Thank you so much Mrs. Rao for being a long time reader. Very happy to know!
Turned out awesome !!!!!! Thq u.
Glad to know Madhavi. Thank you!