Dahi Vada Recipe (Dahi Balla)
Updated: August 18, 2023, By Swasthi
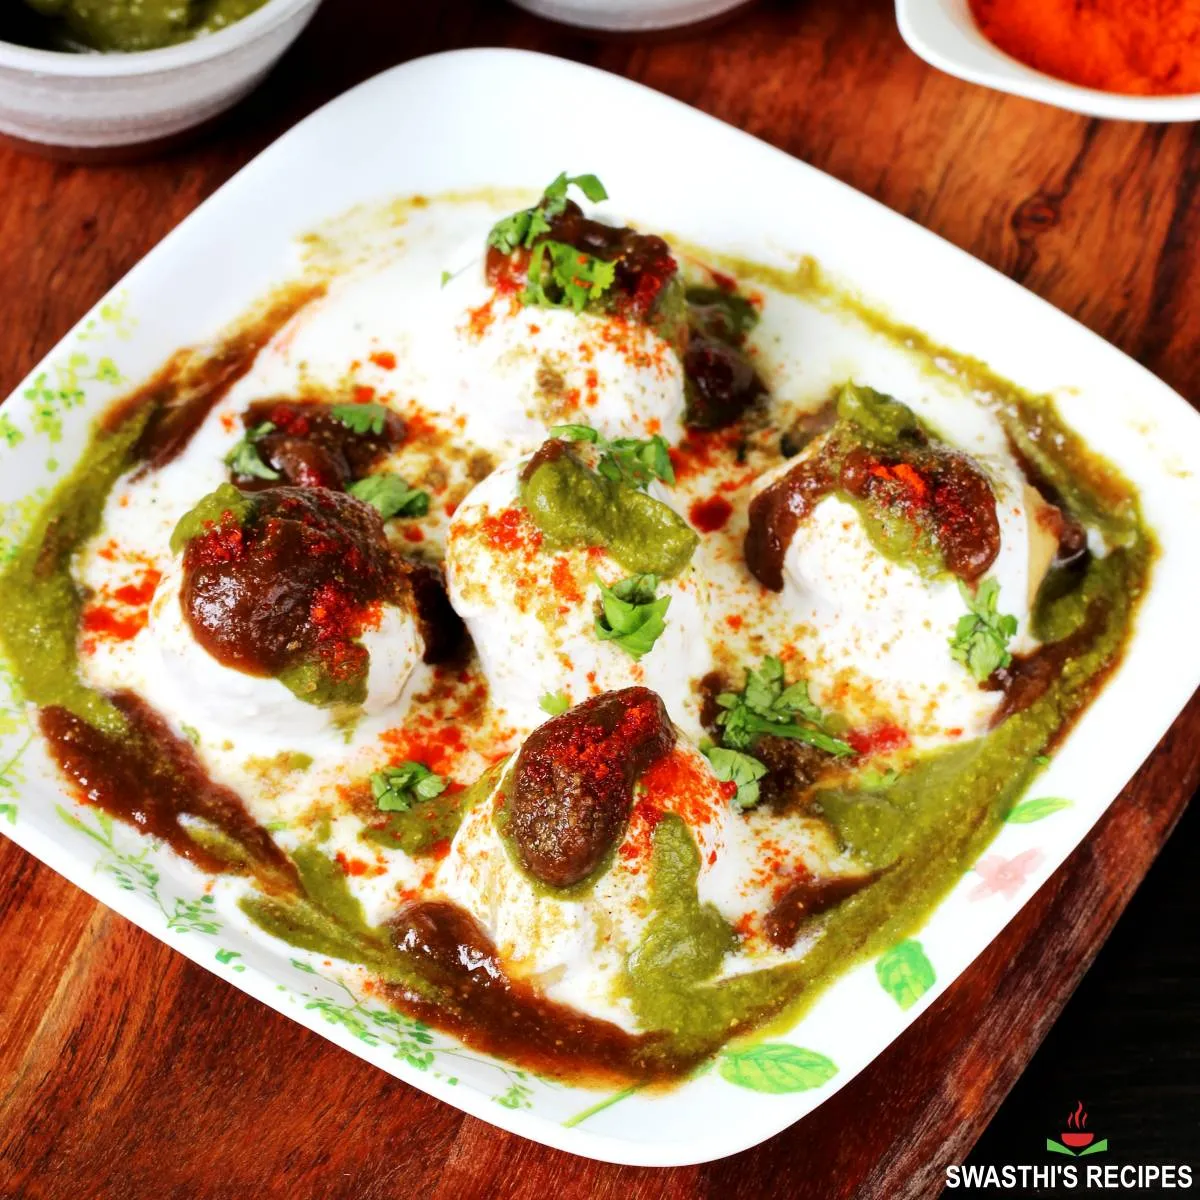
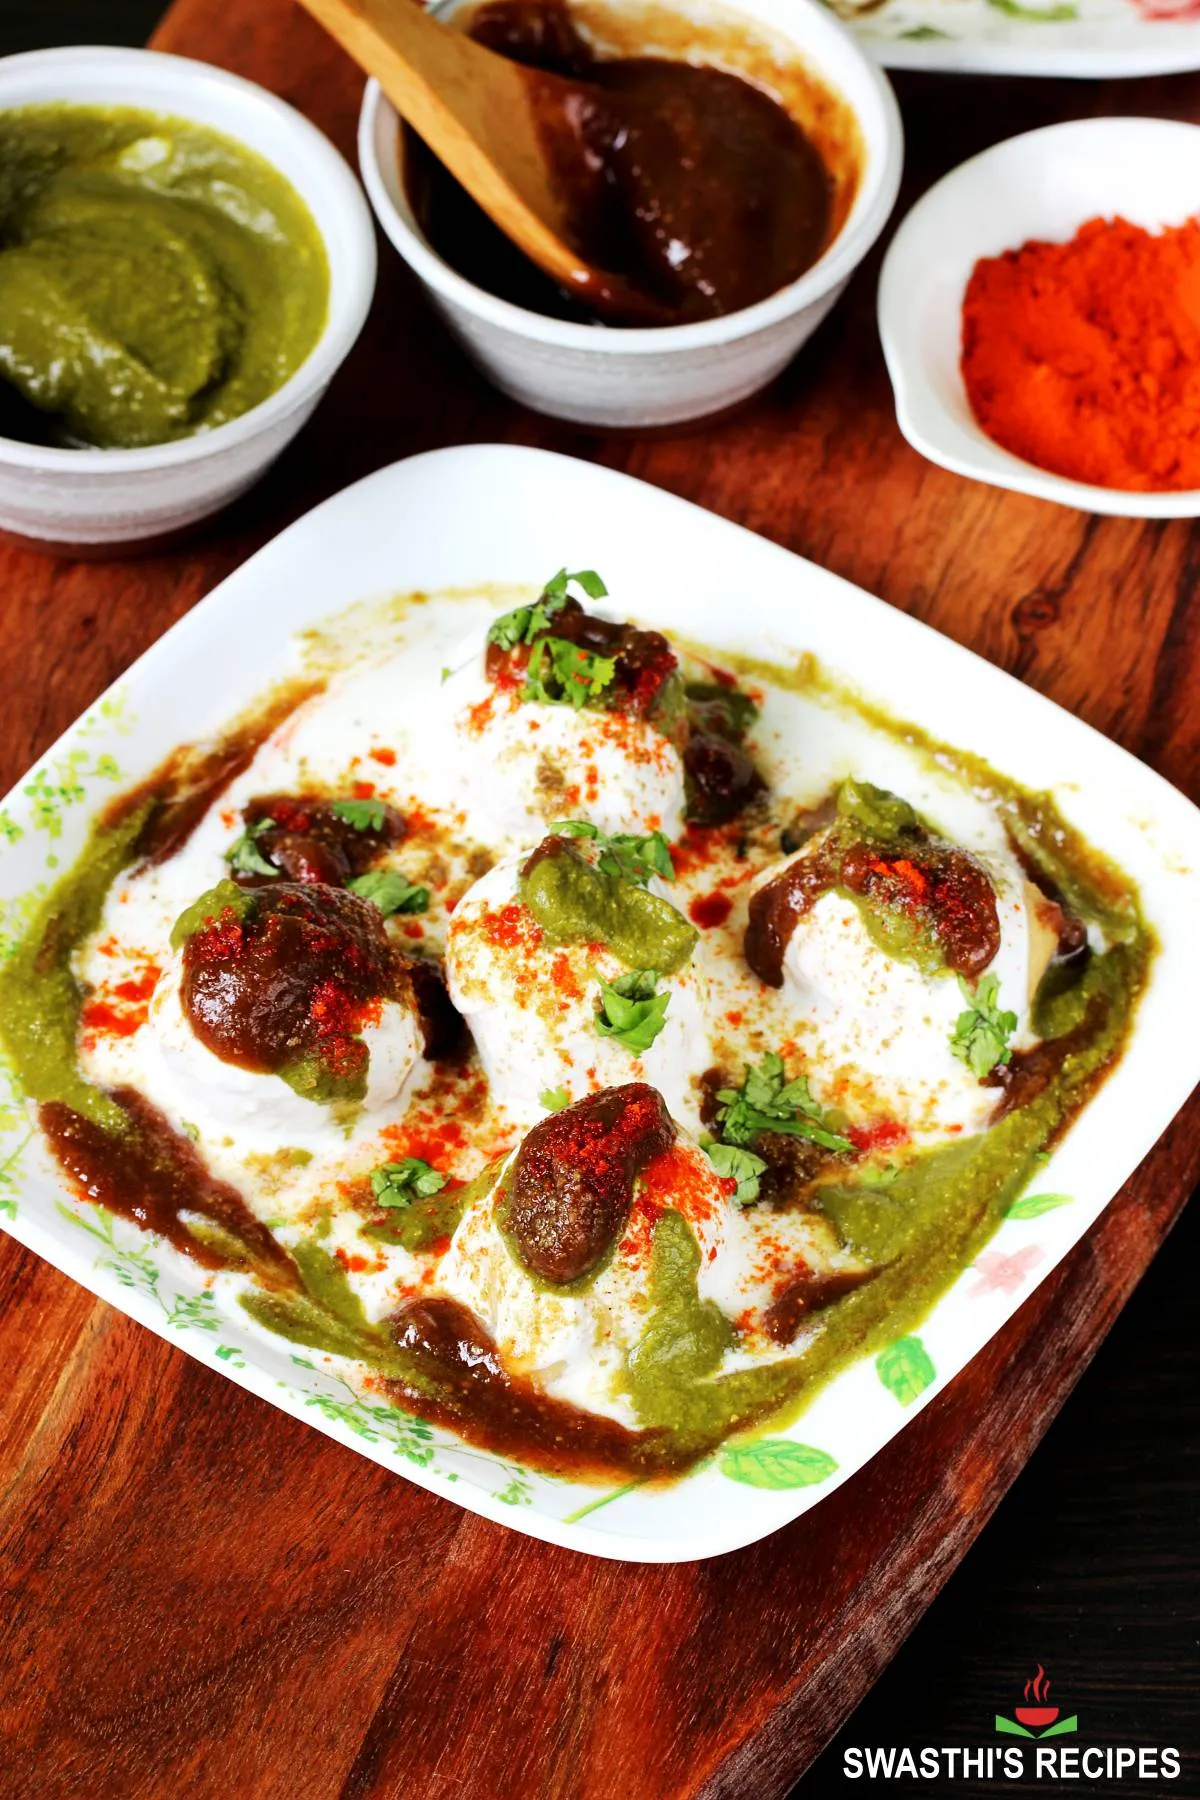
Dahi Vada Recipe – A complete step by step photo and video guide to make soft, melt-in-the-mouth Dahi Vada at home. Also known as Dahi Bhalla, these are deep fried lentil fritters dunked in creamy yogurt, topped with different kinds of sweet spicy chutneys and then garnished with spice powders. Dahi Vada is one of the most popular Indian street foods eaten across India.
Dahi Vada is also popularly known as Dahi Bhalla in North India. Towards the South, a variant of this is known as thayir vadai in Tamil, perugu vadalu in Telugu and mosaru vade in Kannada.
About Dahi Vada
Dahi Vada are soft lentil fritters soaked in creamy yogurt. Dahi is a Hindi word that means yogurt and Vada are deep fried fritters. These melt-in-the-mouth snack is topped with Tamarind chutney and Green chutney or Coriander Chutney. Lastly garnished with ground spices like cumin powder, red chilli powder and chaat masala.
It is served as a snack or as side in a meal. Most homes make this during special occasions like celebrations, parties & festivals like Diwali, holi and Navratri.
Dahi Vada Vs Dahi Bhalla
Dahi Vada is generally made with only urad dal. While Dahi Bhalla has some moong lentils included to make the vada batter. Some versions of dahi bhalla also have some boiled chickpeas added to it, while serving.
The South Indian thayir vada, perugu vadalu or mosaru vada is tempered with curry leaves, green chilies, mustard and hing. What makes dahi vada or dahi bhalla distinct and unique is the sweet, tangy and hot chutney toppings.
Well-made Dahi Vada have a melt in the mouth texture. The sweet sour Tamarind chutney and flavorful spicy Green chutney compliment the taste. Various spice powders and chaat masala add flavor & zing to the dahi vada chaat making it look & taste super delicious.
Making dahi vada is quite easy, except there is a bit of preparation work. Here are the brief steps of making the entire dish:
How is it made?
- Soak the lentils and make the batter
- Make sweet tamarind chutney
- Make green chutney
- Fry portions of the batter to make vada
- Assemble dahi vada
You can very well complete the first 3 steps the previous day so most of the preparation is done ahead. The last 2 steps can be followed on the day you plan to serve.
For more snacks recipes, you can check
Batata vada
Namak pare
Bread pakora
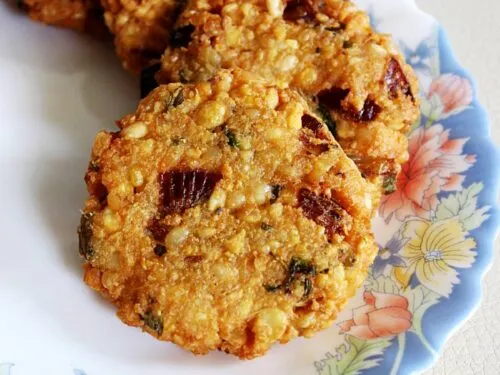
Mixed dal vada
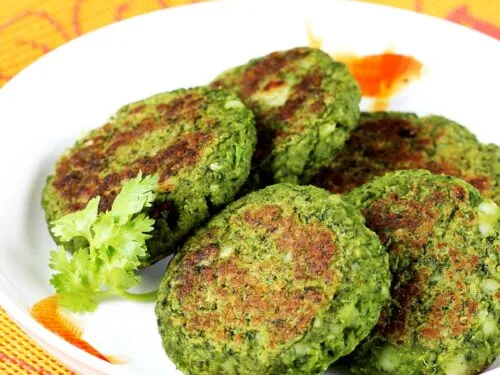
Hara bhara kabab
Samosa
Photo Guide
How to Make Dahi Vada (Stepwise Photos)
Preparation
1. To make dahi vada, always use thick and fresh dahi that is made from full fat milk. If you are new to making it at home, you can follow this post on How to make curd at home. You will need to make it the previous night. You can also use store bought like greek yogurt. Just that you will need to thin down the consistency to homemade yogurt.
2. Add half cup urad dal to a large bowl. You can also add 2 tablespoons of moong dal if you like the flavor. Whole urad dal gives best results. Since I was running out of that I used split urad dal here.
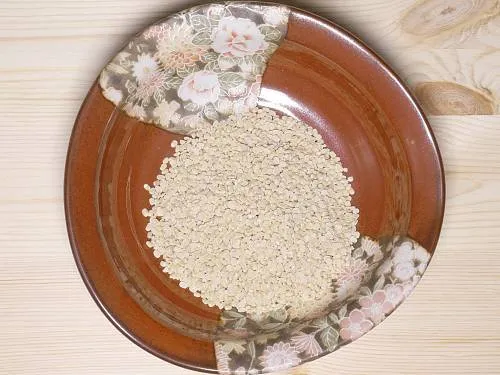
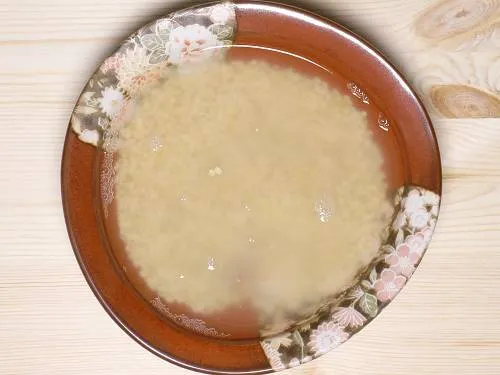
3. Wash it well a few times until the water runs clear. Pour fresh water and soak it for at least 6 hours. Proper soaking allows the batter to fluff up well while grinding. While the dal is soaking you can make green chutney and tamarind chutney. Also keep half cup water in the fridge for chilling.
Make Green Chutney
4. While making chutneys make sure they are medium thick otherwise dahi turns very runny once the chutneys are added. You can dilute if needed while you serve. To make green chutney add all the ingredients mentioned in the recipe card to a blender jar and make a fine paste using very little water or as needed.
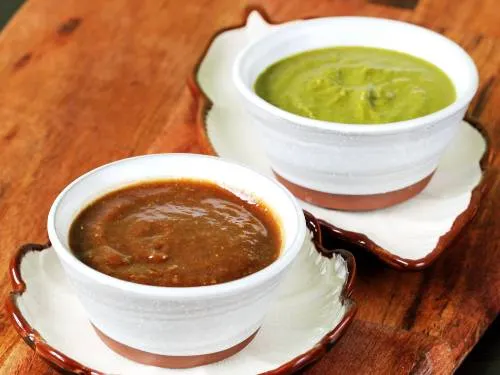
If you are making it ahead and not going to use it up within a day then skip garlic in the green chutney. Sometimes garlic alters the flavor of the chutney. You may use roasted & skinned peanut/fried gram/ bhuna chana dal which helps to keep the chutney thick without turning runny after refrigerating. Chutney without garlic keeps good for about 4 to 6 days in the fridge.
Make Sweet Tamarind Chutney
5. Heat 1 cup of water in a pot. Add
- ¼ cup deseeded tamarind
- ½ cup jaggery (or ¼ cup jaggery & ¼ cup dates).
Simmer all these for 4 to 5 mins until the tamarind turns soft and completely mushy. Add ¼ to ½ teaspoon red chili powder, ½ teaspoon salt, ¼ teaspoon fennel powder, ¼ teaspoon ginger powder, ¼ to ½ teaspoon roasted cumin powder and ½ teaspoon coriander powder or garam masala. Mix well & simmer for 3 mins until you begin to smell it good. Taste this and add more jaggery if needed to suit your taste.
Transfer this to a wide plate cool it. Blend it and pass through a sieve to a wide bowl. Transfer this to a glass or ceramic jar. Store this in fridge and use up with in 4 to 6 days.
Make Dahi Vada Batter
6. Drain dal completely and add it to a blender jar along with ½ teaspoon cumin, ¼ teaspoon salt, ½ inch peeled ginger, 1 green chili and ⅛ teaspoon hing. Pour 2 tablespoons chilled water.
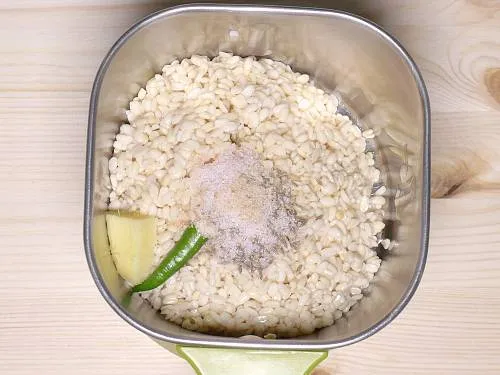
7. Blend it coarsely first, then add a tbsp of water at one time and grind it again. Scrape off the sides.
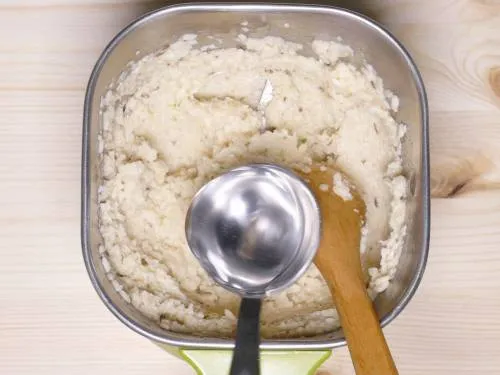
8. Keep blending until you get a smooth, thick and fluffy batter adding 1 tbsp chilled water each time or as needed. Do not add too much water as the batter may turn runny. If the blender jar turns warm wait until it cools down before you begin to blend again. If the batter turns hot, vada will come out hard.
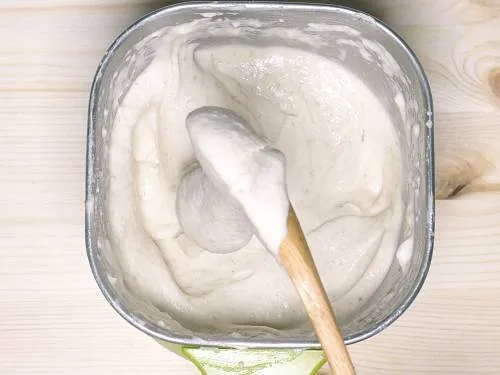
9. Towards the end of blending, you must have thick, smooth, fluffy and light batter. Be careful and do not make the batter runny as sometimes the runny batter vada can burst while frying.
Troubleshooting: If you happen to add more water by mistake & the batter has become runny, add some powdered poha or rice flour and mix it.
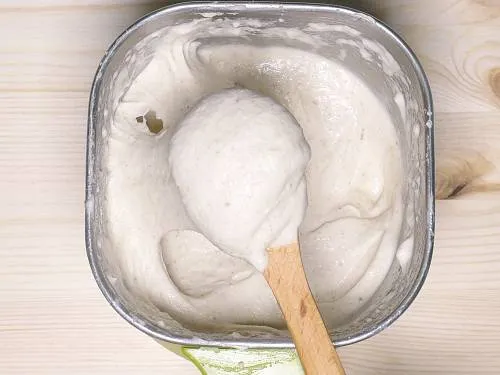
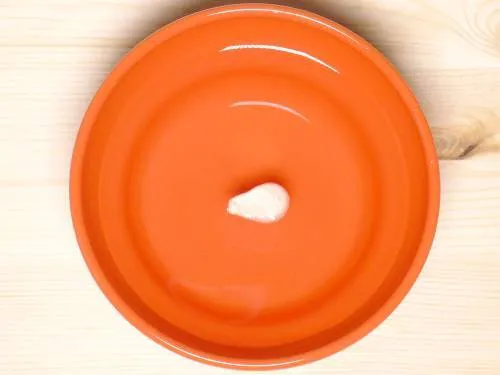
10. To check this, you can drop a small amount of batter in a bowl filled with water. Light and fluffy batter floats.
11. Transfer the batter to a bowl and whisk or beat it well with your hand or a whisk, in one direction for 60 to 90 seconds to aerate. By incorporating air into the batter vadas become fluffy, light and also they get cooked well.
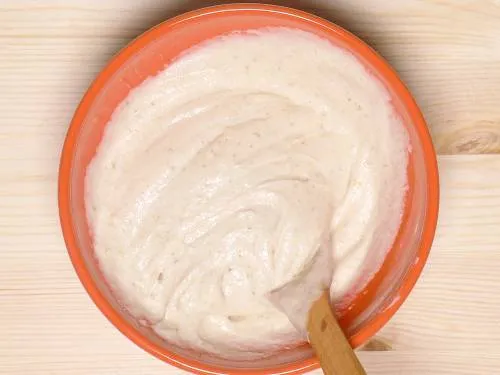
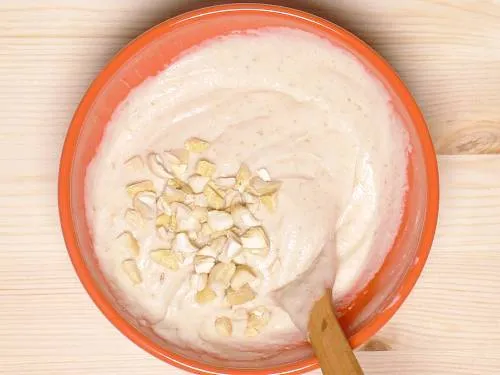
12. Add cashews if using. Due to harsh sunlight in my kitchen, the color of the batter looks different. It turns out white.
13. Place a wide bowl half filled with water away from your stove to soak the fried balls. Add half teaspoon salt to this.
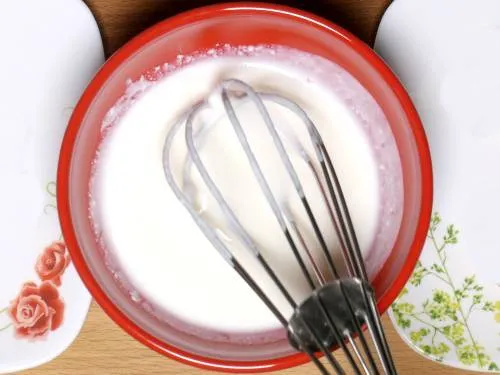
14. Add 2½ cups dahi/ yogurt to a large wide bowl. Use a bowl which is wide and big enough to hold all your vadas. Add a tbsp of powdered sugar and salt as needed. Whisk them together until smooth. Taste test and adjust sugar and salt. Set this aside.
Fry Vada
15. Heat oil on a medium flame for deep frying. When the oil is medium hot enough, drop a very small amount of batter. It has to come up to the surface without turning brown. This is the right temperature. Drop small amounts of batter in the hot oil either using your greased fingers or greased tablespoon. You can also use a fruit scooper.
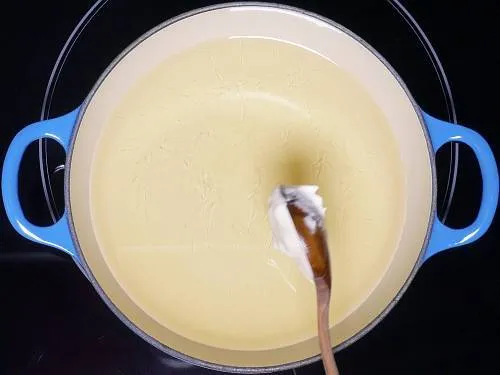
16. Add as many vadas as your kadai fits without overcrowding. The well ground batter will instantly puff up after adding to hot oil.
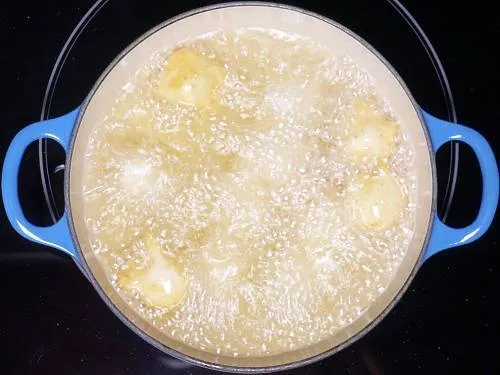
17. When they become light golden, stir them and continue to fry on a medium heat.
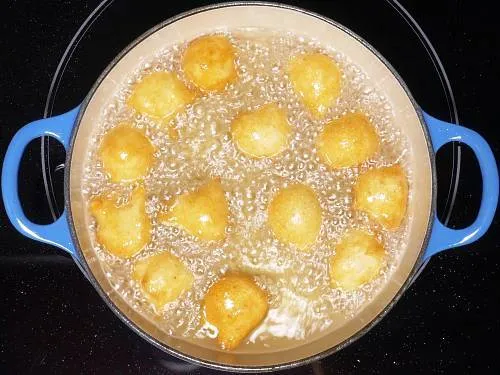
18. When they become deep golden and crisp remove them from oil.

19. Drain them on a kitchen tissue or steel colander first.
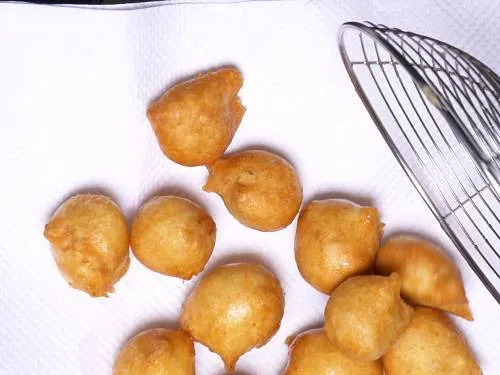
20. Immediately transfer the hot fried vadas to the bowl of water. Rest them for 20 mins. Timing may vary depending on the size of the vadas. While these soak fry the next batch of vadas.
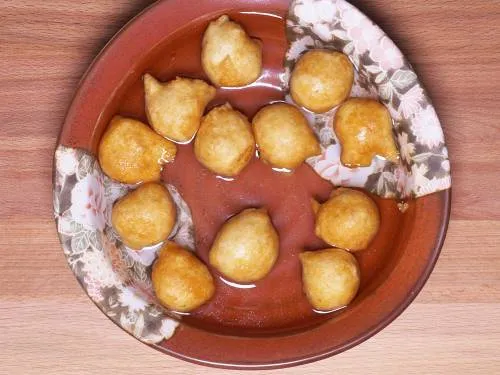
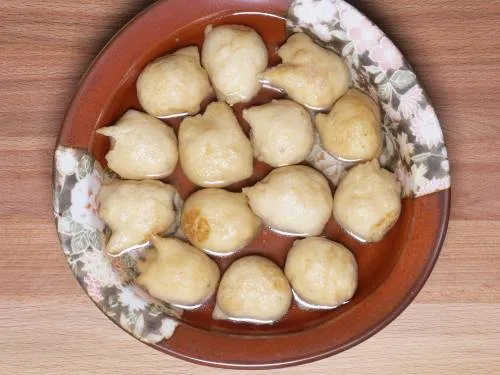
21. They will absorb water and become bigger in size.
Assemble Dahi Vada
22. Remove one vada at one time from the water.
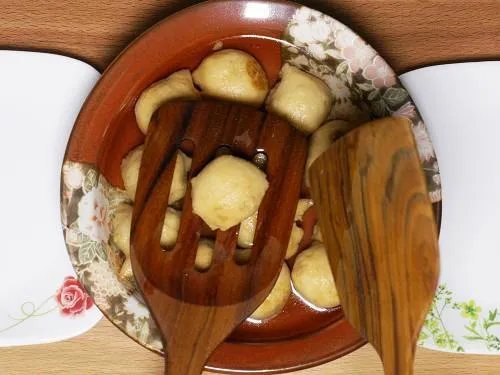
23. Gently press down the vadas in between spatulas or your palms one after the other to remove excess water. Handle them gently they may break. Add them directly to the bowl of whisked yogurt.
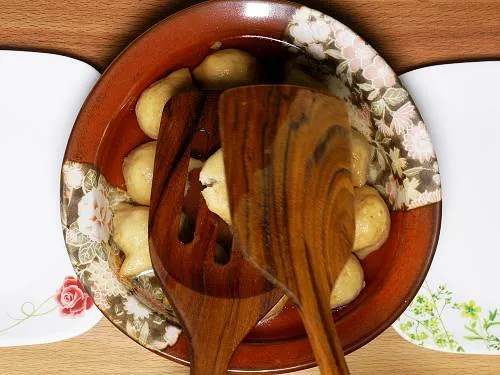
24. Allow them to rest for at least 2 hours in the fridge. After soaking if you feel you need more dahi whisk another half cup yogurt with more powdered sugar and little salt. Pour that to the bowl. Later transfer dahi vada to serving plates or tray.
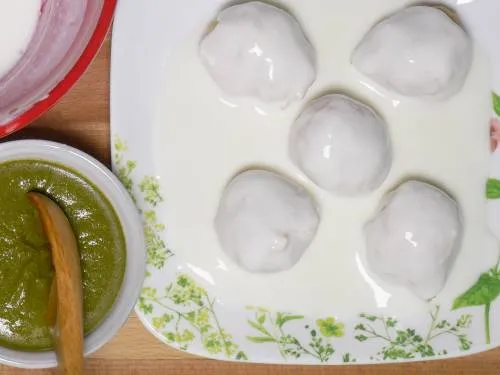
25. Top the vadas with a generous amounts of green chutney and sweet tamarind chutney.
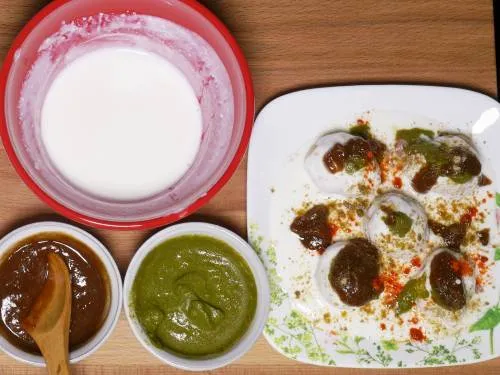
26. Sprinkle cumin powder, chaat masala, black salt and then red chili powder. Finish off with coriander leaves. Make sure you adjust the amount of chutneys, chaat masala, cumin powder and red chili powder to suit your taste buds. Serve dahi vada immediately after you sprinkle the spice powders.
Here are my tips to make soft, mouth melting dahi vadas.
Pro Tips
Soaking dal: Soak the dal for atleast 4 to 6 hours otherwise the batter will not turn fluffy while blending.
Blending dal: After soaking, blend the urad dal well until thick, light & fluffy. If using a blender it is essential to use chilled water to blend the lentils as this prevents the blender from heating up.
Secondly add water only as needed so the batter does not become runny. If you pour lot of water as one time, the batter turns runny. So add only a few tbsps each time until you get the right consistency.
Consistency of batter: The batter must be of dropping consistency otherwise the vadas will be out of shape, flat and soak up lots of oil. This dropping consistency can be achieved only by adding water with caution.
Aerate the batter: This is the key step to make fluffy dahi vada. After blending the batter, aerate it well by beating it in a circular motion. This incorporates air in the batter and makes fluffy dahi vadas.
You can do it with your hand if making in small quantity. If you double or triple the recipe then use a hand beater or a stand mixer.
Tips to Fry Vada
Equal portions of batter has to be slided to the hot oil to make vada. If you make them of different sizes, then the frying time will vary.
Frying has to be done on a medium heat. Frying on low flame will make them hard and frying on high flame will not cook them from inside but will brown them.
So consistent medium heat is required to fry them well and evenly.
Tips to Soften The Vadas
Soaking the hot fried vadas immediately in water or buttermilk helps they absorb water from inside keeping them soft and moist. Rest them in water until they soak up well and become bigger in size.
Then gently squeeze the excess water and dunk them in the whisked yogurt.
Tips to Make Chuntey
Good tamarind chutney and green chutney are the key ingredients which actually enhance the taste of dahi vada. I use this tamarind chutney and this green chutney to make my dahi vada.
I usually stock the tamarind chutney as it keeps good for a few months in the fridge. However I prefer to make the green chutney fresh on the same day or on the previous day. Here are the tips:
- Make sure you don’t use garlic in the green chutney if you are making it ahead as sometimes it alters the flavour and taste of the chutney.
- If you are making these ahead to refrigerate, then keep the consistency of the chutney thicker. I always feel the taste and flavour of the chutney retains for longer by keeping the consistency thicker.
- Dilute the chutney just before serving or assembling the dahi vada.
- If your yogurt is runny, then use the thicker chutney without diluting.
Assembling Dahi Vada
Preparing yogurt: Whisk the chilled yogurt well with some salt and sugar. Homemade curd is the best choice for dahi vada. Please avoid using store bought dahi that is sour in taste. If you do not know how to make curd at home, then you can check this post – curd recipe.
I always make homemade curd to make dahi vada and I can assure you it makes a lot of difference.
- After whisking the yogurt transfer it to a large serving bowl.
- Drenching softened vadas in yogurt: Once the vadas soften, Squeeze off the excess water and add them to the whisked yogurt. Rest them for 2 hours in the fridge.
- Pouring chutney: Bring the chutney to a slightly pouring consistency by adding water as needed. Pour them over the dahi vadas.
- Sprinkling spice powders: Sprinkle cumin powder, chaat masala and chilli powder. Keep the roasted cumin powder ready a day ahead. If you do not know how to make it, dry roast a few tbsps of cumin/jeera on a very low heat until fragrant. Cool and powder it.
- Garnish with some chopped coriander leaves and pomegranate seeds for garnish.
How to Store:
If you plan to make this ahead, then go ahead and do it till soaking the vadas in dahi. Once prepared cover the serving tray with a cling wrap and refrigerate. Keep it at room temperature a few hours before serving. Pour the chutneys and sprinkle spice powders only before serving.
I had a lot of queries from readers about freezing the vadas or about refrigerating the dahi vada for a few days.
Earlier I had never tried it so couldn’t share. Here are my updates on freezing vadas and refrigerating dahi vada.
How to Freeze Vadas?
Cool the vadas completely after frying. Line your freezer bag with a unbleached parchment paper. Arrange all the vadas and seal it. Open the bag a little and remove all the air by squeezing the bag gently. Seal it and freeze them for up to 4 weeks. Alternately you can also store them in freezer safe glass containers.
When you want to make dahi vada with your frozen vadas, bring water to a boil and add these vadas. They will puff up well in about 25 to 35 mins. When they soften, remove them and squeeze off the excess water. Add them to the whisked yogurt and rest for another 2 hours. Top with chutneys.
Related Recipes
Recipe Card

Dahi Vada Recipe (Dahi Bhalla)
For best results follow the step-by-step photos above the recipe card
Ingredients (US cup = 240ml )
For Vada
- ½ cup urad dal (skinned black gram) (whole or split)
- ½ inch ginger
- 1 green chili
- ½ to ¾ teaspoon cumin seeds
- ¼ teaspoon salt (adjust to taste)
- ⅛ teaspoon hing (asafoetida)
- 2 to 4 tablespoons chilled water (as needed) (do not use a lot)
- 6 cashew nuts chopped
- Oil as needed for deep frying
For Green Chutney
- 1 cup coriander leaves
- ¼ cup mint leaves (pudina leaves)
- 1 green chili (use as needed)
- ¼ inch ginger
- 1 garlic clove (optional)
- ½ teaspoon cumin seeds
- 1 tablespoon Lemon juice or amchur (dry mango powder) as needed
- 1 tablespoon roasted gram (for binding, optional)
- ¼ teaspoon salt (optional)
- water very little if needed
For Tamarind Chutney
- ¼ cup tamarind (seedless)
- ½ cup jaggery or ¼ cup jaggery & ¼ cup dates (seedless) (use as needed)
- 1 cup water (¼ cup more if needed)
- ½ teaspoon salt (or kala namak, adjust to taste)
- ¼ teaspoon dry ginger powder
- ¼ teaspoon fennel powder
- ¼ to ½ teaspoon roasted cumin powder
- ¼ to ½ teaspoon red chili powder
- ½ teaspoon coriander powder or garam masala
- ⅛ teaspoon hing (asafoetida)
Other Ingredients
- 2½ to 3 cups curd (plain yogurt) (thick & fresh, unflavored)
- 1 tablespoon powdered sugar
- ½ teaspoon salt
- 1 teaspoon roasted cumin powder
- ½ teaspoon red chili powder
- 1 teaspoon chaat masala
- ¼ cup coriander leaves chopped finely
Instructions
- Wash urad dal thrice and soak for at least 4 to 6 hours. Chill 1 cup water in the refrigerator to blend the lentils later.
Make Tamarind Chutney
- Add 1 cup water, tamarind, jaggery and dates to a pot. Simmer for 4 to 5 mins until the tamarind turns completely mushy.
- Stir in red chili powder, salt, cumin powder, fennel powder, dry ginger powder and coriander powder or garam masala. Mix and boil for 2 minutes until the aroma of spices comes out. If the mixture becomes too thick, pour ¼ cup hot water.
- Taste test to adjust salt and jaggery to your preference. Cool down, blend and pass through a sieve to a wide bowl.
- Optionally temper – Heat a teaspoon of oil or ghee in a pan. Add hing and then pour the tamarind chutney. Simmer for 2 to 3 mins until bubbling hot & thick. Cool this completely.
- Transfer this to a dry glass or ceramic jar. Store this in fridge and use up within 4 to 6 weeks.
Make Green Chutney
- Add coriander leaves, mint leaves, green chili, ginger, garlic, cumin seeds, lemon juice, roasted gram & salt to a blender jar. Grind to a smooth chutney, adding water (2 to 3 tbps) only as needed. Taste test to adjust salt and spice.
Make Batter
- Drain the water from soaked urad dal and add to a blender jar. Also add cumin, salt, green chili, ginger, hing and pour 2 tbsps chilled water.
- Grind for a minute and scrape the sides, repeat blending adding 1 tbsp water each time only as needed until the batter turns thick, fluffy and light. (Avoid adding too much water as it makes the batter runny. We want a thick & fluffy batter here.)
- When the batter is ground perfectly, it looks lighter in color. Remove to a bowl. Using your hand or a whisk, whisk/ aerate it well for 1 min in one direction.
- Test the consistency – drop ¼ tsp batter to a bowl of water. If it floats it means the batter is aerated well else blend it a little longer or whisk a little longer.
- Stir in the cashews if using.
- To a large bowl, pour 2 to 3 cups water and ½ teaspoon salt. Keep this aside on the kitchen counter.
Fry Vadas
- On a medium flame, heat oil in a kadai. Test if the oil is hot enough by sliding ½ tsp batter. It should sizzle and come to the surface steadily without turning brown.
- Grease your fingers or a tablespoon or a fruit scooper. Take small portions of the batter and gently slide into the oil.
- Fry on a medium heat, untouched for 3 minutes and then stir them. Continue to fry until golden and crisp. Remove to a steel colander or lined rack.
- Transfer the hot fried vadas to the bowl of water. Rest them for 15 to 20 mins, rotating them with a spoon in between. Timing may vary depending on the size of the vadas.
- While these rest fry the next batch of vadas. Repeat the same process of soaking them in water.
How to make Dahi Vada
- Add 2½ cups yogurt, a tbsp of powdered sugar and ½ teaspoon salt to a large wide bowl (big enough to hold all your vadas). Beat well with a whisk until smooth. It should not be too thick like Greek yogurt and not very runny. Taste test and adjust salt.
- Gently press down the vadas in between spatulas or your palms one after the other to remove most of the water. Drop these to the bowl of yogurt & ensure all of the vadas are dunked in the yogurt well.
- Cover this and chill in the refrigerator for at least 2 hours. This is when the dahi vadas soak up a bit of yogurt and flavor.
- They will be softer by 2 hours. If you like more yogurt, whisk another half cup yogurt with sugar and salt. Pour that as well. Transfer the dahi vadas to serving tray or plates.
- Top with a generous amounts of green chutney and sweet tamarind chutney.
- Sprinkle cumin powder, chaat masala, black salt and red chili powder. Garnish with coriander leaves. Adjust the quantity of chutneys, chaat masala, cumin powder and red chili powder to suit your taste.
- Serve dahi vada immediately after you sprinkle the spice powders.
Notes
- I have not used moong dal here. If you want you can add 2 tbsps skinned moong dal.
- Skip garlic from the green chutney, if you prefer to store longer.
- To use greek yogurt, whisk it with little water to bring it to consistency. We don’t want the yogurt to be thick. It has to be moderately thick so the vadas absorb little bit of the dahi.
- You can make the entire recipe 1 day ahead and refrigerate. Add the chutneys and garnishing the day you are going to serve it.
- Alternately you can make these a day ahead – tamarind and green chutney, blending the batter, preparing the yogurt. The day you want to serve these, just fry the vadas and add them to the yogurt. This will just take about 30 mins or so.
- Fried vadas can also be soaked in buttermilk (yogurt diluted with water). Fried vadas soaked in water taste very bland later so I have been making these by soaking in buttermilk.
- Resting dahi vada: I recommend resting vadas in dahi for at least 2 hours so they soak up little dahi. I feel they taste better and softer.
- You can store the prepared dahi vadas in refrigerator for a day. If you want to keep them for 2 to 3 days, then store the softened vadas in air tight box and add them to chilled yogurt the day you want to serve.
- Fried vadas can be frozen for about a month. Keep them in a glass freezer safe container or a Ziploc lined with an unbleached parchment paper. Add them to boiling hot water the day you want to use them. Remove them when they soften. After soaking them in yogurt, they taste as fresh as the day they were made.
Video
Watch Dahi Vada Video
NUTRITION INFO (estimation only)
© Swasthi’s Recipes
Dahi vada recipe first published in March 2017. Updated & republished in November 2022.
About Swasthi
I’m Swasthi Shreekanth, the recipe developer, food photographer & food writer behind Swasthi’s Recipes. My aim is to help you cook great Indian food with my time-tested recipes. After 2 decades of experience in practical Indian cooking I started this blog to help people cook better & more often at home. Whether you are a novice or an experienced cook I am sure Swasthi’s Recipes will assist you to enhance your cooking skills. More about me
Follow Swasthi’s Recipes





Comments
For how many days can u keep the batter without frying.
Hi Eva, you can keep for 3 to 4 days. Bring it close to room temperature before frying or leave it on the counter for atleast an hour before frying
Always enjoy your recipes
Can I keep the left over batter in the fridge to be used later
If yes how long
Thanks
Thanks Kiran. Yes you can store it for 1 to 2 days
What is the purpose of adding powdered sugar & salt to the yogurt is it for a sweet & salty flavor ? Thanks
Yes it is to sweeten slightly and improve the flavor
I am a beginner and the clear instructions helped. Please also share a no fry dahi bhalla recipe
My third time making this and it is my favorite recipe to make dahi vada. I made a double batch last night along with your tamarind and green chutney. Finished with the toppings now and it looks so good. Can’t wait to dig into it!
Wonderful explanation on how to prepare in simple and tasty way. 👌👌👋
Hi, my vadas turned hard…they did not absorb any water. I areated the batter…a small portion floated on water…also used recently purchased urid dal….any suggestions thanks
Btw all your recipes are awesome
Hi Sarita,
They did not absorb water means the batter is not ground well. It either requires little more soaking or longer grinding. You purchased the dal recently but never know for how long it was sitting in the stores. It could be very old dal. Try adding a pinch of baking soda, that should help
Good
Very useful tips on the recipe
Dear Swasthi
I am a fan of your recipes. They are mostly foolproof. I wish to serve dahi vadas for a group of 14 people on coming Sunday. Can I already boil and soak on Thursday and assemble the yoghurt and chutney on Sunday? I know you have answered many questions related to this but I want to be very sure on how I can store for 3 days in advance. Really appreciate your answer.
Hi Rishika,
Thank you so much! There is a typo in your comment. But I understand you want to fry and soak the vadas on Thursday to assemble and serve on Sunday. I would instead follow this –
Thursday – Fry and cool them completely. Store in air tight container and refrigerate.
Thrus to sat (any day ) – Make the chutneys
Sunday – Heat water and add the cold vadas to hot water. Let them soften, squeeze and then assemble at least a few hours before serving. If the weather conditions are warm/hot, refrigerate after assembling.
Hope this helps! Have a great time!
Made this dahi vada last week with my sister. it was delicious. we also made the imli chutney and green chutney to go with this. Tasty
Making dahi vada was like a weekend project but it turned out fabulous. All the credit goes to you Swasthi. Your video and step by step instructions helped me a lot. Thank you and keep posting
Made dahi vada for a post new year family dinner and everyone loved it. I think your chutneys are the best. Tasted so much fresher and delicious than the bottled which I have always been using. It was so much fun trying out this with my husband. All thanks to you!
Yamini, that’s wonderful to know! Thank you so much for sharing back.
Can I make the batter ahead and for how many days does the batter keep good? Is it good to store the dahi vada for 3 to 4 days? please reply
Reshma,
I just got to see this. Hope I am not too late. Yes you can make the batter ahead and even the dahi vada. Storing/ refrigerating the prepared and assembled dahi vada for 2 days is just okay. You can also store the batter for 3 days. I would prepare the chutneys, dahi and the batter 2 days ahead. Fry and assemble the vadas one day ahead. hope this helps
These Dahi vada were a blast in last night’s dinner party. Thank you for posting
That’s nice to know Meera. Appreciate for letting us know
Good
Thank you
Hi! I had a doubt. I do not have a cup for measurement but I do have a weighing machine. Could you tell me how much urad dal I’ll need in grams instead of 1/2 cup? Thank you!
yummy
Thank you for the amazing work you do. For the first time I made dahi vada perfectly. I made all the chutney a day ahead and prepared the rest. It was easy to make a large batch to serve 10 people. Vada were soft and perfectly soaked up. Compliments were pouring in from the guests. All credit goes to you.
That’s great to know Priya. Thank you so much for sharing back! That makes me very happy.
Hi, My Bhallas are bursting in kadhai, pls help
Hi, I have already mentioned the troubleshooting tip in the post. They burst if the batter is runny. Simply add little powdered poha to the batter. 1 to 2 tablespoons poha powder would be enough. Don’t add a lot. Rice flour also works but it can make the bhallas hard.
This is my favorite dahi vada recipe. Never fails! Thank you
Glad you like it Beena. Thank you