Peanut Chutney (Groundnut Chutney, Palli Chutney)
Updated: August 29, 2022, By Swasthi
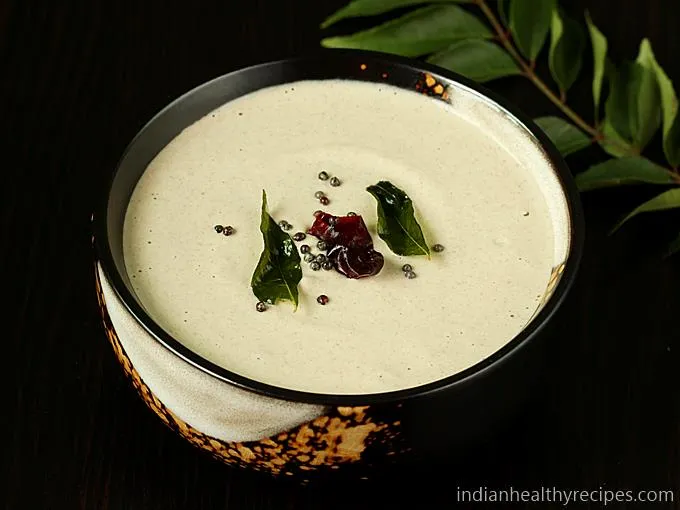
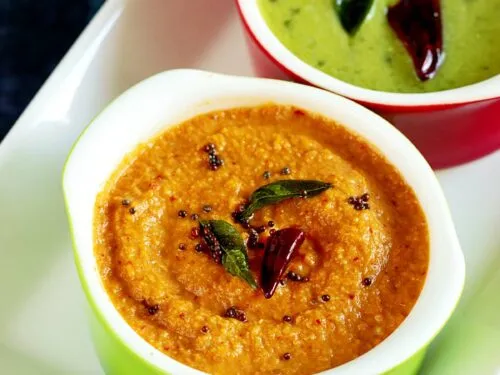
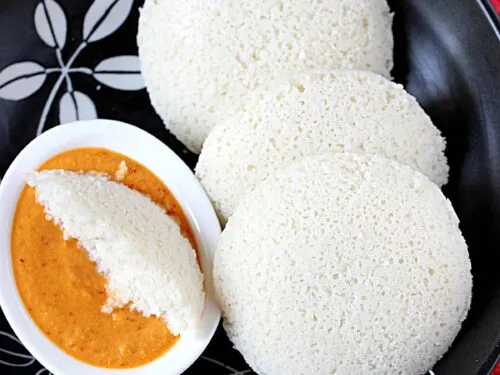
Peanut Chutney, also known as Groundnut Chutney is a delicious and flavorsome Indian chutney variety made with roasted peanuts, chilies, cumin seeds and garlic. This easy Peanut Chutney is the perfect vegan side for all your favorite Indian Breakfasts & snacks like Idli, Dosa, paratha, uttapam, punugulu, Vada, pakora and bonda.
It also goes well as a spread on your toasted bread, flatbreads and in your sandwiches & wraps. It is excellent to brighten up your meal by serving it on the side.
About Peanut Chutney
Peanut Chutney is also known as Palli Chutney and is a popular traditional condiment from the Andhra Cuisine. It is also known as Groundnut Chutney among the non-natives, while groundnut is just another term for peanuts.
This Indian peanut chutney is protein-packed and boost the nutrition profile of your everyday breakfast meal.
In this post I share not 1 but 3 ways to make the same. A basic Andhra style traditional palli chutney, mint peanut chutney and onion groundnut chutney. All these are simple and made with the most basic pantry ingredients.
While traditionally raw peanuts are used to make this chutney. They are roasted and then ground with the other ingredients. If you have access to store bought roasted peanuts (roasted & skinned is even better) you may use them. But ensure they smell and taste good.
My Recipes
The traditional Andhra recipe gives you a thick & creamy Peanut chutney that is delicious with a great blend of flavors. It is a version often made in Telugu speaking homes.
A few variations exist and some people prefer to deskin the dry roasted peanuts before grinding as it may cause bitterness and astringent mouthfeel. Peanut skin is high in Tannin compounds like tea and chocolate which leaves a bitter taste.
So if you prefer, deskin the roasted peanuts by following my pro tips section or buy skinned peanuts for ease. However I never do that because my family does not have a problem with the peanut skin.
The traditional version is usually made with only 6 ingredients such as roasted peanuts, garlic, green chilies, cumin seeds, salt and tamarind. All of these are ground with water to a smooth chutney & most often it is not tempered.
However every home has their own recipe. So many people use various other ingredients like urad dal, chana dal and curry leaves.
My Mom would always add some roasted urad dal, chana dal & curry leaves to most of chutneys as these enhance the flavour. So the recipe I have shared here is the way we make it at home.
More Chutney Recipes
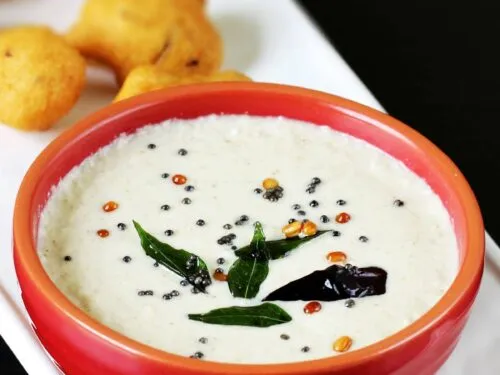
Coconut chutney
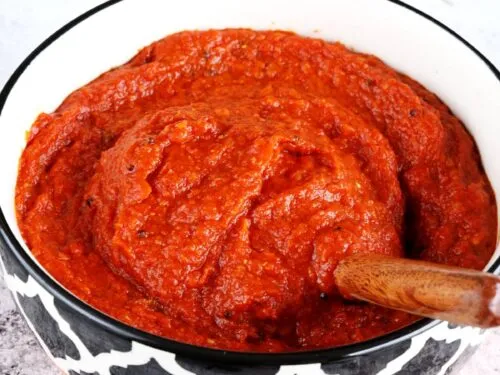
Tomato chutney
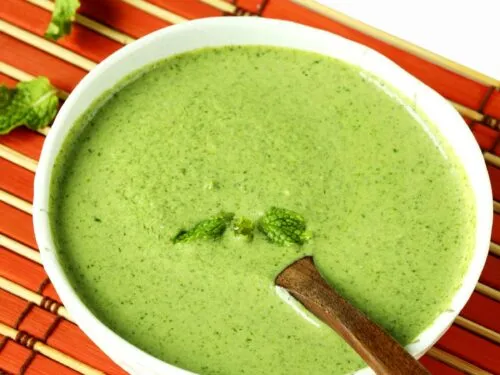
Pudina chutney.
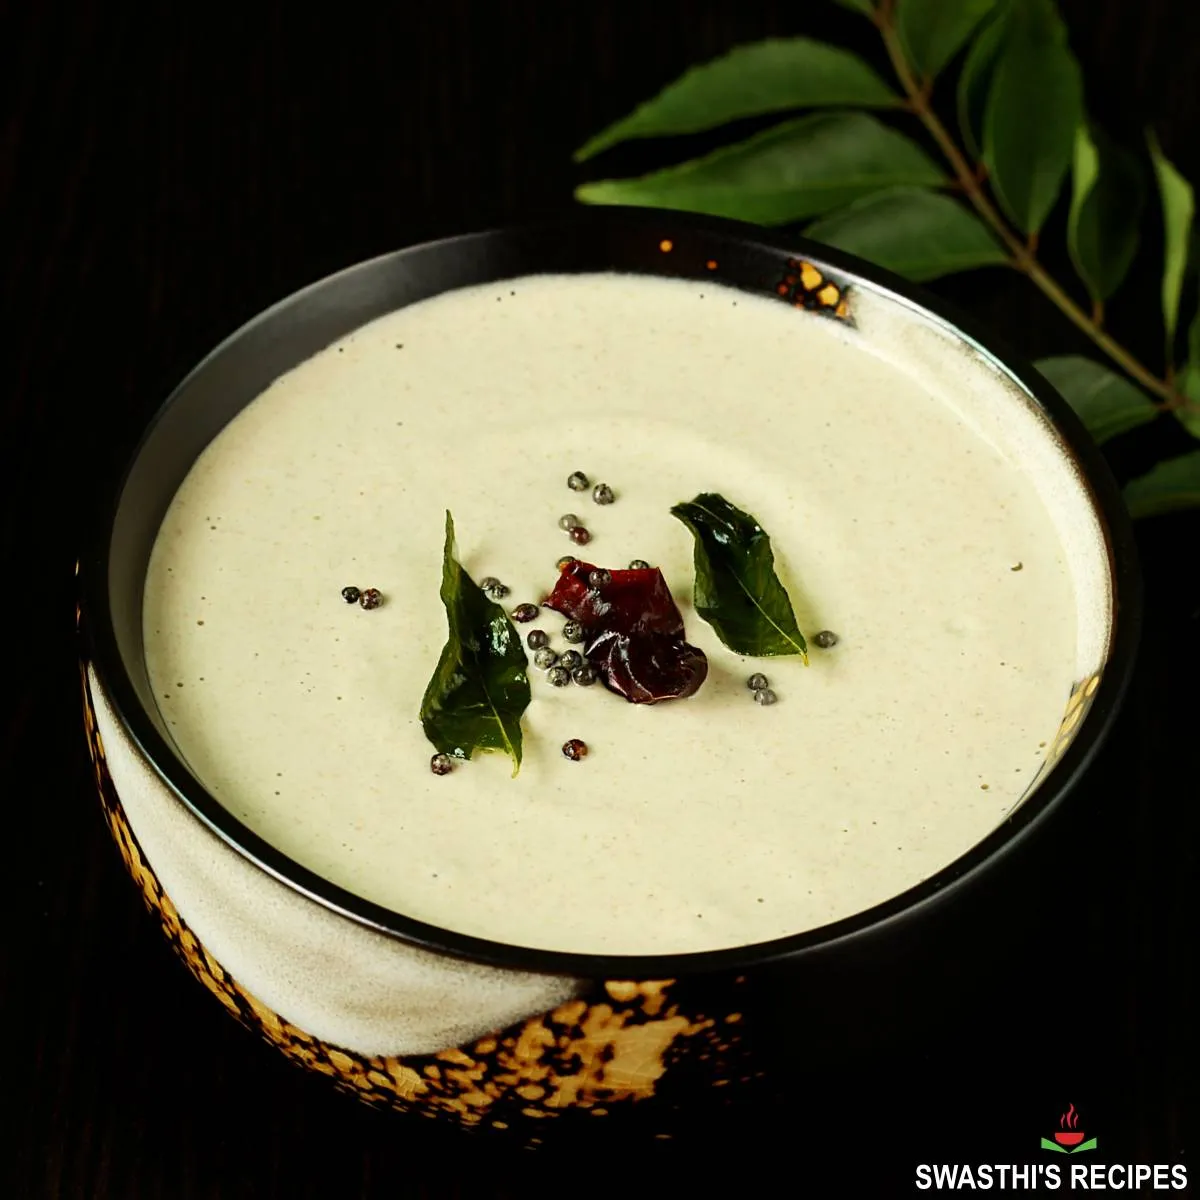
Photo Guide
How to make Basic Peanut Chutney (Stepwise Photos)
Preparation
If you want to use tamarind, either use ¼ teaspoon tamarind paste or Soak a small piece (½ to 1 tsp) in ¼ cup warm or hot water. Set this aside to soak.
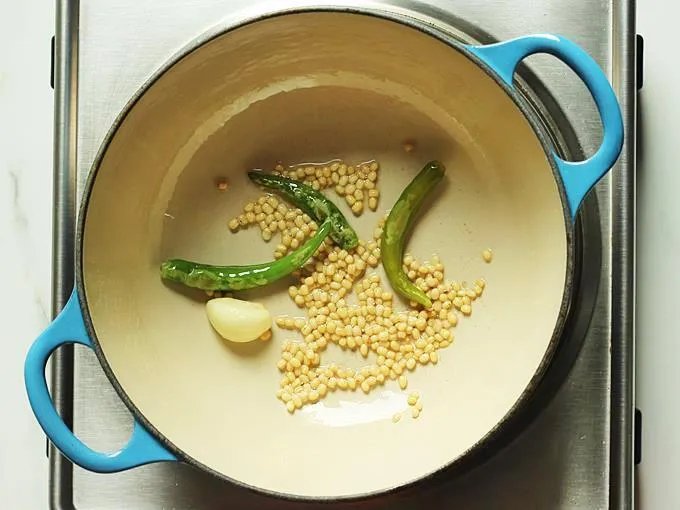
1. Pour 1 tsp oil to a pan or kadai and heat it. Add 2 to 3 slit green chilies, 1 garlic clove or (¼ inch peeled ginger) and 1½ tablespoon urad dal or chana dal (Bengal gram). To make Andhra style peanut chutney, garlic is not fried but added directly to the chutney jar later. So if you want you can also add it directly to the jar. Dal lends a nutty aroma to the chutney. However you can skip it here.
2. Begin to fry them on a medium to low heat until dal turns golden & aromatic.
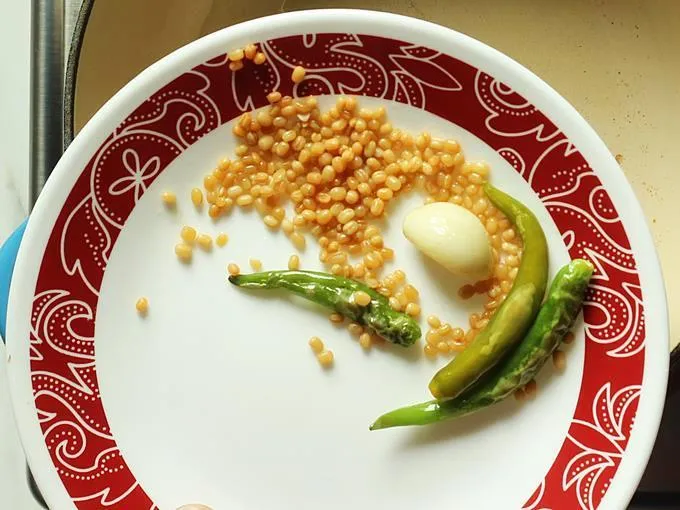
3. Remove the fried ingredients to a plate.
Roast Peanuts
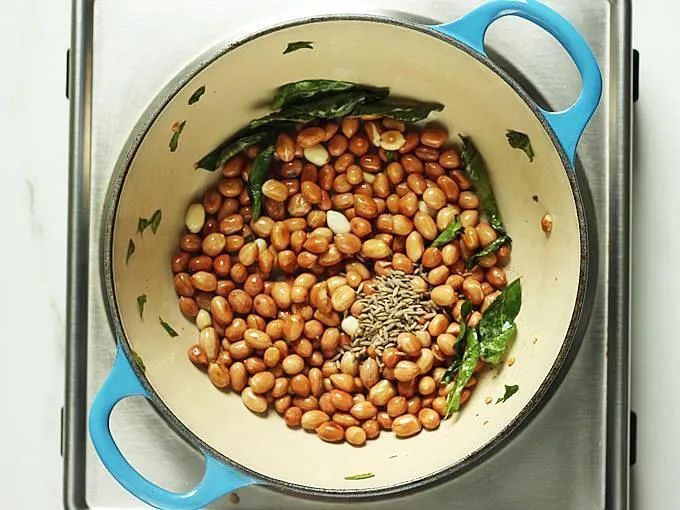
4. To the same pan, add peanuts. Begin to roast on a medium flame stirring constantly. When they are half done, add 1 to 2 sprigs of fresh curry leaves. You can also skip them if you don’t have. Curry leaves are good for the body and also makes the chutney more aromatic.
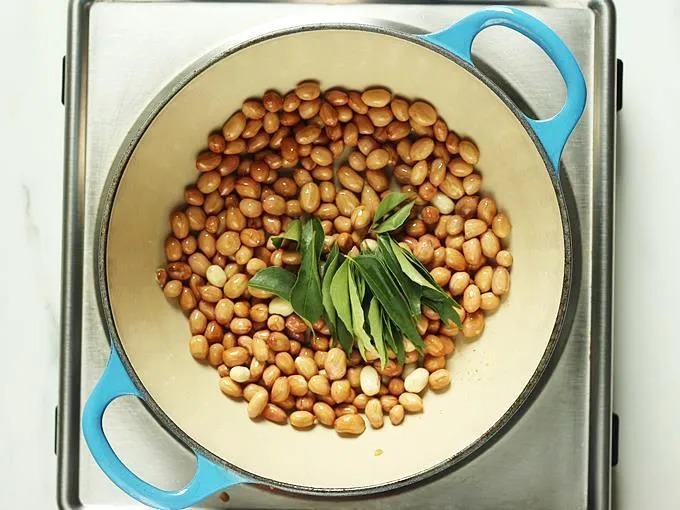
5. Continue to fry until the peanuts are well roasted. They begin to splutter as they roast. This step is the key to bring out the aroma of peanuts. When they are done, add ½ teaspoon cumin seeds and turn off the stove. Curry leaves should be crisp to get a nice aroma. Remove to a plate and cool all the ingredients.
Grind Peanut Chutney
6. Add them to a blender/grinder jar along with salt. Pour water just enough to cover them. If you want to use tamarind, pour the tamarind soaked water instead. You can also add raw garlic at this stage. If you have kids at home. First blend the chutney without chilies. Set their portion aside and then add the chilies and blend again.
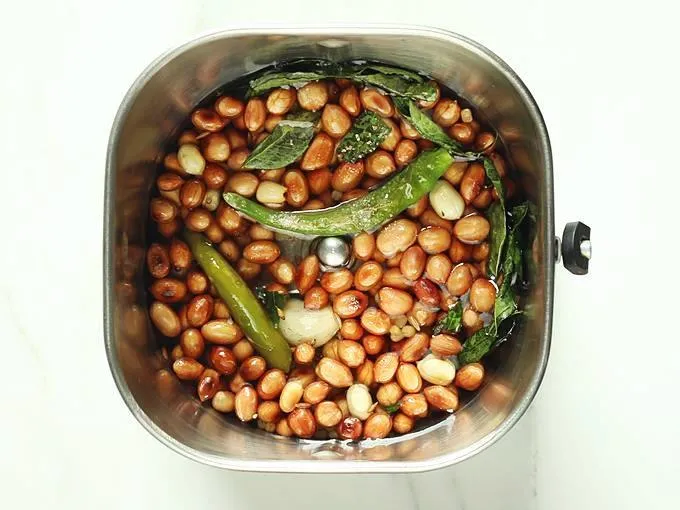
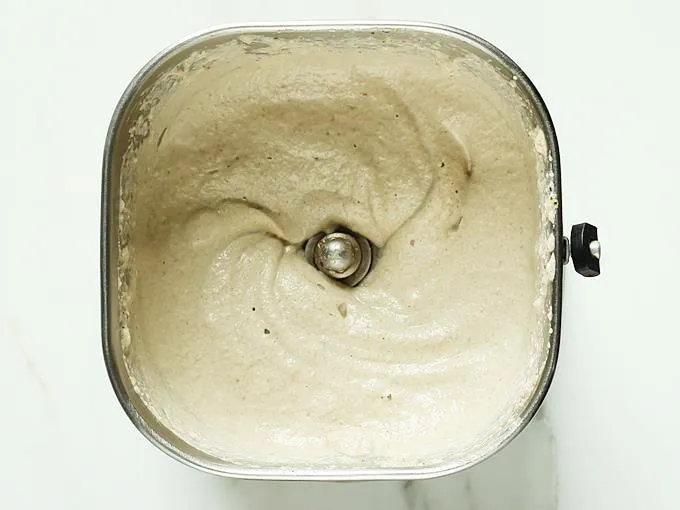
7. Pour more water as needed and bring to a consistency you desire. Usually peanut chutney is made thick. Check salt and spice. Add more if needed.
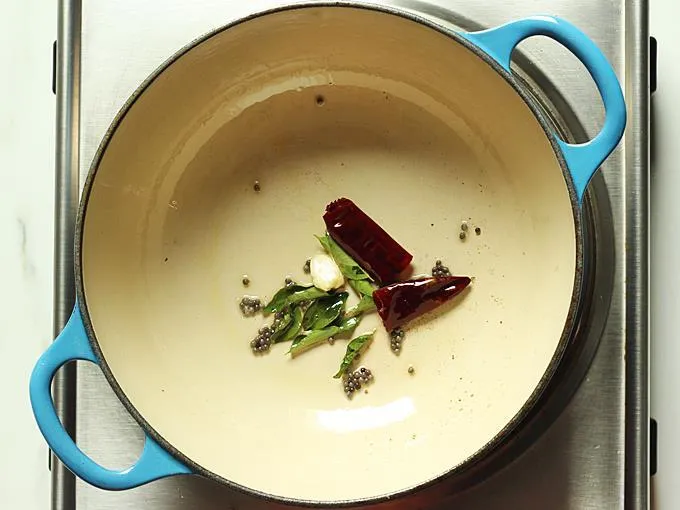
8. Most people do not temper peanut chutney. If you prefer, just heat 1 tsp oil. Add 1 pinch of mustard, 1 broken red chilies, few curry leaves and 1 crushed garlic. When the leaves turn crisp and garlic begins to smell good, turn off the stove and add a pinch of hing if you want. Pour the tempering over the peanut chutney.
Serve Peanut Chutney with idli or dosa or any snacks.
Ingredients & Substitutes
Peanuts: Always choose good quality peanuts and avoid rancid ones. Do check the peanuts before roasting them. Almonds can be substituted in this recipe. Just soak them in boiling hot water for 5 mins. Add them to cold water and peel the skin. Pat dry and use them as mentioned in the recipe.
Green chilies: Traditionally green chilies are used but you can also use red chilies. Ingredients like red chilies and tamarind also affect the color of the chutney. If you like a orange chutney, then use red chilies.
Tamarind: I do not use tamarind in my chutney as we don’t like the flavor. Since breakfasts like idli, dosa and uttapam already have a slight tangy flavor from the fermented batter, I prefer to skip it.
Garlic: Most people prefer to use garlic raw so they add it raw to the blender without frying. This gives a pungent smell.
Curry leaves are healthy so sometimes I add a lot of them about half cup to my peanut chutney. It tastes good but they have to be fried well until crisp. If you do not have fresh leaves you may simply skip them or add some mint leaves.
Dal is one of the key ingredient in most chutney recipes. Either chana dal or urad dal is used to enhance the flavor. But this peanut chutney tastes good even without dal as peanut itself has a nutty aroma. So you can easily skip dal.
Pro Tips
1. Roasting peanuts very well until aromatic on a medium to low heat is very important for a good tasting chutney. Avoid frying on high flame. The last few minutes you can roast them on a low heat to bring out the aroma. Under roasted peanuts smell raw in the chutney.
2. Peanut chutney stays good for 2 to 3 hours after that the taste begins to diminish. So to keep it good for long hours, use filtered water or boiled and cooled water. I never refrigerate this peanut chutney as I always feel it tastes best & much more delicious when it is freshly ground.
3. Traditional Andhra peanut chutney is a bit elaborate to make and is time consuming. The peanuts are roasted first, cooled and then the skin is removed completely. Roasted nuts are wrapped in a cloth and then rubbed so the skin comes off easily.
Many people say the skin of the peanuts really affect the taste of the peanut chutney. However it is a personal choice. The chutney made with skinless peanuts taste much nutty & has a intense flavor.
4. To save some time in the mornings, we usually roast all the ingredients the previous night & cool them. It is so much easier in the morning to just blend them.
Recipe 2 – Mint Peanut chutney
I sometimes add mint or pudina leaves to the peanut chutney & it totally elevates the flavor & taste. Mint aids digestion so it is great to add a handful of these leaves. I also use a piece of ginger and little lemon juice for this version.
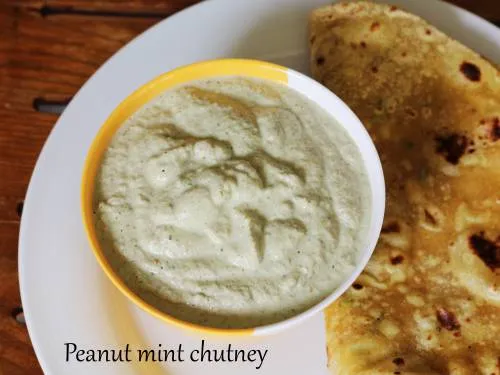
Ingredients
½ cup peanuts
2 to 3 green chilies
½ tsp cumin seeds (jeera)
1 tbsp oil
½ to ¾ cup Mint leaves or pudina leaves
½ inch ginger or 1 to 2 garlic cloves
1 tbsp lemon juice or little tamarind (optional)
½ tsp salt (adjust to taste)
Water as needed
Instructions
- Pluck the mint leaves from the stems and add them to a bowl of water. Rinse them & set aside to drain completely.Heat oil in a pan and fry the chilies for 2 to 3 mins until they get blistered. Remove to a plate.
- Add the peanuts to the pan and fry them on a medium heat until golden & aromatic. Then turn off and add cumin. Fry for 30 seconds
- I always use the raw mint leaves to make this chutney. But if you do not like to use them raw then fry them for about 1 to 2 mins.
- Cool and transfer all the ingredients to a blender jar. Add ginger or garlic, salt and little water.
- Blend to smooth chutney adding more water if needed.
- This chutney needs no tempering. If you prefer then heat 1 tsp oil. Add a pinch of mustard and a broken red chilli.
- When the seeds splutter, then add curry leaves. The leaves will turn crisp then add hing. Pour this over the peanut chutney. Serve with idli, dosa, paratha.
Recipe 3 – Onion peanut chutney
In this recipe, onions give a natural sweet taste to the peanut chutney. You can fry the onions until transparent or even caramelize them. Both ways it tastes good.
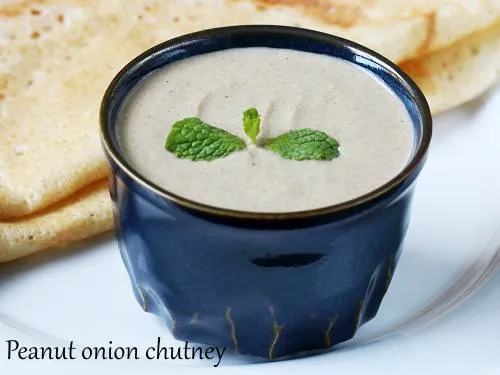
Ingredients
- ½ cup peanuts
- ½ cup cubed onions
- ¾ tsp Cumin seeds
- 2 sprigs curry leaves (optional but recommended)
- 2 tbsp roasted gram (optional)
- 1 to 2 garlic cloves
- 2 to 3 green chilies or red chilies
- Salt as needed
- 1 tbsp oil or as needed
- Tamarind paste as needed (optional)
Instructions
1. Ensure you use cubed onions instead of chopped. The flavor and taste is best with cubed onions.
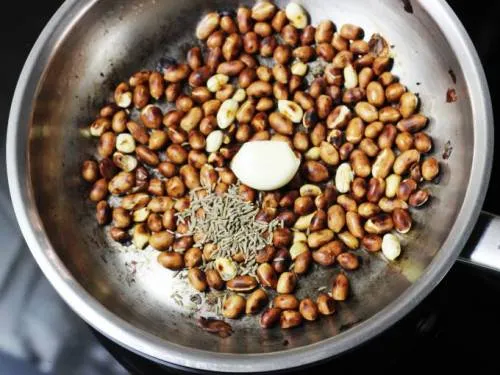
2. Heat oil in a pan. Fry the peanuts on a medium heat until golden & aromatic.
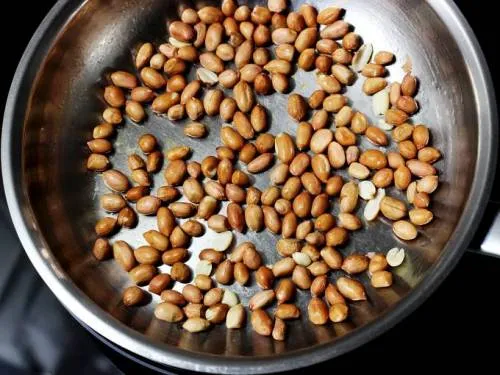
3. Add cumin and garlic to the hot pan and saute for 1 to 2 mins. Remove these and set aside. I used rinsed peanuts here so the skin got charred too quickly before they were roasted.
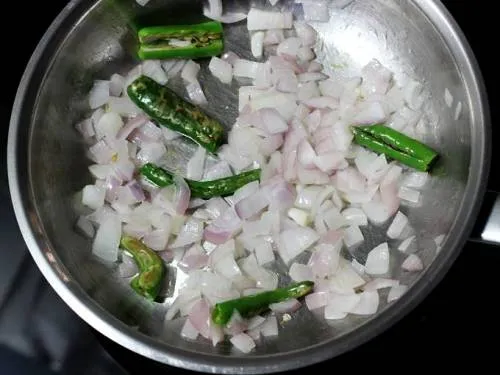
4. Add another teaspoon oil and fry the onions and slit green chilies for 3 to 4 mins. Or until the onions turn pink to golden. The raw smell of the onion should go away. You can also add curry leaves along with the onions if you want.
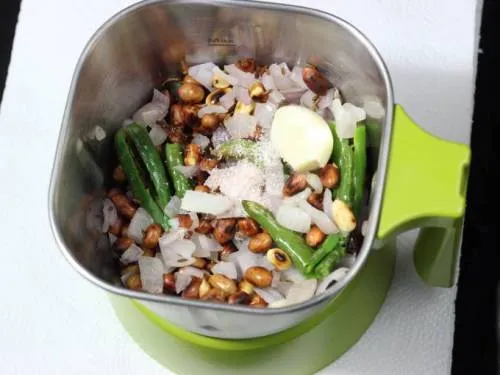
5. Cool all the ingredients. Blend them together with salt and water as needed. If using fried gram and tamarind paste you can add them to the jar now.
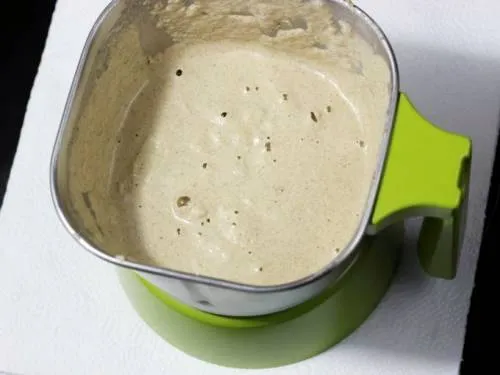
6. Make a smooth chutney adding more water as needed. Taste test and add more salt. Pour more water if needed to bring it to consistency. Remove this to a serving bowl.
7. Tempering is optional. But you can if you prefer. Heat 1 tablespoon oil and add a pinch of mustard seeds, 1 pinch of cumin seeds (optional), 1 pinch of urad dal. When the dal turns golden, add curry leaves and red chilli. Turn off when the curry leaves turn crisp. Add a pinch of hing.
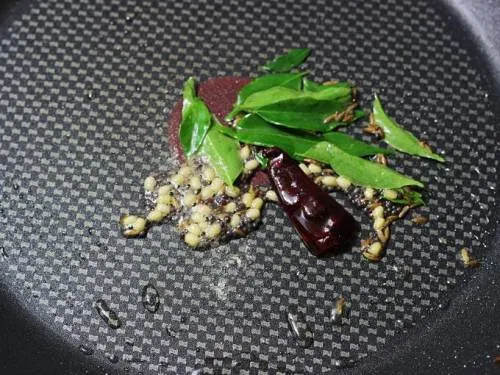
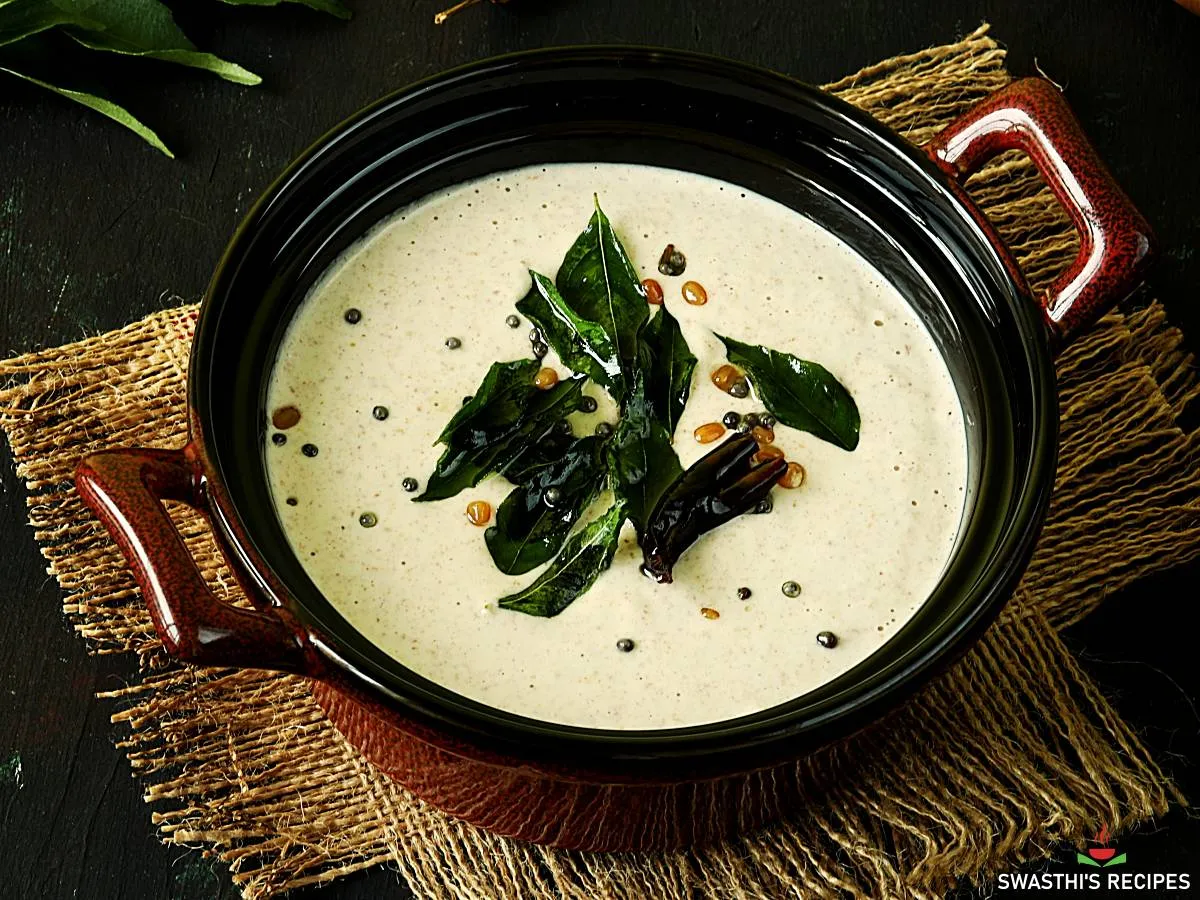
Pour the tempering to the chutney. Serve peanut chutney with dosa, idli and uthappam.
Variations
Peanut pachadi for rice
This is basically a thick ground mixture which is called as pachadi. It is mixed with hot plain rice & ghee. This is usually served in many Andhra restaurants in a Bhojanam. Here is my mom’s version.
Heat 1 teaspoon oil and fry 6 to 8 red chilies, 1 teaspoon urad dal & 1 tablespoon chana dal until lightly golden. Add 1 tablespoon coriander seeds, ½ teaspoon cumin seeds. Fry until aromatic and set aside. To the same pan add 1 teaspoon oil and 1 sprig curry leaves, ½ cup peanuts and roast until aromatic. Add ¼ cup coconut (dried or fresh).
Saute just for 1 to 2 mins. Cool and add to a grinder with salt, 1 to 2 garlic cloves, 1 teaspoon tamarind paste and 1 teaspoon jaggey (optional). Scrape the sides. Add 4 to 5 tbsps water and grind to a coarse thick chutney. If you want you can temper this peanut chutney.
Instant Groundnut chutney
Simply blend half cup store bought roasted peanuts, 1 small garlic clove, 2 green chilies, ½ teaspoon cumin, little salt and 8 mint leaves (if you like) with 1/3 cup water until smooth. You can also use some lemon juice or tamarind paste to add tang to the chutney.
Tomato peanut chutney
Roast ¼ cup peanuts until golden & aromatic. Keep them aside. Fry 1 sprig curry leaves, 1 garlic clove & 4 red chilies until crisp in 1 tablespoon oil. Add 1 ¼ cup chopped tomatoes & saute until mushy & soft. Cool & blend these with water to a thick chutney. You may temper it if you prefer.
You can also add onion and tomatoes both to make a tangy, spicy & delicious chutney. I have shared a similar one here on my tomato chutney recipe
Faqs
Yes peanut chutney is healthy if eaten in moderation. It is protein-packed, rich in fiber & healthful fats. Though peanuts are low-carb nuts, they are high in calories. So it is best to eat this in moderation for optimal health benefits.
Peanut chutney keeps good in the refrigerator for 2 days. After that the flavor & taste begins to diminish. However fresh ground chutney is much more flavorful.
No! Reheating it will alter the flavors. You may steam it for a short while.
Related Recipes
Recipe Card
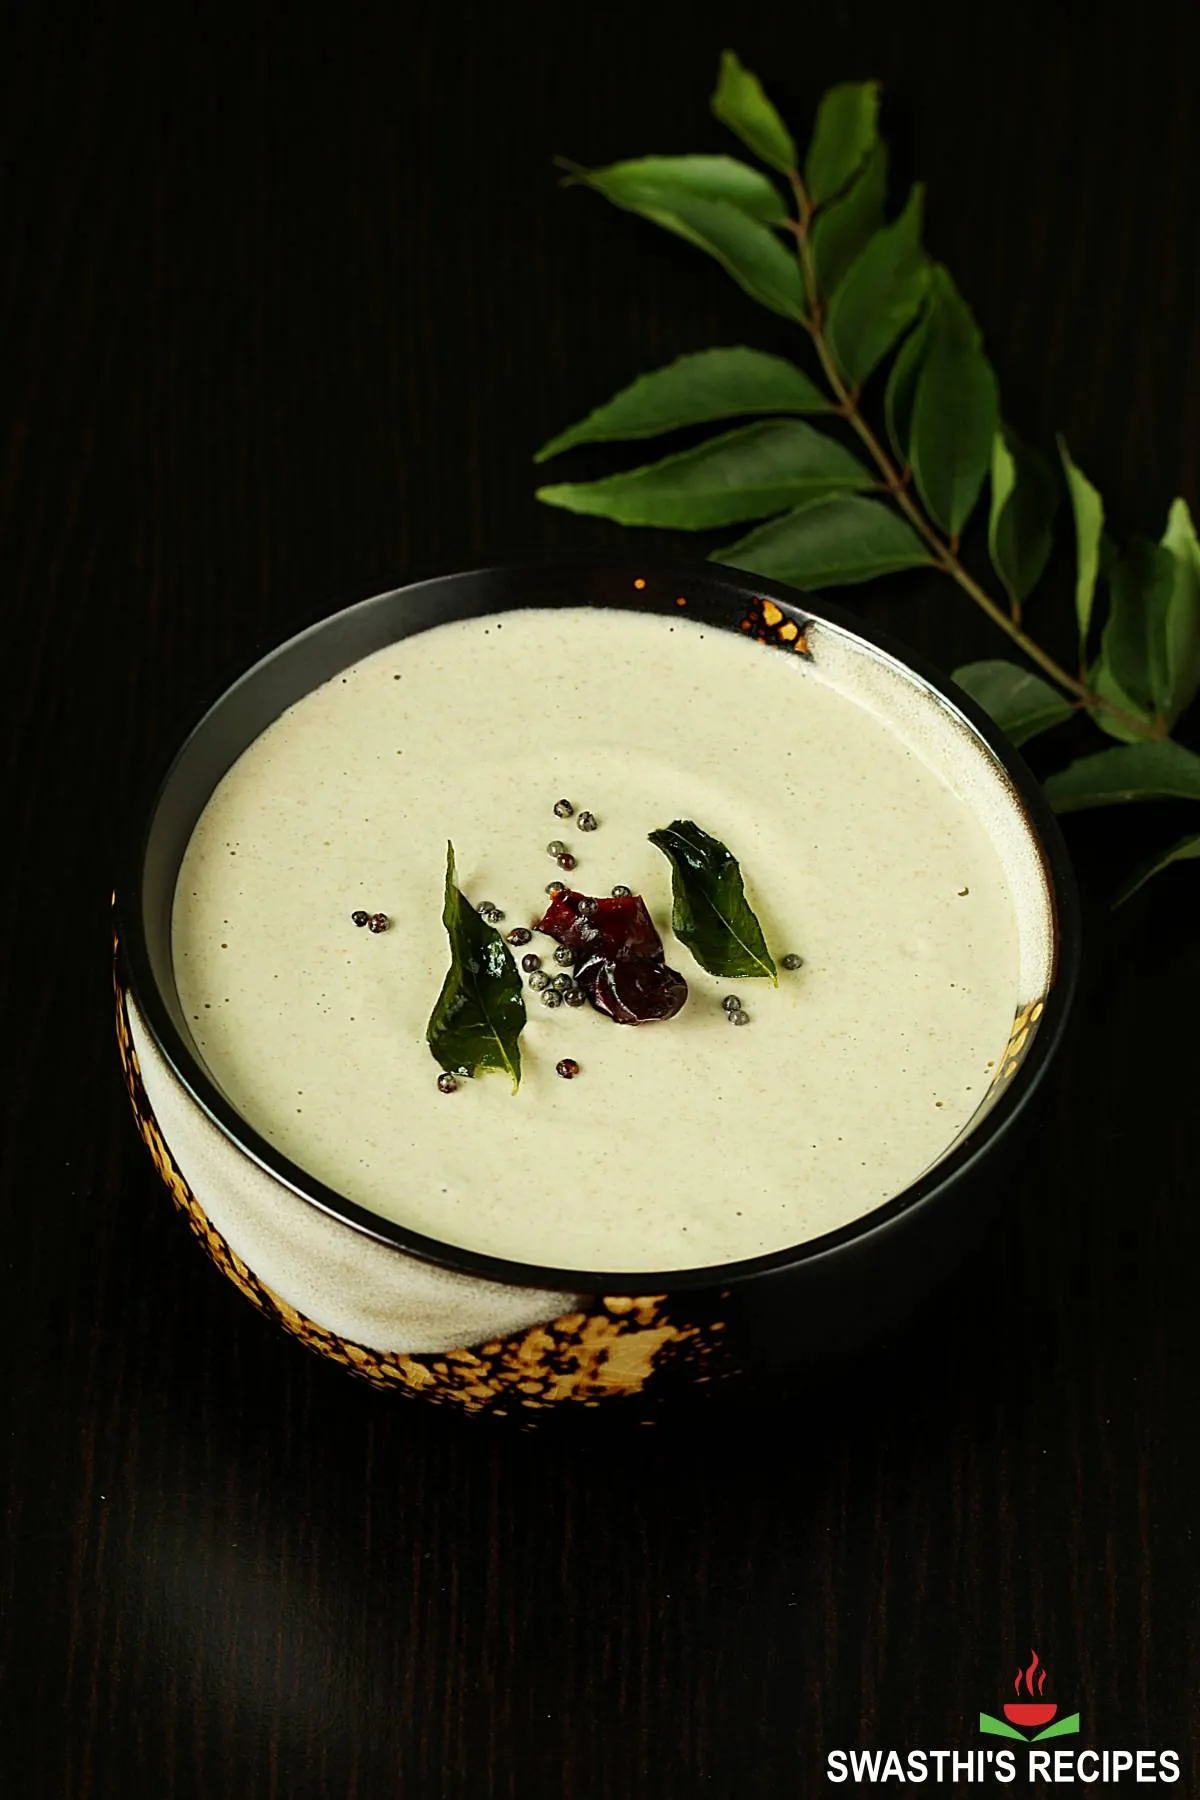
Peanut Chutney Recipe (Groundnut Chutney)
For best results follow the step-by-step photos above the recipe card
Ingredients (US cup = 240ml )
- ½ cup raw peanuts (groundnuts) (or roasted skinned peanuts)
- 1½ teaspoon oil
- 1 small garlic clove (or ¼ inch peeled ginger)
- 1 to 2 green chilies or dried red chilis (adjust as needed)
- ¼ teaspoon salt (adjust to taste)
- ½ teaspoon cumin seeds (jeera)
- ½ to ¾ cup water (adjust as needed)
Optional
- 1½ tablespoons urad dal or chana dal (optional) (skinned black lentils or bengal gram)
- ½ teaspoon tamarind or paste as desired (optional)
- 1 to 2 sprigs curry leaves (optional)
To Temper (optional)
- 1 teaspoon oil
- ¼ teaspoon mustard
- 1 red chili broken
- 1 pinch hing (asafoetida, optional)
- 1 small garlic crushed
- 1 sprig curry leaves
Instructions
How to make Peanut Chutney
- Heat 1 tsp oil in a pan. Fry green chilies, dal & garlic until the dal turns golden.
- Remove and set aside. You can also add garlic directly to the chutney jar without frying.
- Add peanuts & fry on a medium flame until golden and aromatic. Not only the skin of the peanuts, but also the nut has to turn slightly golden to bring out the aroma.
- Add cumin to the hot peanuts. You can also do dry roasting of peanuts without oil. Keep aside to cool.
- Transfer all these to a blender jar along with garlic, salt and ½ to ¾ cup water.
- If using tamarind, soak it in some water and filter the tamarind soaked water to the jar.
- Blend to smooth peanut chutney. I do not use tamarind for peanut chutney.
- Taste it and add more salt and chili if needed.
Optional – Talimpu / Tempering
- Add 1 teaspoon oil to the hot pan.
- Next add mustard, red chili, garlic and curry leaves. Fry till the leaves turn crisp.
- Lastly add hing. Turn off the heat and pour this over the groundnut chutney.
- Serve peanut chutney with idli or dosa.
Notes
- Most Telugu speaking homes dry roast the peanuts first and remove the skin. Then use them for making peanut chutney. The taste of that is much richer.
- If you prefer to use tamarind for the chutney then soak it in little water before you begin to fry the peanuts. Then it turns soft, squeeze it and use. You can also skip soaking tamarind and add it directly to the jar if it is clean.
NUTRITION INFO (estimation only)
© Swasthi’s Recipes
This post was first published in July 2015, Updated & republished in December 2020.
About Swasthi
I’m Swasthi Shreekanth, the recipe developer, food photographer & food writer behind Swasthi’s Recipes. My aim is to help you cook great Indian food with my time-tested recipes. After 2 decades of experience in practical Indian cooking I started this blog to help people cook better & more often at home. Whether you are a novice or an experienced cook I am sure Swasthi’s Recipes will assist you to enhance your cooking skills. More about me
Follow Swasthi’s Recipes

Comments
Nice recipe
Please add the portion size in recipe Card, I am on a diet and dependent on your recipe chart, I sometimes see that you give calories per 100g and sometimes for 200g, it would be absolutely great if you mention it. ?
Hi Kailash,
The portion size can change depending on the consistency. Ex: in the recipe I give a range for water but you may add more depending on many factors and the portion size can change. So instead follow the serving size mentioned in the recipe card. For this divide the total quantity by the number of servings mentioned in the recipe card. The nutrition values also match that.
Can I freeze the chutney? And use after a week
Yes You can freeze
Tried it today and it turned out very tasty. I would never use garlic in peanut chutney but today I gave it a go and now this will be my go to recipe for this chutney. Thank you Swasthi Ma’am ❤️
I tried this today. It was amazing! Thank you for posting the recipe. ?
Hi Swathi, I enjoyed your peanut chutney. It did come out well , but I have added a lot of peanuts & my chutney is remaining, can I use it again by putting it in the refrigerator
Hi Usha,
Yes. Store it in the refrigerator. To warm up, pour little warm water and mix or you can also steam it for a few minutes. But don’t overdo because the flavors change.
I made the mint one for my fiancé to go with dosas – every time I use your recipes he feels very happy because it reminds him of home.
Because I am American it took me some time to learn Indian food but your recipes are wondefully explained, even what each optional ingredient does.
It really means a lot! ❤
Hi Hannah
That’s awesome! So glad to know the recipes help.
Thank you so mcuh!
Very good recipes. Extremely useful.
Thank you!
Excellent recipes. Very useful.
Happy New Year Swasthi
I follow your blog for everything I cook. They have been of great help since the lockdown. Thank you for all the amazing recipes. Wish you the best.
Hi Rajani,
Happy new year! Thank you so much for the wishes. So glad to know the recipe have been useful.
🙂
I love it and so delicious best this peanut chutney recipe. Thank you so much! I’m tried to learn
how to cook and follow your recipes. Keep it up! 🙂 Thanks again!
Welcome Rita
Glad you liked it. Thank you
Hi swati, I try almost all your recipe and every time it comes awesome. I am an Indian residing in United States though we find Indian food here but I don’t feel them authentic flavor . My family loves home made food . Every now and then I use your recipe ..Thanks and all the best..
Hi Farheen
Glad to know the recipes turn out good. Thank you so much for your time to comment back here!
🙂
Deatest friend
Your recipes are incredible behind words please keep it up.May Almighty Allah always bless you.
Sincerely yours
Maaida Kausar
Hi Maaida
Ramadan Mubarak! Thank you so much for the wishes. Have a great time!
Came out great! Thanks!
Welcome Anila
I tried it this morning without the tempering as I was running out of time. but it turned out nice and spicy. thanks for sharing this simple yet delicious chutney recipe.
Welcome Rumin,
Glad you liked it. We usually don’t temper this chutney. It is optional. Thanks for the comment!
I love all your recipes. When I need to cook for a special occasion I immediately refer to your recipes.
Hi Alvina!
Thank you! Glad you like the recipes.
🙂
Best peanut chutney! I have been trying a lot of your recipes. Needless to say every recipe of yours is a keeper. Great work.
Thanks Pari,
Glad you liked the peanut chutney. Thanks for trying the recipes. Happy to know you like them.
🙂
Hey Swasthi, i just roasted the peanut a bit too much but otherwise the chutney turned out great :). Thanks a ton ?
Welcome Neetu,
Glad you liked it. At the last stage they get over roasted very quickly. I remove to a plate immediately to stop them from getting roasted further. Thanks for the comment.
🙂
Thanks so much. This recipe turned out fabulous. ☺️
Welcome Kritika
Hi Swasthi,
I always look forward to trying your recipes. So precise with good results. This peanut chutney was so yummy ?. Made it with your mysore bonda for a kitty party. My friends loved it them very much. Thanks a lot for sharing such awesome recipes.
Hi Revathi,
You are welcome. WOw! Mysore bonda with peanut chutney is a wonderful combo. Happy your friends loved it. Thanks for trying.
Thank you swasthi,
I tried this recipe today- it was very good. We ate it with dosas.
Welcome ARao,
Thanks for the comment. Glad to know the chutney turned out good.