Ven Pongal Recipe (Khara Pongal)
Updated: January 10, 2023, By Swasthi
Ven Pongal recipe with stovetop & Instant pot instructions. Pongal is a popular South Indian food made with rice & moong dal, either to a sweet or savory dish. Ven Pongal also known as Khara Pongal is the name given to the savory version, which is tempered with ghee, curry leaves, black pepper, ginger, cumin & hing. This super flavorful and delicious dish is offered to the GODS – deities as naivedyam not only in South Indian homes but also in temples during regular pooja, auspicious days & festivals.
Both versions of pongal are offered to Goddess Durga & Lakshmi during Navratri, Varalakshmi puja and even on regular days. Many households also have a custom of offering this during Friday and Saturday Pooja.
About Ven Pongal
Ven Pongal is a traditional South Indian dish made with rice, split yellow mung dal, ghee, cumin, ginger, pepper and curry leaves. The word “Venn” means “White” in Tamil and “Pongal” means “to bubble & overflow” which signifies abundance. It also refers to this rice lentil dish.
Ven Pongal is one of the foods made during the 4 day long Pongal/ Sankranti festival. You can also find the sweet version of this here – Sweet pongali recipe.
Apart from being a popular festive dish, the savory version is a comfort food for many South Indians as it is light on the stomach and easy to prepare. It can be served for a meal anytime of the day – breakfast, lunch or dinner.
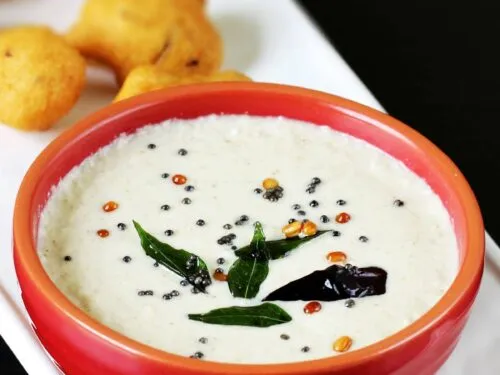
It is ideal to serve this for breakfast with coconut chutney as making chutney is faster. If having it for lunch or dinner, it can be served with sambar or Pongal gotsu. A lot of times I do not make any sides and we eat this with some papads & pickle on the side.
My Recipe
This Pongal recipe will give you a super aromatic, delicious and protein packed dish under 30 minutes. I have given the instructions to make this in a pressure cooker, instant pot & even in a regular pot.
A lot of times I make both versions of Pongal at the same time as my kids want the sweet version and my husband the savory version. If you want to know how to make both the dishes easily at one time do check the faqs section below.
Traditionally pongal recipe is made with newly harvested short grain rice & moong dal as they give the best gooey texture to the dish. Aged rice & dal is not so go good to achieve that texture. Cow’s ghee is used to temper the dish as it is more favoured for religious offerings & the aroma is great.
However you can easily make this with any kind of short grain rice & skinned yellow moong dal that’s available to you. But good quality ghee is the star ingredient to make a good Pongal as it really elevates the flavour of the dish.
For our regular meal, we make Pongal with every other grain like millet, rolled oats, steel cut oats, quinoa, rava and even with brown rice. It turns out as good with any other grain. But if offering during Pooja we restrict to rice & millets.
The recipe I have shared here is the way we make it at home. Every household has a different recipe to make Pongal. The proportion of rice:dal varies and is a personal choice. We make this with equal proportion of rice and dal which gives a real rich & creamy taste.
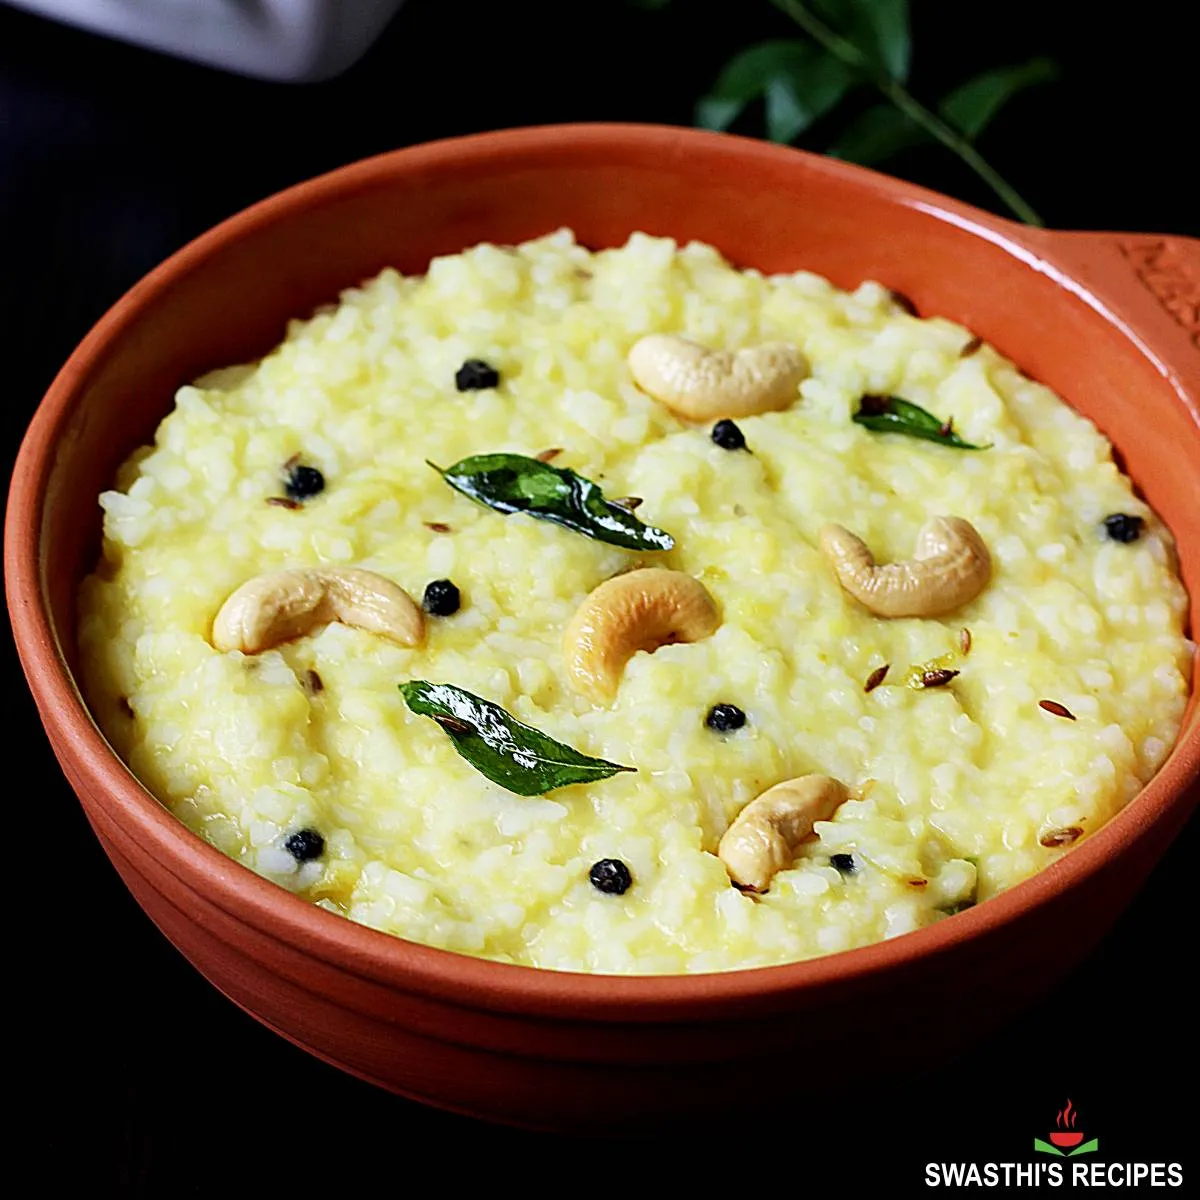
More About Khara Pongal
If you are new to South Indian cuisine and wondering what & how this tastes. Ven pongal is basically a South Indian version of the traditional Ayurvedic moong dal khichdi.
The final tempering with spices and curry leaves is what makes Pongal so special and distinct from khichdi.
If you are a beginner or making this recipe for the first time, take a look at the tips and notes for best results.
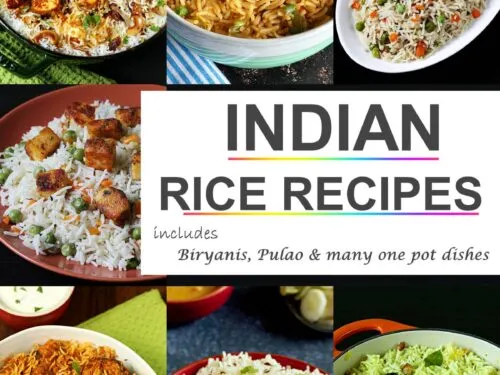
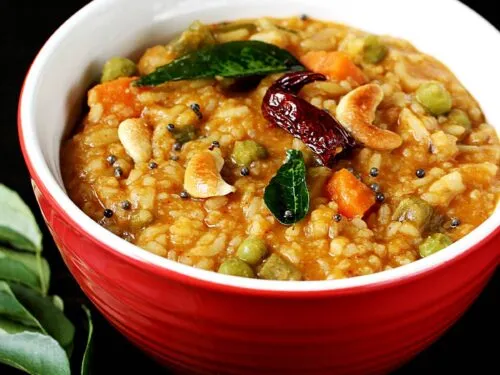
You may like these Rice recipes
Bisi bele bath
Sambar rice
Puliyogare
Lemon rice
Photo Guide
I usually use my stainless steel pressure cooker or instant pot to cook most of my foods directly in it. However you can also make the Pongal in a bowl by placing it in the pressure cooker. If you do not own a cooker then just cook it in a regular pot.
There are 2 ways you can prepare the rice and lentils for making Pongal. You either dry roast the lentils first and then rinse before cooking or rinse them first and then fry in ghee until golden.
In the past I would roast the lentils first and then rinse them. But lately I started to rinse them first to get rid of the pesky pesticide residues that may be on the surface of the lentils. Next I roast them. You may do it any way you like.
How to Make Ven Pongal (Stepwise Photos)
Preparation
1. Add ½ rice to a bowl and rinse well a few times until the water runs clear. Drain and set aside. Add ½ cup lentils to another small bowl and rinse well a few times. Drain the water completely. If you have time you may leave the lentils in the colander to air dry for a while. This is optional.
2. Pour 1 teaspoon ghee to a cooker or pot and heat it on a medium flame.
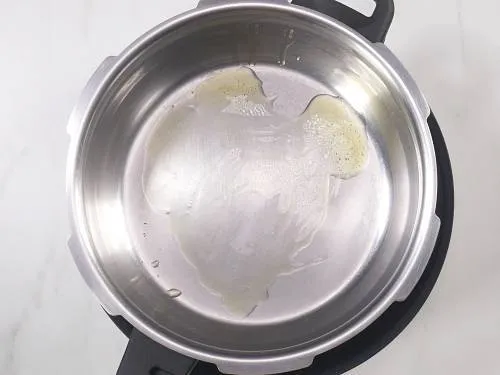
3. Add the moong dal and fry stirring often until aromatic and light golden.
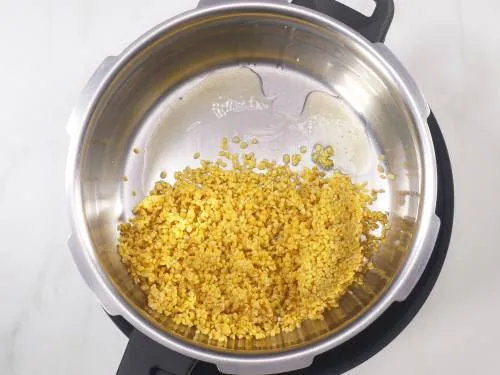
4. This takes around 5 to 7 mins on a medium to low flame. Keep stirring often to prevent the dal from burning. Do not brown the dal as it alters the flavors.
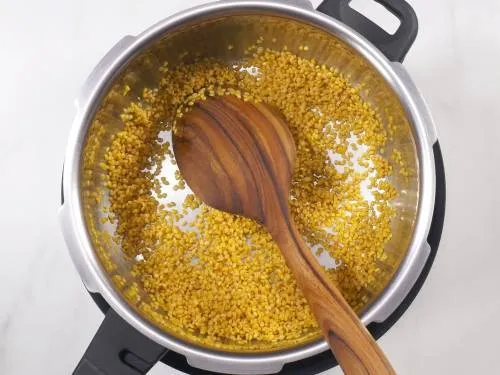
5. When the moong dal begins to smell aromatic, add ½ cup rinsed rice to the same pot. If you are on a health spree, you may substitute half of the rice with brown rice. But will need to soak for at least 30 to 45 minutes to get a smooth Pongal.
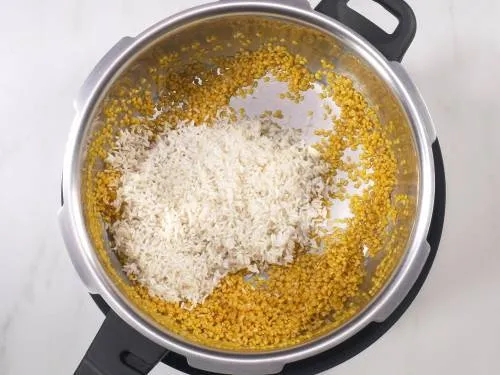
6. Pour 3¼ to 3 ½ cups water & add ½ teaspoon salt.
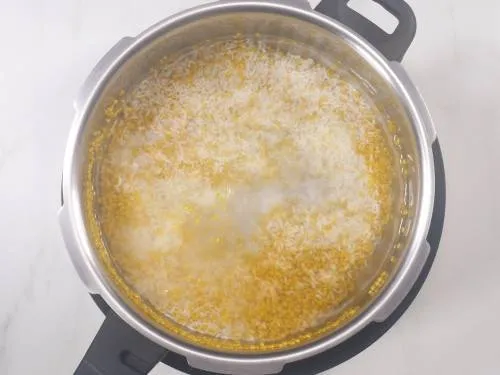
7. If cooking in a pressure cooker directly, cook on a low to medium flame for 3 whistles. Or For a pot in pot method you can place the bowl in the cooker and pressure cook for 4 to 5 whistles. You can also cook in a pot until soft adding more hot water as needed.
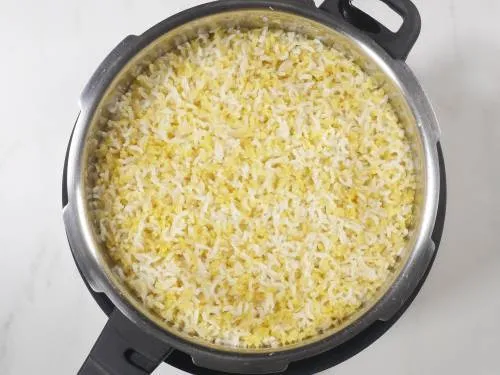
8. When the pressure releases naturally open the lid and stir well. Rice and dal should be cooked well to soft & mushy. The whole thing should be mushy and soggy. Optional: If you think the consistency is thick for your liking, then you may add little boiling water and boil the Pongal for another 2 to 3 mins. Taste test and add more salt if needed.
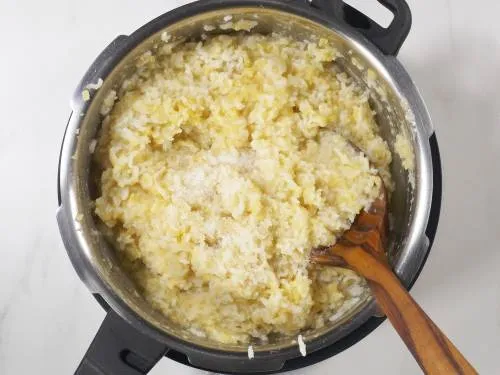
Temper Ven Pongal
Pongal gets its authentic and traditional flavors by using a generous amount of ghee. I would suggest adding 3 to 4 tbsps for the tempering if you can. If you can’t eat so much ghee, instead cut down your portion size. Split open 10 cashew nuts and break them.
9. Heat a small pan with 2 to 4 tablespoons ghee. When the ghee turns hot, add the cashews and fry them till light golden. Remove them to a plate & set this aside. We will use them for garnishing. I prefer to keep half in the pan and remove half for garnish.
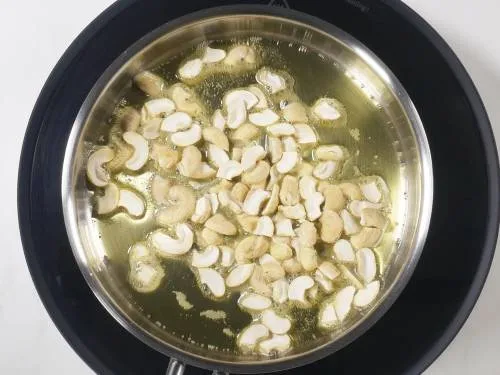
10. To the same pan, add ¾ teaspoon cumin seeds and ½ teaspoon crushed pepper corn. Let the cumin & black pepper sizzle. Some times whole pepper burst in ghee or oil so I crush them gently and use.
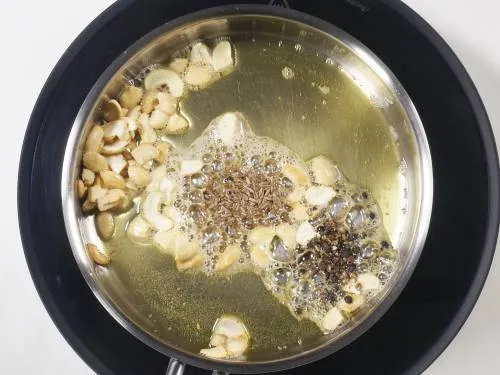
11. Turn down the heat to low. Add 1 inch ginger (fine chopped or grated) & 1 slit green chili (optional). Traditionally no green chilli is added. If not making for naivedyam, you can use a slit green chili to add heat. We also add a pinch of turmeric as we don’t offer savory foods without turmeric.
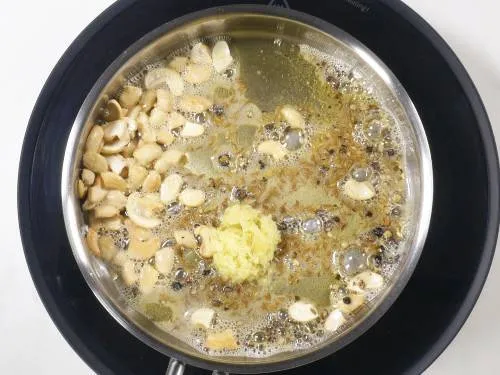
12. Fry the ginger for 30 seconds and add curry leaves. When the leaves turn crisp & you begin to get a good aroma of the tempering, then add 1/8 teaspoon hing. Turn off the stove.
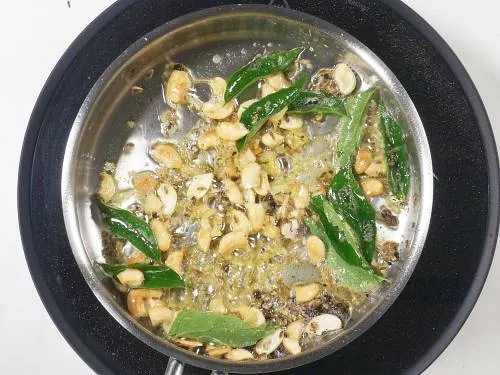
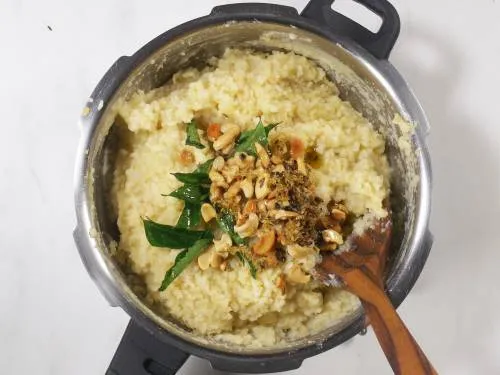
13. Pour this to the cooked rice and dal. I keep some of the crisp fried curry leaves aside for garnishing. Give a good mix and optionally simmer for a minute or two so the flavors are well infused. Cover immediately so the flavors are well infused.
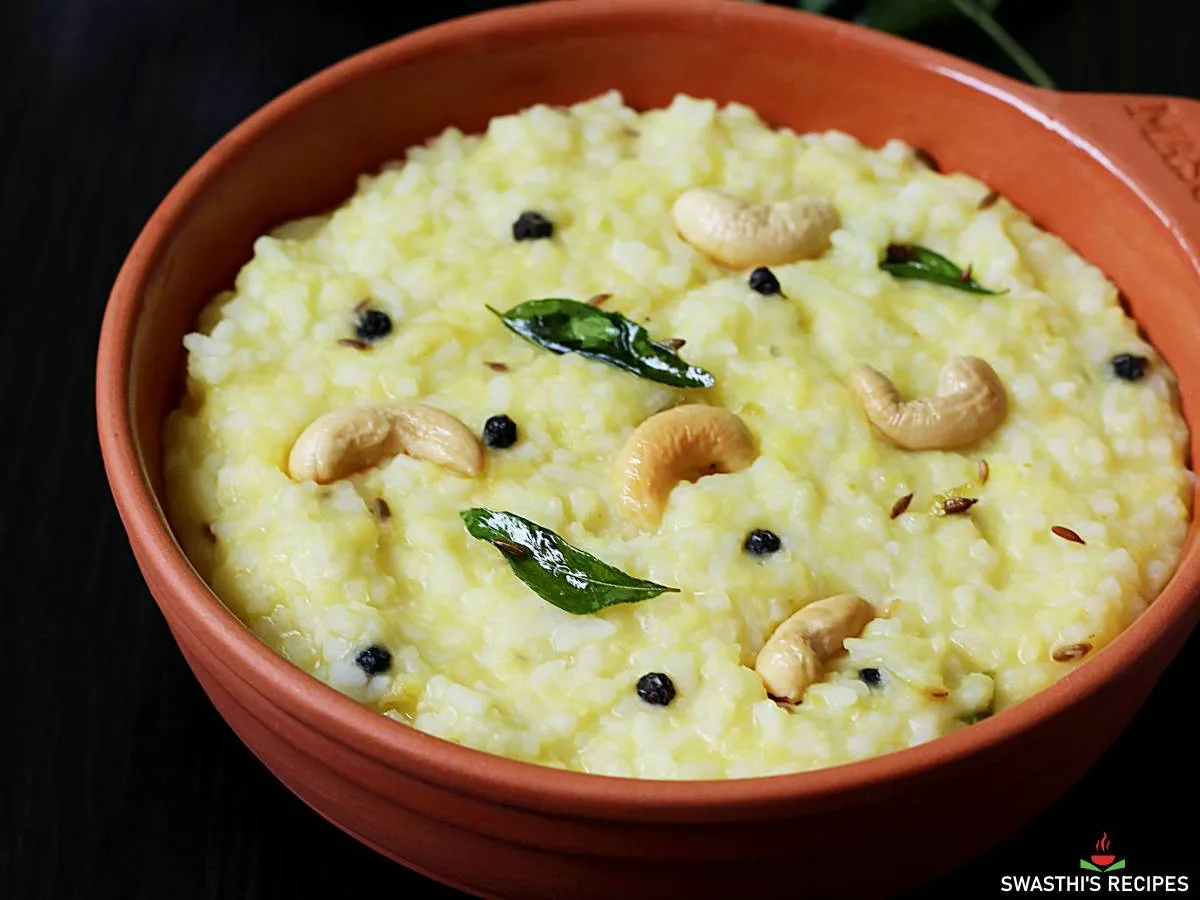
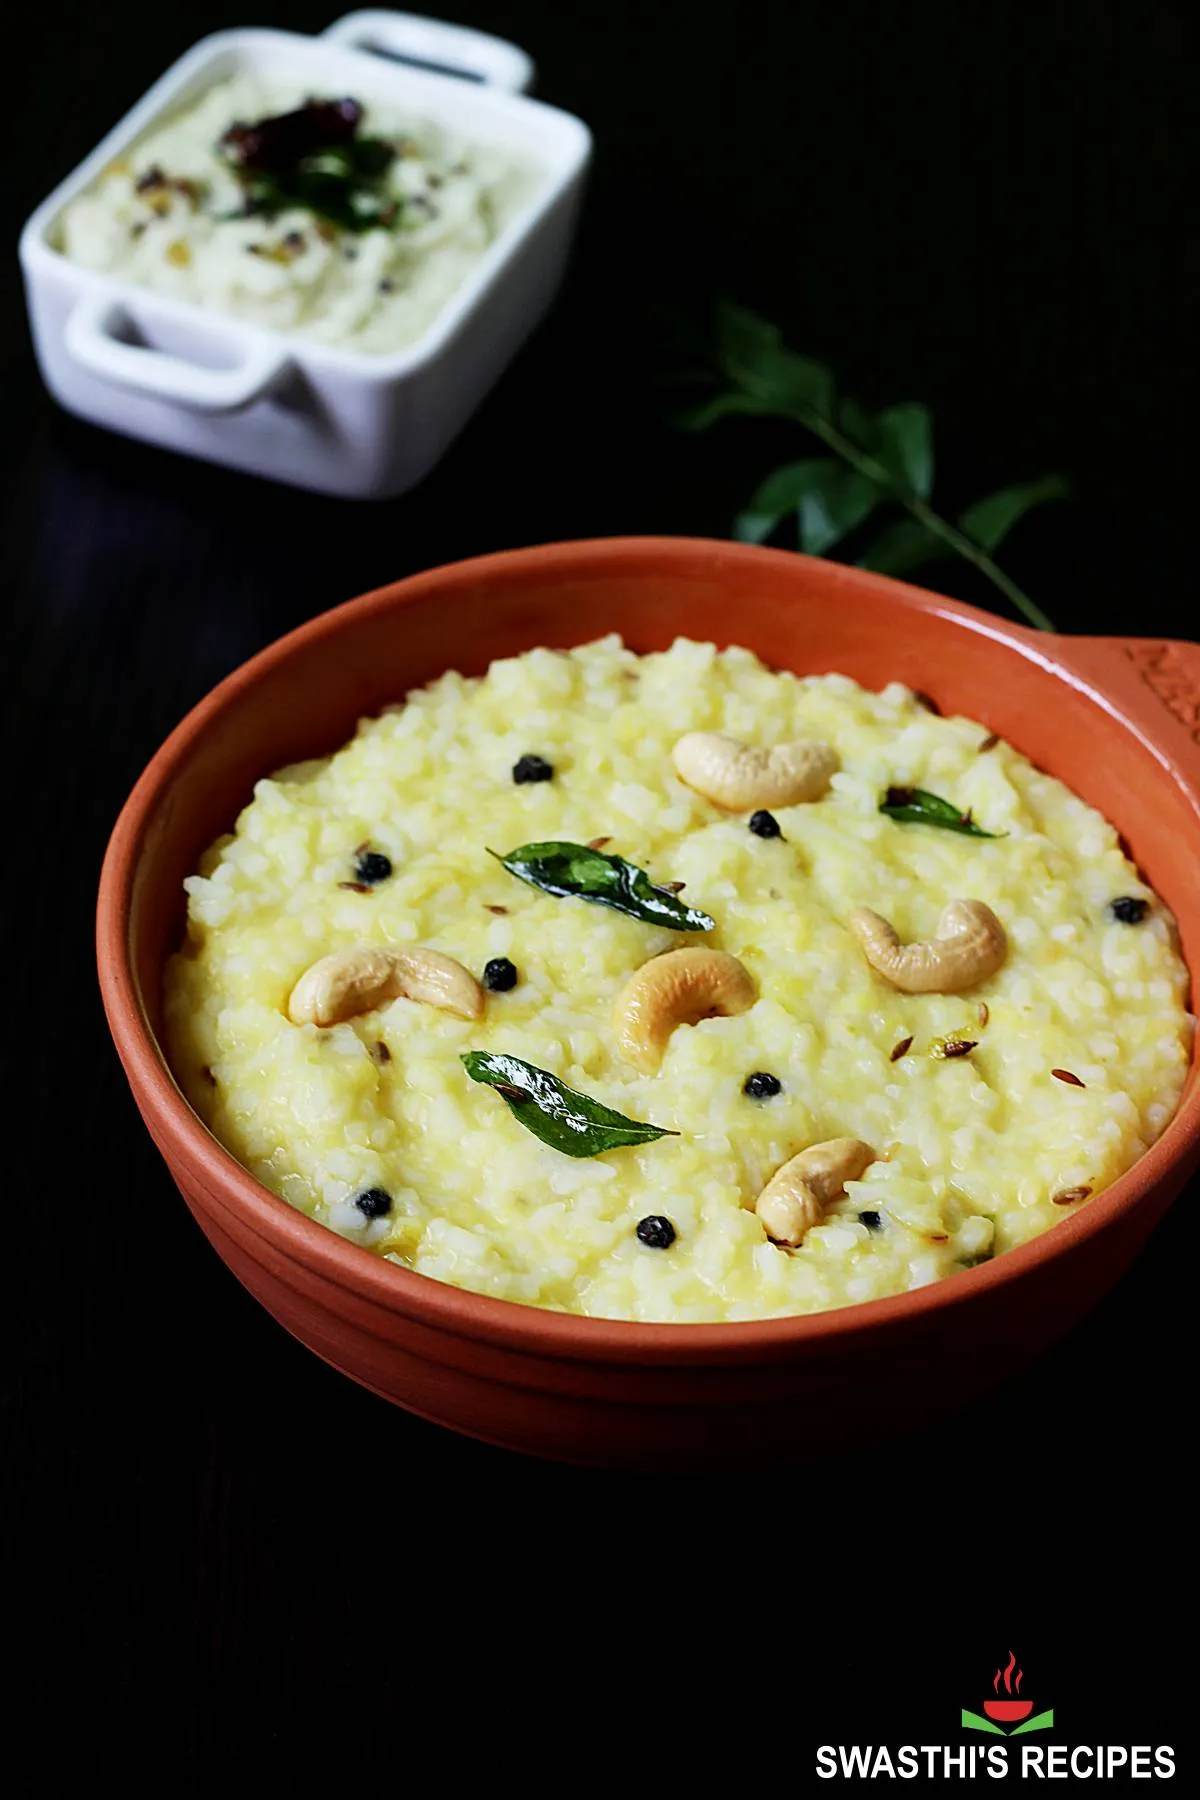
Serve khara pongal with coconut chutney or pickle. Ven pongal is best served with coconut chutney, pickle, tiffin sambar or gotsu. Please note it is best served hot as it becomes too thick & sometimes lumpy after cooling down.
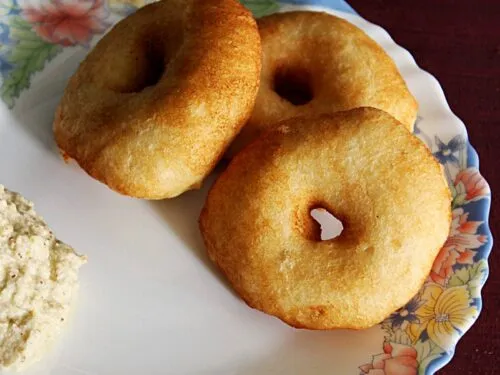
More Naivedyam recipes,
Puliyogare
Curd Rice
Rava kesari
Medu vada
Pro Tips
Amount of Ghee
Ghee not only enhances the flavour but also helps in digesting the lentils well. So do not reduce the amount of ghee mentioned in the pongal recipe as it brings a whole lot of aroma to the dish. It also make the dish less sticky.
Ratio of rice: dal
The ratio of rice & dal is a personal choice. My mom always made pongal with equal amount of rice and dal so that we get enough protein in our diet. However you may reduce the quantity of dal or increase the quantity of rice if you prefer. But adjust water accordingly.
Roasting Moong Dal
We usually dry roast the moong dal good enough for a month, cool it and then store in a dry jar. This saves some time whenever you plan to make the dish. You can also rinse the lentils, air dry for a while to they are not too wet. Then roast them until crunchy. Please note that rinsed lentils takes more time to fry.
Kind of Rice
Khara pongal is usually made with short grain rice varieties that is locally grown in South India. So most people use whatever they use for their regular cooking, if possible from the current year’s harvest.
But avoid using basmati rice for this pongal recipe. I have made it on several occasions when we were running out of the short rice. It won’t taste the same.
Texture of Ven Pongal
Traditionally it is made to a gooey texture however some people prefer it mushy but not semi-solid. To get that texture you can reduce the water. I have shown that way in the video.
Choosing Ingredients
The key ingredients to make a good pongal are good quality ghee, curry leaves, pepper, ginger and hing. There are no substitutes to these ingredients and do not skip any of these.
- Ensure ghee is flavorful and fresh. Homemade ghee is best.
- Use fresh curry leaves, frozen leaves or wilted leaves won’t really work well to infuse the flavors.
- Crush black pepper slightly and use. Sometimes whole pepper corn burst while tempering especially when they are fully submerged in ghee.
- Peel and rinse ginger well before grating or chopping otherwise it can taste bitter.
- Hing is known as asafoetida. It is used for aroma & also believed to aid digestion. To make the dish gluten-free, use hing that has no added gluten to it. But do not skip it.
- Cumin seeds cannot be substituted with ground cumin. The whole seeds release flavor when tempered.
- Green chilies are never used in a ven Pongal. But I use it if not making it for offering. If you have any side dish to go with it then you may skip green chilli.
Faqs
Yes ven pongal is healthy as it is made with equal amounts of rice and lentils. It is protein-packed and uses a moderate amount of ghee which is a healthy fat. To make this further healthy, use brown rice or millets.
No. Pongal & khichdi are not same. Though both use rice and dal, they don’t taste the same as the method of cooking them is different.
They taste different and even the process of making them is different. To make khichdi, the tempering is done first and then rice & dal are cooked with it. To make Pongal, rice & dal are cooked first then lastly tempering is added.
Ghee Pongal is just another name for ven Pongal or khara Pongal. Since the dish is tempered with ghee it gets the name ghee Pongal.
How to make both Sweet & Ven Pongal Together?
Double the ingredients for rice, dal & water (1 cup rice, 1 cup dal, 6 cups water). Cook together in one pot/ cooker following the same cooking instructions but without adding salt.
Make jaggery syrup with ¾ cup jaggery & ¼ cup water. Add half of the cooked Pongal to it.
Fry cashews and raisins in a small tadka pan. Pour it to the sweet version.
Then make the tempering for the ven Pongal in the same tadka pan and pour it to the other half. Also add salt first and then pour the tempering.
How to Make Ven Pongal in Instant Pot?
I have shared one pot method in the recipe card below. It is basically cooking everything together. First we make the tadka and then cook the rice lentils together in it.
The other method is to simply roast the rice in a pan. Then cook rice and dal with salt following the pot-in-pot method for 10 minutes. Make a tempering in a small tadka pan and pour it to the cooked Pongal.
With both the methods I have felt ven Pongal turns best if little hot boiling water is added towards the end before the tempering.
Related Recipes
Recipe Card
Ven Pongal Recipe (Khara Pongal)
For best results follow the step-by-step photos above the recipe card
Ingredients (US cup = 240ml )
- ½ cup rice (any short rice or millets, oats, quinoa)
- ½ cup moong dal (skinned split mung beans)
- 3¼ to 3½ cups water (more if needed)
- ½ teaspoon salt (adjust to taste)
To Temper
- 2 to 3 tablespoons ghee (½ tbsp more for serving)
- 10 cashew nuts (or as needed, optional)
- ¾ teaspoon cumin seeds (jeera)
- ½ teaspoon black pepper corn (crushed lightly)
- 1 inch ginger (peeled, grated or sliced or chopped)
- 1 sprig curry leaves
- ⅛ teaspoon asafoetida (hing)
- 1 green chili slit (optional, skip if offering to god)
Instructions
Preparation
- Add ½ cup dal to a pot or pressure cooker. (If you prefer to rinse the lentils before roasting, follow my step by step photo instructions in the post).
- Dry roast on a low to medium flame till it begin to smell nice & aromatic. Do not brown or discolor the moong dal. This step is optional however pongal gets a real aroma from the roasted dal.
- Add ½ cup rice to the roasted dal. Wash them at least three times. Drain the water completely. Pour 3¼ to 3½ cups water. Add ½ teaspoon salt. Cook the rice & dal to a soft texture.
- For pressure cooking: If cooking directly in the pressure cooker, then cook for 2 to 3 whistles on a medium flame. If cooking in a bowl, then place it in the cooker and pressure cook for 4 whistles. When the pressure releases naturally, open the lid.
- To cook in pot: You can also cook the rice & dal in a pot until soft & mushy. Add more water if needed as it cooks.
- Open the cooker when the pressure drops. If you prefer, you can mash up the cooked rice & dal a bit to get creamy consistency. It should be mushy and soggy.
- If it is too dry, add some boiling water to bring it to a consistency you like. Boil It for a few minutes. It should not be very runny or dry. Add more salt if needed and stir.
How to make Ven Pongal
- Heat a small pan with 2 tablespoons ghee. Split open 10 cashew nuts & fry them till golden. Remove these to a plate for garnish.
- To the same pan, add ¾ teaspoon cumin seeds & ½ teaspoon crushed pepper. When the seeds splutter, lower the heat, add slit green chili (optional) & ginger. Saute for 30 seconds.
- Add curry leaves. Saute well until the tempering turns aromatic & curry leaves turn crisp. Then add hing. We also add a pinch of turmeric & it is optional.
- Pour this to the cooked pongal. Mix and simmer for 1 to 2 minutes so the flavors are absorbed. Serve ven pongal hot with coconut chutney or sambar.
Instant Pot Pongal
- Rinse rice and dal a couple of times and drain the water. Press SAUTE button and pour ghee to the steel insert.
- Fry the cashews until golden and remove them to a plate. Then add cumin seeds and crushed pepper.
- When they splutter, add ginger, curry leaves, green chili (optional) and hing. Saute for 30 seconds.
- Then add turmeric, moong dal and rice. Saute for 2 to 3 mins until the moong dal begins to smell good.
- Pour 3 cups water and add half teaspoon salt. Deglaze the pot by scrubbing the bottom with a spatula.
- Press CANCEL button and secure the instant pot with the lid. Position the steam release valve to sealing.
- Next press PRESSURE COOK button and set the timer for 9 mins. When the IP is done, it beeps. Let the pressure release naturally.
- Stir and taste test. Add more salt if needed. If the consistency is too thick, pour some hot water & give a good mix. Garnish ven pongal with more hot ghee and fried cashews. If you want you may temper it once more but I have not felt the need.
Notes
- Ghee: Ensure ghee is flavorful and fresh, preferably homemade. Do not reduce the amount of ghee mentioned in the recipe as it brings a whole lot of aroma to the pongal. If you are on a low fat diet, just reduce the serving size.
- Rice & dal proportions: We always make Pongal with equal amount of rice and dal so we get enough protein. You can increase rice or reduce dal in the recipe if you prefer. Adjust water as per the changes.
- Roasting lentils: To save some time, you can roast moong dal ahead. Cool and store it for a month in an air tight jar.
- Choosing rice: Use any kind of short grain rice and avoid basmati as overcooked gooey basmati rice won’t taste good. The flavors also won’t be the same.
- Curry leaves: Use fresh curry leaves, frozen leaves or wilted curry leaves won’t impart the same flavors.
- Black pepper: Crush black pepper slightly before adding to the tempering. Sometimes whole pepper corn burst in the tempering pan especially when there is a lot of ghee.
- Avoid bitter taste: Peel ginger well before rinsing and grating as otherwise it can taste bitter.
- Hing / asafoetida is used for aroma & also aids digestion. To make the dish gluten-free, use hing with no added gluten. But do not skip it.
- Do not substitute cumin seeds with ground cumin. The whole seeds release a different flavor.
- Green chilies are never used in a Pongal. But I use it if not making it for offering. If you have any side dish to go with it then you may skip green chilli.
- Adjust the consistency: Ven pongal becomes thick upon cooling, so if it is too thick after cooking pour some boiling hot water and simmer for a few minutes. Turn off when it is gooey.
- Whole grains: You can substitute rice with brown rice, millets, steel cut oats or quinoa. You will have to soak them for at least 15 mins and then use in the recipe to reduce the cook time. Also use more water for brown rice. For health benefits soak the brown rice, millets or steel cut oats for 6 to 8 hours.
Video
NUTRITION INFO (estimation only)
© Swasthi’s Recipes
This pongal recipe post was first published in September 2014. Updated & republished in January 2023.
About Swasthi
I’m Swasthi Shreekanth, the recipe developer, food photographer & food writer behind Swasthi’s Recipes. My aim is to help you cook great Indian food with my time-tested recipes. After 2 decades of experience in practical Indian cooking I started this blog to help people cook better & more often at home. Whether you are a novice or an experienced cook I am sure Swasthi’s Recipes will assist you to enhance your cooking skills. More about me
Follow Swasthi’s Recipes

Comments
Swasthi, your instructions and tips are just right. My family and i love your recipes. I made both venn and sweet pongal today.My son who is a chef in Canada loved it totally.Thank you so much.
I tried this recipe and came out very well. I am planning to cook for a pooja at my home. 9 adults and 2 children. Can you help me with the ingredients quantity?
Thank you Gayathri. Yes please scroll down to find the recipe card. Change the number of servings to 12 from 3, You will get the recipe for 12 servings. You will need about 2 cups each rice and dal. Hope this helps.
Love this ven pongal and I make it all the time for a healthy meal. I’m planning to make this for a temple event to serve 50. On the side we are going to have coconut chutney, masala vadai, a healthy drink and fruit. For this recipe how do I adjust the amount of ghee. I usually top up the dish with an extra tsp of ghee while serving, as indicated in the recipe. My questions are how do I adjust this extra amount and when do I add that? Can I just pour it over the dish? Do I just scale the recipe for 50? Any help is highly appreciated
Thanks Kayla. Very happy to know you love this. I feel 30 serving as per this recipe will serve 50 at an event. I assume this is not a full-meal and is a kind of refreshment to the guests. In this case it serves many. I would just go with the recipe as written and add more at the finishing stage if required. More than the quantity it is the quality of ghee & hing that adds authentic and traditional notes to the dish. So try to use high quality desi cow ghee for tempering the spices like cumin, black pepper, ginger etc. Hope you have a great time at the event!
Super ven pongal recipe. Came out so good
Thanks Jyothi
Amazingly and clearly explained..have made this several times and i make sure to follow all your steps accurately.
Amazing
👌
Thank you for posting this recipe. Made as per exact measurements and it came out perfect. Your recipes never fail
excellent!
When I was a child, my parents took us to a lof of South Indian temples. I was never religious and I don’t remember anything about the temples, or the trips except for the Pongal. Cooked this today and and it came out so good. felt like I was back in time with my parents. Thank you for that!
Pongalo Pongal, Ven Pongal..
Pongalo Pongal, Happy Pongal to you all Raman
Thank you soooo much Swasthi for this amazing recipe. I really like the way you do photo tutorial with each and every step of the recipe. Also the cultural context about the dishes. I will share this recipe with friends who are also interested in learning to prepare Indian dishes.
Thank you
Love the recipe and your full step by step details of recipe with all options for cooking
Thank you so much Sufia.
I tried this recipe and came out very well. Can I add copra gratings to it? I first try your recipes which are tasty and easy to follow.
Glad it came out well. Yes you can add the copra gratings. Thank you Shalini
Thank you for the amazing recipes. Love this ven pongal. So comforting and delicious with lemon pickle.
Glad you like it Mrudula. Thank you
Hello Swasthi,
Thank you for the recipe, did you use high or low pressure in instant pot?
Hello Dhyanitha,
High pressure. You can also use porridge mode 9 to 10 mins.
God bless and thank you for sharing, i have always wanted to try out ven Pongal, i am going to try it out
Thank you so much for the wishes. Hope you enjoy the pongal.
Absolutely loved making this one. So delicious. Thank you for the recipe!
Glad to know Padma. Thank you
I made this ven pongal for a small potluck celebrating Pongal Festival in our community center. It came out delicious. Thank you.
So glad to know Neena. Thank you so much for sharing back.
The way u mentioned to reduce the meal but not the ghee in the recipe is so hilarious…….no compromise on proportion…. recipe is yumm….thank u so much …..
Haha Husnul! Actually these were the words my Mom would always say to me while making pongal. Thank you!
🙂