Poori Recipe, How to make Puri
Updated: September 13, 2023, By Swasthi
Puffed Poori will soon be everyone’s favorite at your home! Poori or Puri is a popular Indian breakfast immensely popular all over India. This detailed step by step picture guide and video post will help you make perfectly puffed Puri each time. Dough discs fried to perfection until a little crisp on the outside but soft on the inside is what you will make with this recipe! For a savory meal serve these puri with Puri bhaji or poori masala, Chana curry, Coconut chutney or Veg kurma. If you love sweet meals, these are best eaten with Suji halwa, Basundi or Shrikhand.
Most Indian households make these for the weekend & festive meals. Similar to Naan, tandoori roti & Bhatura these are very much popular in the Indian restaurants and are served for breakfast & even for a meal.
So what is poori or puri?
About Poori – Puri
Poori also spelled as Puri is an Indian fried bread made with just 3 ingredients – wheat flour, salt and water. Small portions of unleavened dough is rolled to small discs and deep fried in hot oil. A perfectly made puri puffs as soon as it hits the hot oil.
Traditional Puri recipe uses wheat flour. However you will find them in the restaurant and tiffin centres being made with a mix of wheat flour, all-purpose flour and semolina. Each ingredient makes a difference to the taste and texture of your puri.
While the whole wheat flour poori tastes nutty, those made with a mix of wheat and all-purpose flour taste less nutty as APF imparts a milky flavor. There is also a Bengali version known as Luchi, made exclusively with all-purpose flour.
My Mom always made poori with wheat flour and semolina (suji, rava) to make them crisper. Semolina helps the puffed Poori to hold its puffed shape longer. Adding semolina is more common in our parts of Karnataka. In fact we never make Poori without it. You may skip if you do not prefer.
If you are a beginner I highly recommend reading the full post, especially Tips and Troubleshooting sections below.
More breakfast recipes
Crispy Dosa
Soft Idli
Rava Upma
Poha
Photo Guide
How To Make Poori (Stepwise Photos)
Make the Dough
1. Add 1 cup whole wheat flour, ¾ teaspoon fine rava (semolina or suji) and 1/8 teaspoon salt to a mixing bowl. You can also skip rava and salt. If using milled flour (atta from flour mill) then do sieve and discard the bran.
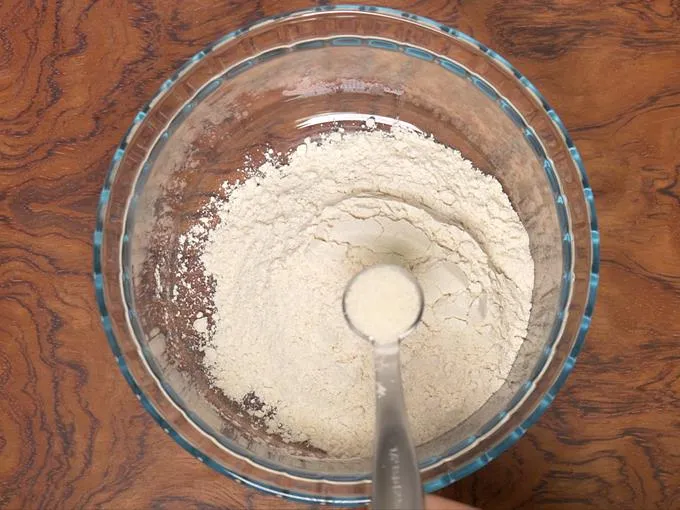
2. Pour ¾ teaspoon oil. Mix all of them well & pour ¼ cup water (4 tablespoons).
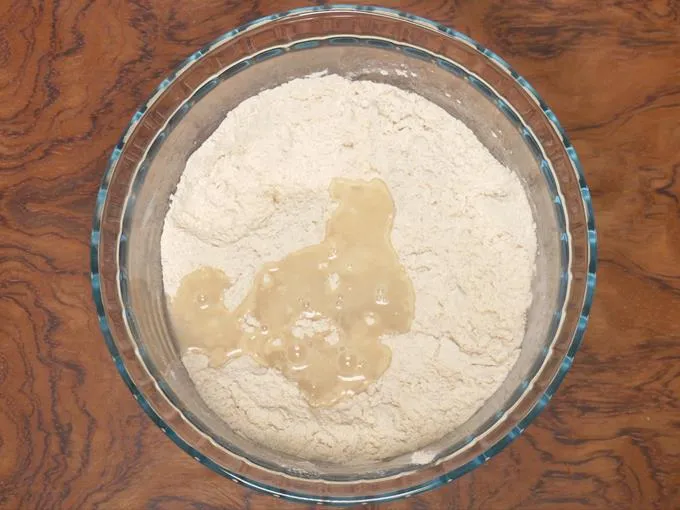
3. Begin to mix to form a stiff dough. You will need another 1 to 2 tablespoons water. Sprinkle more water only as needed.
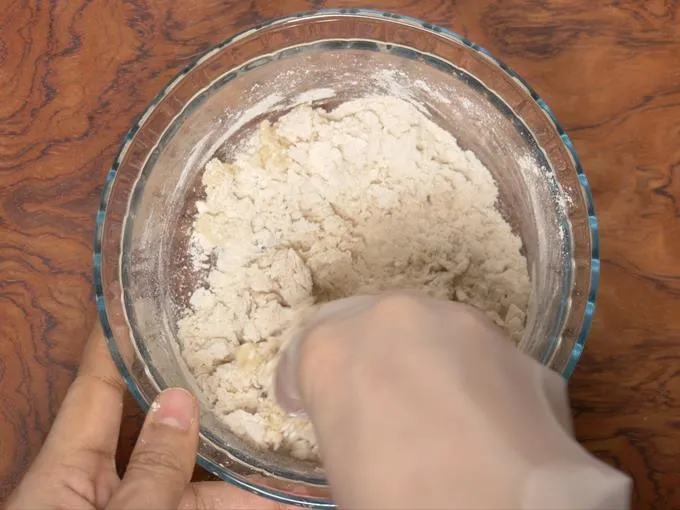
4. Make a stiff & tight dough that is not crumbly or dry. It should be smooth but not too soft like the roti dough.
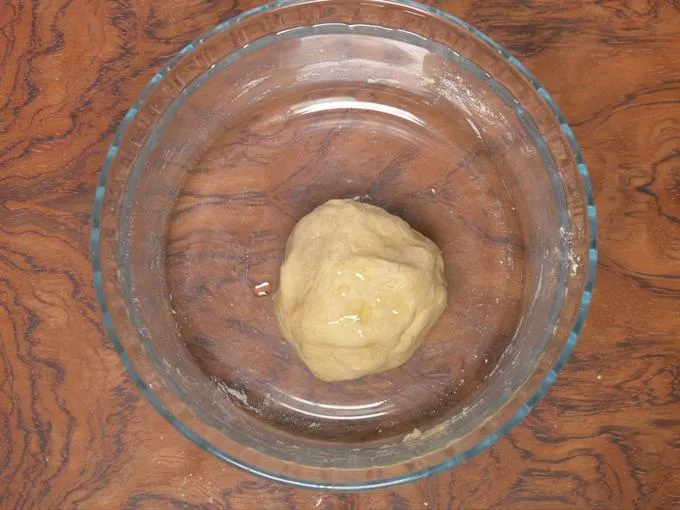
5. Drizzle another ¼ teaspoon oil and knead lightly to just smoothen the ball. Do not knead it for longer like it is done for roti or chapati. Dough must still be stiff and tight. When you press it with your fingers, you will still feel it is tight and stiff, not too soft.
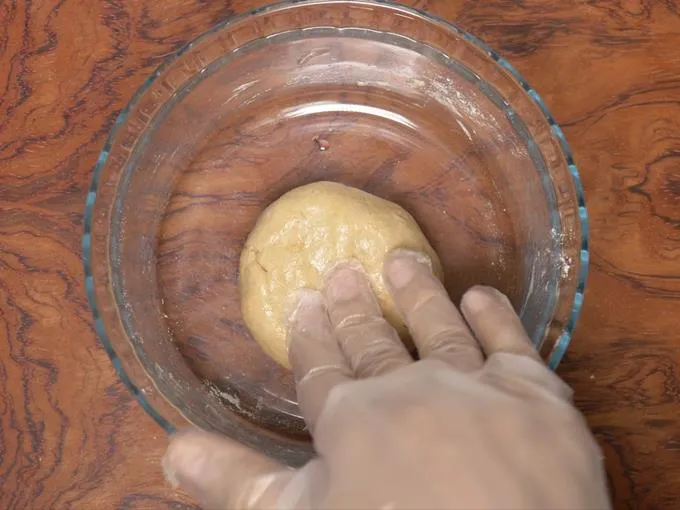
6. Keep this dough covered always until all of it is used up to roll pooris. I usually do not rest the dough for more than 3 to 5 minutes.

7. Divide it to 8 to 10 parts.
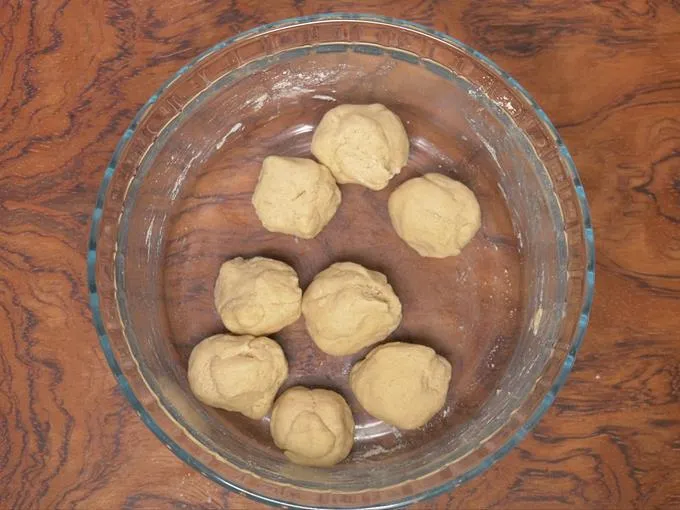
Roll Puri
8. Gently roll them in between your palms just to make them smooth. Do not knead them.
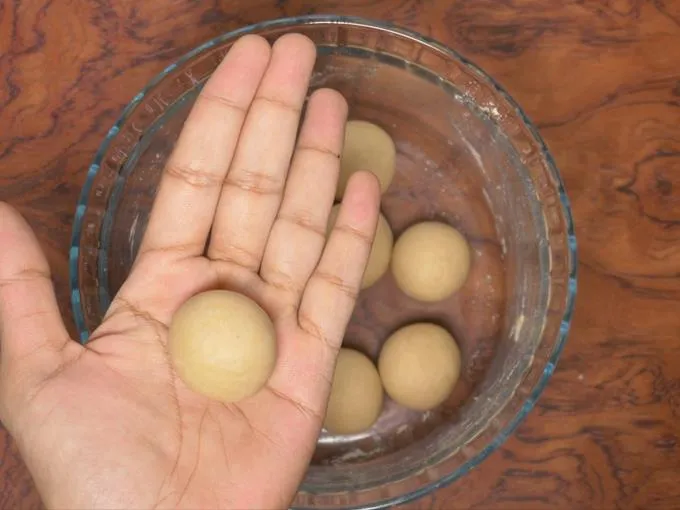
9. Sprinkle flour over the rolling area or smear some oil. Using oil for rolling keeps the deep frying oil clear till the end. It is good especially if your are making lot of puris. If using flour, make sure you use as little as possible and dust it off from each of the puri before frying.
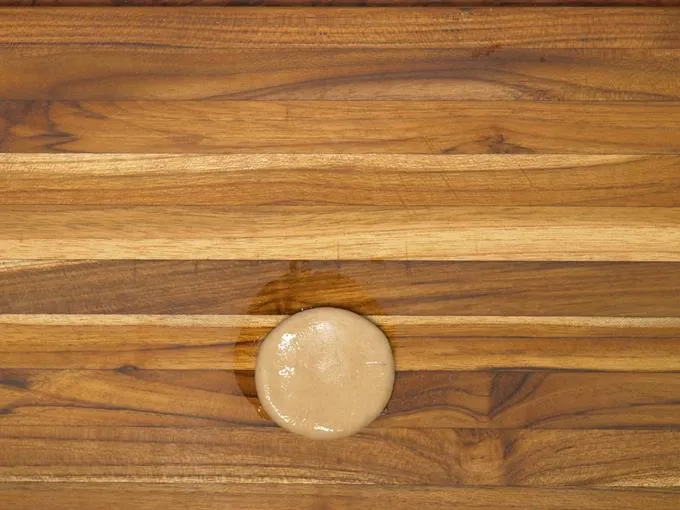
10. Flatten the ball and smear little oil. Begin to roll the poori evenly from the center.
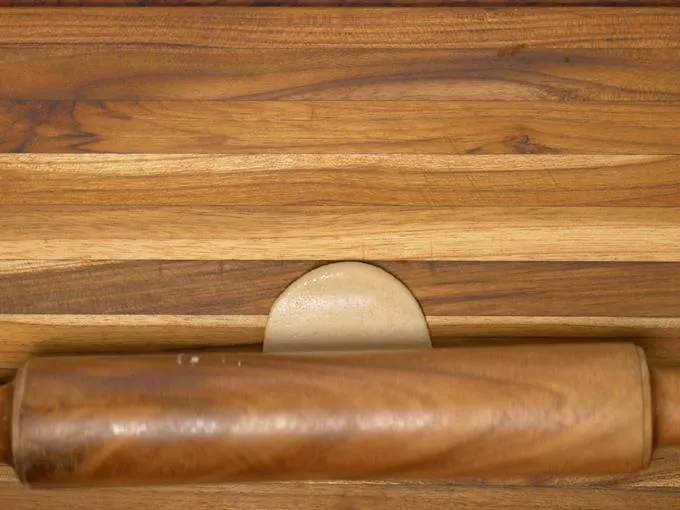
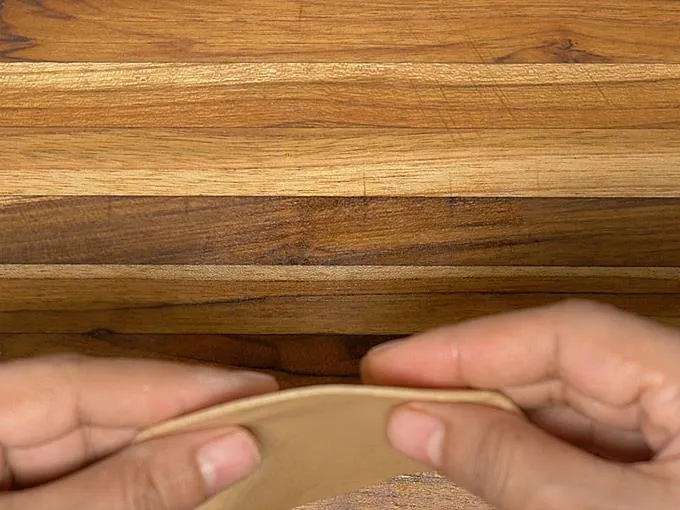
11. Do not roll them too thin or too thick.
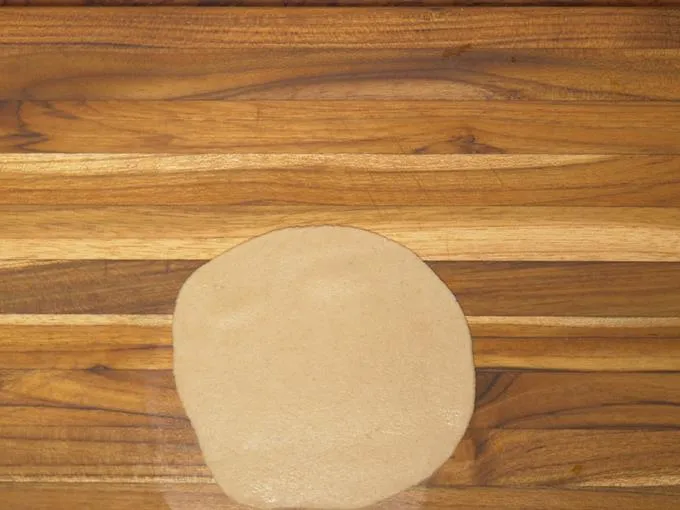
12. They need to be moderately thick else they will not puff.
13. Next after making 5 to 6, heat the oil on a medium high flame. Do not leave the rolled puris without frying for long. While it heats up, continue to roll up the rest as well.
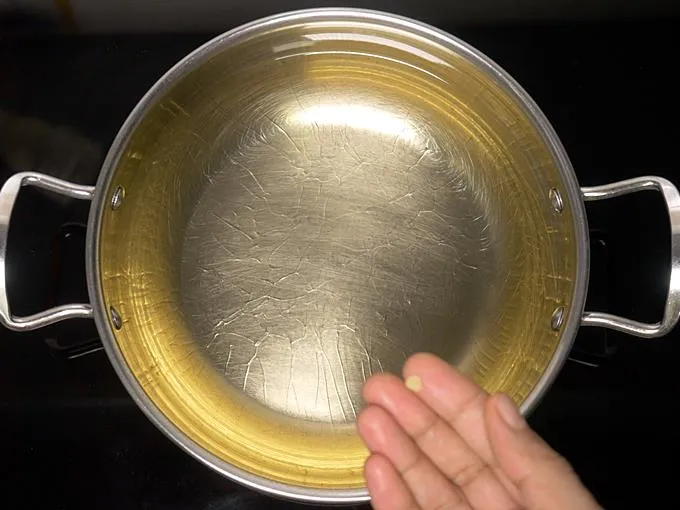
14. Check if the oil is hot by dropping a small portion of dough. If the oil is hot enough for frying, it will sizzle and rise to the surface immediately. But it should not brown quickly.
Fry Poori in oil
15. Gently slide the puri from the side to the hot oil. If you have used flour, do dust off the excess flour before frying. As soon as it is added to the pan, it sinks completely.
16. Do not disturb until the poori comes up at least half way to the surface.
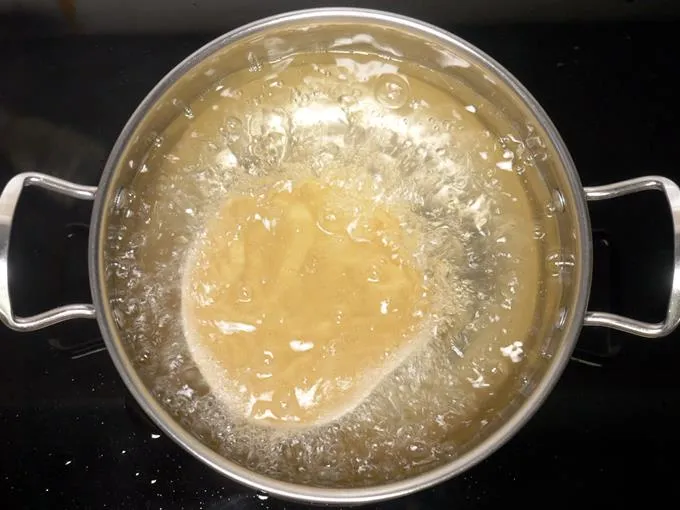
17. Then quickly but gently keep pressing the poori down to the oil. If you press too hard, holes can form on the poori and will not puff.
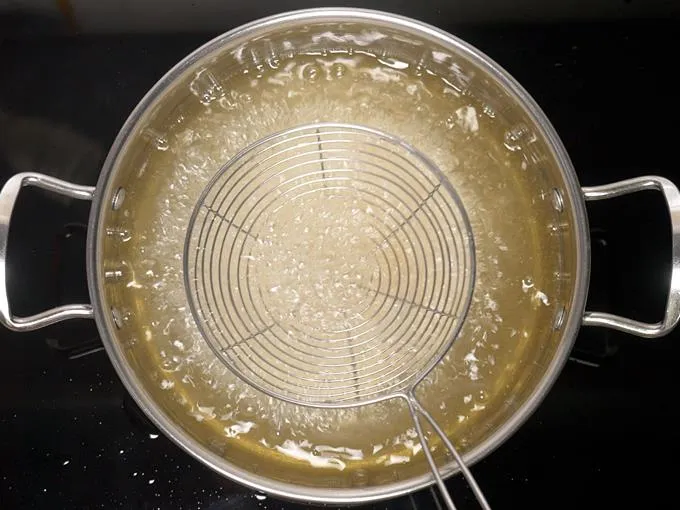
18. Poori puffs completely.
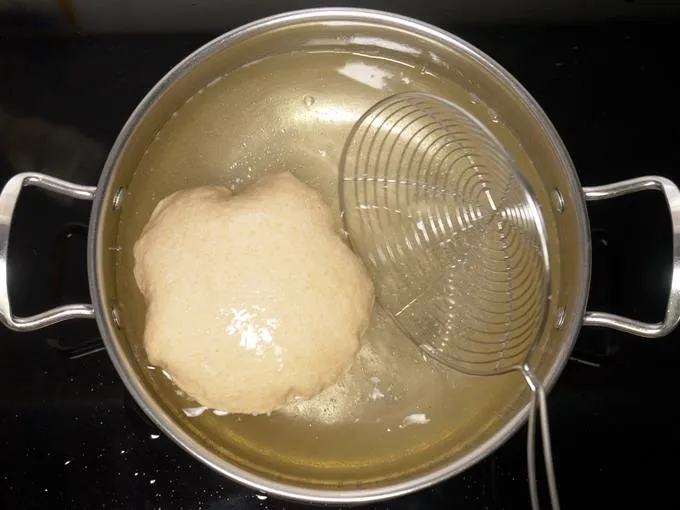
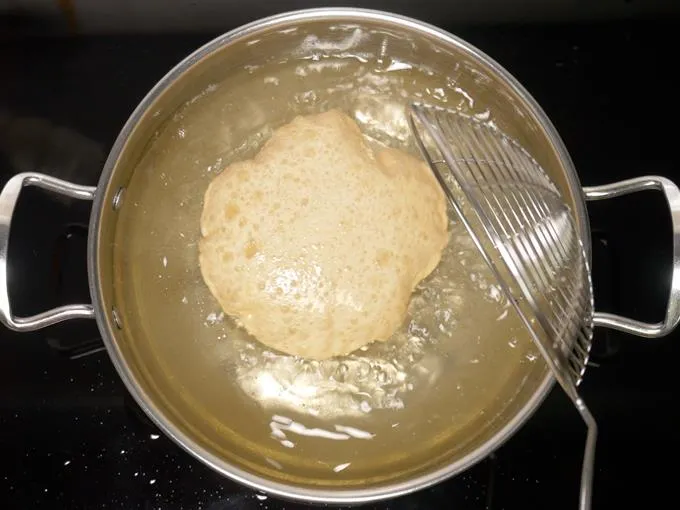
19. Next turn the poori and fry until crisp and golden. Remove to a steel colander or a cooling rack. To fry the rest of them as well, make sure the oil is hot enough but not smoking hot.
Serving Suggestions
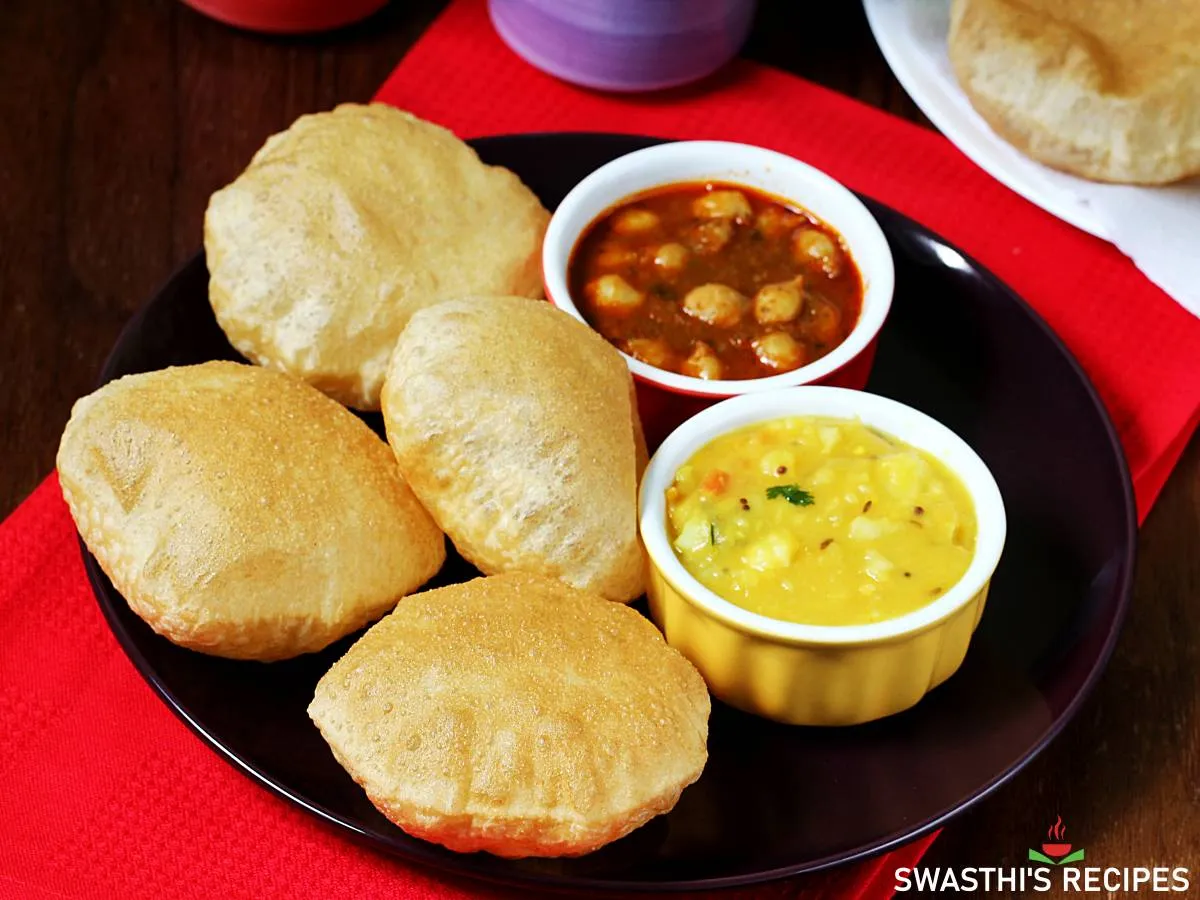
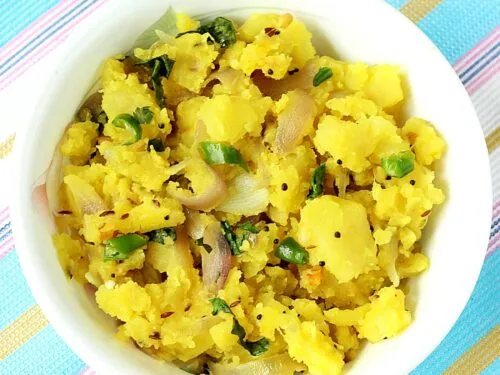
Puri masala is a side dish made with potatoes, onions, spices and tomatoes. You can make a dry or a semi dry bhaji.
Potato masala is the same dish that is used for stuffing masala dosas. It is similar to the puri masala but there is no tomato used here.
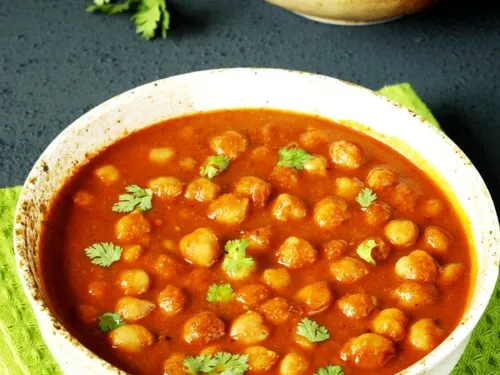
Chana masala made with chickpeas, onions, tomatoes and spices makes for a great side.
Mix veg kurma is most commonly made in South Indian homes when poori is served for Lunch or dinner. Mix vegetables are cooked in a coconut cashew curry.
Coconut chutney: In South Indian tiffin centers and restaurants, poori is served with coconut chutney along with a coconut chana curry or veg kurma or potato masala.
Halwa, Bombay chutney, Basundi, Shrikand & Mango shrikand are more sides commonly eaten with poori.
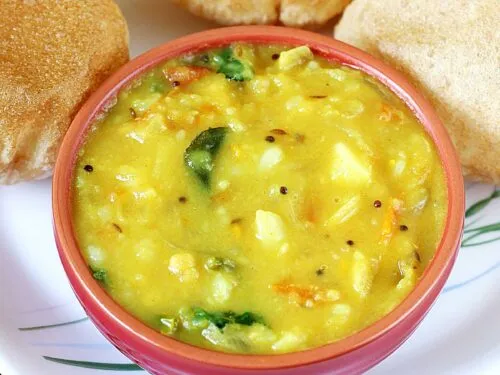
So it totally depends on what you like. On busy mornings we eat them with this easy potato peas Sagu.
Pro Tips
Making dough: The most important step to make good pooris is to make the dough correctly. It must not be sticky or loose but must be a tight dough. This helps in puffing them well without soaking up oil. To know the correct texture of dough, check my video.
Amount of water to use for making the dough depends on the kind of flour. So adjust the amount of water as needed while forming the dough.
Kneading: Do not knead the dough to the extent it becomes soft like roti dough. The key here is to just knead it for a short time until the dough becomes smooth and uniform but not soft. If you press down the dough you should feel it is tight and not soft. This is the stage at which you need to stop kneading.
Resting dough: Try as much not to rest the dough as soaked dough will absorb more oil. If making in large quantities then, make the dough in batches. It is not that you can’t make pooris with rested dough but they won’t be the best.
Rolling: The dough has to be rolled to a disc that is neither too thin nor too thick. So rolling them to the correct thickness also matters for a puri to puff well. Too thick puris won’t puff and too thin will come out hard like papad. But how do you know what is the correct thickness. Check out my video & experiment.
Frying : For the pooris to puff well, oil has to be hot enough. If you fry them in oil that is not hot enough then they will soak up oil and won’t puff. So do the heat test by simply dropping a small flat piece of dough to the hot oil. It has to rise immediately without turning brown. This is the right temperature. Regulate the stove as needed to maintain the heat consistently.
Troubleshooting
Dry & crumbly dough: Too dry or crumbly dough will yield you hard puris. So if the dough is dry, feel free to sprinkle little water as needed while forming the dough.
Sticky dough: Be cautious while you add water. But if it becomes sticky, then you can always add some flour to bring it to the right texture – non-sticky tight dough.
Poori not puffing: Roll them evenly to a not too thick or too thin discs. Oil is not hot enough. Heat up the oil a bit more.
Variations
- To make palak puri, puree one cup of palak with few tbsps water and use that to make dough.
- To make methi puri, add some fresh chopped methi leaves to the dough. Incorporate the leaves first then add water as needed.
- Make masala poori, add 1/8 tsp cumin or jeera powder, ½ tsp red chilli powder, ¼ tsp garam masala, ½ tsp fine crushed kasuri methi and some salt to the 1 cup flour.
Faqs
Pooris are best made with freshly made dough. If the dough rests longer then they will absorb more oil.
For a perfectly puffed poori, roll the dough evenly to a disc that is not too thin or too thick. If they are too thin they will turn crisp like papads and won’t puff. If they are too thick then also they won’t puff. To know the exact thickness, check my video or step-by-step photos where I show the thickness. If the dough is not rolled evenly then also they won’t puff. They have to be evenly rolled.
More moisture in the dough will collapse the puffed poori within a few minutes. For the pooris to remain puffed always add fine semolina. It not only makes them crisp but also holds the puff for longer.
Too much moisture in the dough, meaning sticky or too soft dough can make them oily. Make a stiff and non-sticky dough. Don’t knead the dough a lot. We don’t knead the dough like roti dough. The other reasons can be – Frying them in oil that is not hot enough. Avoid using wheat flour to which extra bran has been added.
Lack of moisture in the dough, meaning dry and crumbly dough can yield hard puris. The other reasons are frying them at low temperature for long time & frying them in oil that is not hot enough. Also rolling them too thin can make it hard.
Each region and household has their own way of serving them. Poori masala, puri bhaji, chana masala, veg kurma, coconut chutney and sagu are some of the sides to serve with puri.
Since it is a fried food, enjoy these in moderation. Eating them daily is not a good idea. So limit them to weekends and occasions.
Can puri be made in air fryer?
Yes. I have tried making puris in air fryer several times but the texture and taste won’t be the same as fried puris.
When fried the discs puff and some amount of steam is trapped inside. This steam gives the soft texture from inside. But when air fried, the moisture in the rolled poori dough tend to evaporate due to the hot air that’s generated. Making them hard and they won’t puff.
So steaming them first before air frying helps in incorporating some moisture while they cook partially.
So I steam the rolled puris in a greased thatte idli stand for 3 mins. After 3 mins remove them immediately from the steamer and cool completely. Place them in the air fryer and air fry for 3 to 4 mins at 200 C – 400 F.
The most important thing is to experiment the temperature and time as it depends on the air fryer. But they will puff well when done at a stretch without pausing.
The second thing is the dough has to be soft and kneaded well like the roti dough. So you can just use the regular roti dough to make poori in air fryer. Making these is easier for 2 servings but it becomes tedious and takes a lot of time to make many puris.
Related Recipes
Recipe Card

Poori Recipe, How to Make Puri
For best results follow the step-by-step photos above the recipe card
Ingredients (US cup = 240ml )
- 1 cup wheat flour (atta)
- ¾ teaspoon semolina (fine rava or chiroti rava) (optional)
- ¾ teaspoon oil (or ghee)
- ¼ cup water (plus 1 to 2 tbsp) (adjust as needed)
- ⅛ teaspoon salt (adjust to taste)
- oil (for deep frying)
Instructions
Make Poori dough
- Mix together flour, salt, rava and oil in a large mixing bowl.
- Pour ¼ cup water. Begin to make a little stiff & tight dough, adding more water as needed. (check video)
- Smear ½ tsp oil, knead lightly and smoothen the ball.
- Do not knead it a lot otherwise poori will turn soft and absorb oil while frying.
- Keep the dough covered all the time until the last poori is rolled. Do not rest the dough for more than 3 to 5 minutes. The longer it rests quicker the puffed puri will collapse. They will turn oily after frying.
- Divide the dough to 8 to 10 portions. Avoid kneading them.
- Smoothen all the balls by rolling them lightly in between your palms. Keep them covered in the bowl.
How To Make Puri
- Drizzle a few drops of oil on the rolling area and spread it.
- Smear oil over the dough ball & flatten it.
- Begin to roll it evenly from the center to a round puri.
- It should not be too thick or thin. It must be moderately thick which helps the puri to puff.
- Make 5 to 6 puris and set them aside. Do not stack them.
- Begin to heat the oil on a medium high flame and continue to make rest of the pooris.
Fry Poori
- The oil has to be hot enough. Check by dropping a small portion of dough to the pan. It has to rise immediately without browning.
- If it browns quickly then reduce the flame slightly and allow the temperature to come down.
- Slide the puri carefully to the hot oil. Do not disturb until it rises half way to the surface.
- Quickly but gently begin to press down with a perforated ladle. This helps the poori to puff well.
- Once puri puffs, flip it carefully. Fry on the other side as well until golden and crisp.
- You can fry flipping too and fro once more until slightly crisp & to get the desired color – light golden to dark golden.
- Remove the puri to a steel colander. Fry the next poori the same way.
- Make sure the oil is hot enough, but not smoking before frying the next puri. Serve poori with potato curry, chutney or kurma.
Notes
- Using too much of semolina can make the poori hard or the top layer can turn too crisp & flaky.Fine rava or semolina or chiroti rava works best. If you do not have rawa, just skip it. If using chiroti rava, you can use about 2 tsps per cup of flour.
- Dough has to be stiff and tight but at the same time it must not be crumbly or too dry.
- You must be able to make smooth balls when you roll the ball in between your palms.
- Do not over knead the dough at anytime as it softens the dough. This will make the pooris oily.
Video
Watch Poori Video
NUTRITION INFO (estimation only)
© Swasthi’s Recipes
This Puri recipe post was first published in March 2018. Updated & republished in December 2020.
About Swasthi
I’m Swasthi Shreekanth, the recipe developer, food photographer & food writer behind Swasthi’s Recipes. My aim is to help you cook great Indian food with my time-tested recipes. After 2 decades of experience in practical Indian cooking I started this blog to help people cook better & more often at home. Whether you are a novice or an experienced cook I am sure Swasthi’s Recipes will assist you to enhance your cooking skills. More about me
Follow Swasthi’s Recipes


Comments
Thank you so much for sharing your puri recipe! I tried it out and it turned out absolutely amazing—light, fluffy, and so delicious. Everyone loved it! Grateful for your recipe.
Glad the recipe was helpful. Thanks for letting me know Saleena
I have corrected many of the cooking techniques that I usedto follow. The recipes and the illustrations help a great deal. Thankyou
You are welcome Lena. Glad the recipes have been helpful!
Step by step-along with steps-it is explained very neatly
Thanks Rohini
Love this
Poori is my childhood favorite breakfast meal and always wanted to try out myself but never had the confidence until I saw your video and step by step pictures. I tried the same recipe exactly and they were perfect. Much better than what I eat in the restaurants because mine had no excess oil despite using wheat flour and semolina. So good! I once had puri in a small hotel and they had a unique milk like flavor. Do you think people use milk to mix the dough? How can I get that flavor with your recipe, meaning less oil poori? But I don’t want them oily. Thank you and keep showing us new recipes.
Glad you like them Vanaja. Yes some restaurants use milk but they come out oily. Instead try using 50/50 organic/ unbleached all-purpose flour and wheat flour. Also if your wheat flour has too much bran you may sieve to discard some of it. Too much bran in the flour imparts a nutty flavor and that’s not great if you are aiming for a milky flavor in your poori. But 50/50 works better than sieving. Thanks for sharing your experience.
This (apart from the Semolina) is how I remember making (rolling and sometimes frying) puris with my mother when I was a kid – so thank you.
My only slight criticism is the best thing to have with Puris is Paruppu – Kerala Dhal with a little bit of butter. Ambrosia – and still use my mother’s recipe
Thanks for sharing your thoughts Chandra Sekar. Delighted to read that. Where I have grown up (in Karnataka) poori masala/ aloo masala and sagu are more common with poori. But kerala paruppu sounds delicious too!
This is my first time success with puri and plus is its whole wheat. Puris turned out amazing and I am always going to follow this recipie for a good crispy puri.
Nice 👍 hai
Fantastic
Very good recipe, everyone loved it
Wow…it works. Thank you so much for sharing your recipe and the great tips. So detailed. I have tried so many others but have failed each time. You have made me so happy and my family had a good poori meal❤️❤️❤️. God bless you
What to do if I made the dough and would like to make the puris after an hour ?
Yes you can
Fantastic Poori Recipe! I am a big fan of poori and love them any time. Unfortunately most places I have tried so far served them very oily and sometimes like papad. I am a new cook and learning to follow your recipes since early this year. My first attempt to make poori ended up being a hit and the video helped me a lot. Thank you for the amazing recipes. Now on this is going to be on my weekend lunch menu with your vegetable kurma.
Lohita, thanks for sharing back how the recipe turned out for you. That makes me happy. Hope you enjoy more recipes from here.
Thank u for the recipe
Hi Swasthi
What oil is good for frying poor is ? Do you throw the oil used for frying or use is again ?
Hi Shanthini,
I discard the oil after frying. I use refined organic coconut oil for frying from a brand called medella. It is steam refined (not chemical refined) and is for suitable for deep frying. Look for a similar refined oil suitable for frying in your country. Sometimes I also use ref sunflower oil. Avoid using unrefined oil for deep frying. Here is a list of refined oils with high smoke point which I have tried –
refined safflower oil is best(above 500F/260c)
next is refined peanut oil, ref coconut oil and ref sunflower oil. (around 450F/250C). It is hard to find a organic refined oil brand because most are chemical refined. Hope this helps.
Is it semolina flour or just plain semolina ?
Hi, It is fine semolina.
Hi Swathi, the water for making dough for puri.. is it hot , warm or cold water ?
Thanks.
Hi Nalisha,
Use room temperature water
Can you make a roomali roti recipe for us?
Hi Cindy,
I remember now I haven’t posted the basic roti recipe you asked me long time ago. Are you looking for a rumali roti to cook on induction?
Hi there – well actually I would love the basic recipe more than rumali – I just love thin rotis general. I can’t believe you remember that! I just think you’re tips help me more than others. I’ve been practicing a lot but I’m not perfect yet and I feel like you’re tips help me get things to perfection.
Thanks,
Cindy
Thanks for the recipe. I need to make a big batch of puri’s, would it work if I doubled the ingredients ?
Yes you can double and triple as well. If using more than 3 cups flour then make the dough in batches
Hi,
Can be fried today for next day serving?
Hi,
No. They become chewy. They are best served hot and right after frying
The pooris came out perfect with this recipe. I had been struggling for years with making perfect pooris.. Thank you Swasthi..
Glad to know Swati
Thank you!