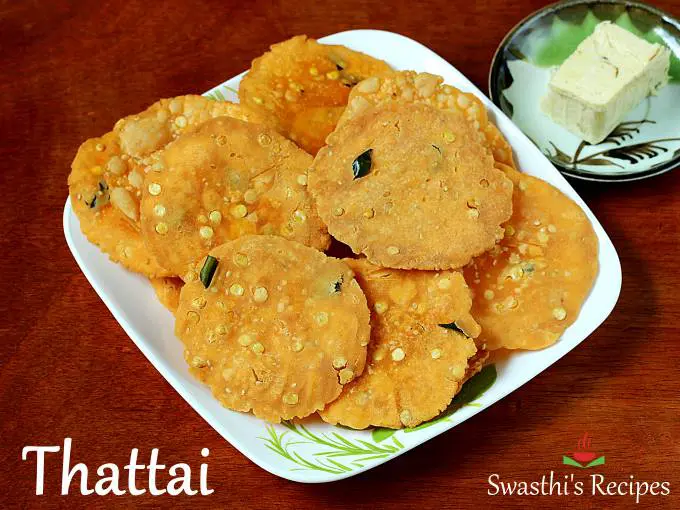
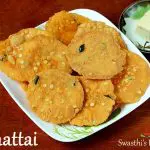
Thattai Recipe
By Swasthi on October 21, 2022, Comments, Jump to Recipe
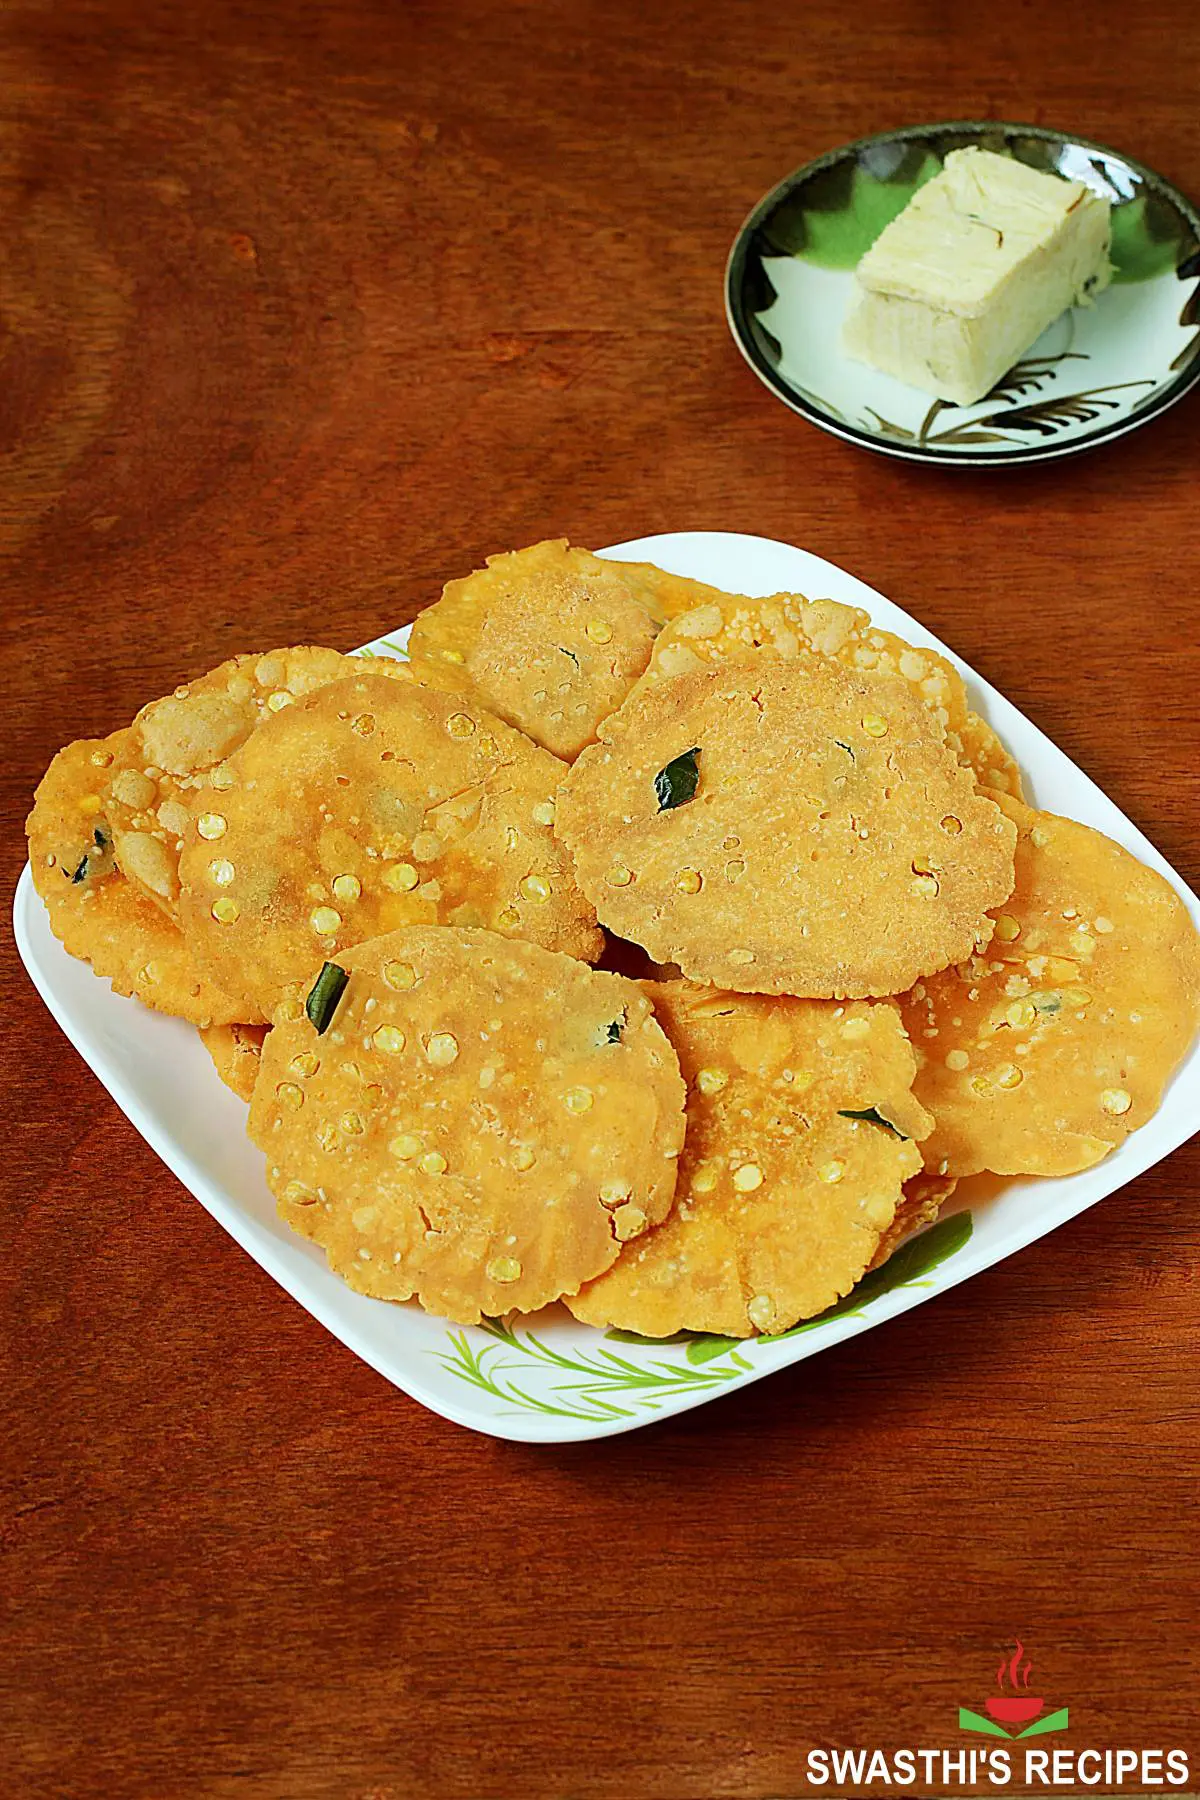
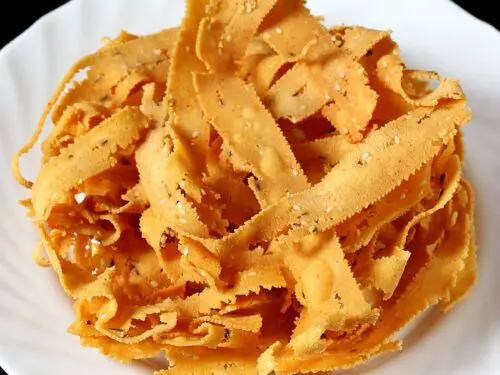
Thattai are popular South Indian festive Snacks made with rice flour, urad dal flour, salt, spices and curry leaves. These crunchy deep fried rice crackers are from the Tamil cuisine and are also known as Thattai Murukku or Thattu Vadai. During the festive season Thattai & Murukku are made in most South Indian homes as festivals are incomplete without fresh homemade delicacies.
About Thattai
Thattai are basically flat, spiced rice flour discs (puris) that are deep fried until crisp & golden. These are a traditional Tamilian snack made during festivals like Krishna Jayanthi and Deepavali. Thattai are minimally spiced with red chilli powder and hing.
They are flavored with butter, curry leaves and sesame seeds. For an added crunch and texture a small amount of soaked chana dal (Bengal gram) is added while making the dough.
Similar versions of Thattai are made in the neighboring states of Tamil Nadu. They are known as Nippattu in Karnataka and Chekkalu in Andhra Pradesh. However all these 3 are different in texture and taste as they are made with different proportions of flour, spices and other ingredients.
Each home has their own recipe of making these to suit their personal preference. This recipe yields light, tasty and crispy thattai that you can make during festivals or all around the year to serve as a tea time snack.
Making perfectly crunchy traditional rice flour snacks begins with rinsing the rice well, draining and drying. Then milled to flour as the fresh ground flour enhances the aroma & texture of these snacks.
To make thattai and murukku, I follow the same traditional method & make rice flour at home using raw rice during festivals. However this time I have made these using store bought rice flour.
If you have a helping hand home then I suggest making thattai with homemade rice flour as they taste the best.
If using store bought rice flour make sure you use the one from an Indian brand preferably South Indian brands. There are tons of varieties of rice flour available in the market – made with long rice, sticky rice, glutinous rice, boiled rice etc.
Many of these do not work well to make these rice crackers. Unknowingly I had tried these snacks a few years ago with different kinds of flours and they turned out to be soft within hours.
So the key to tasty and crunchy thattai is good rice flour. If you are a beginner, I would highly recommend watching the thattai recipe video and the following the step by step photo instructions.
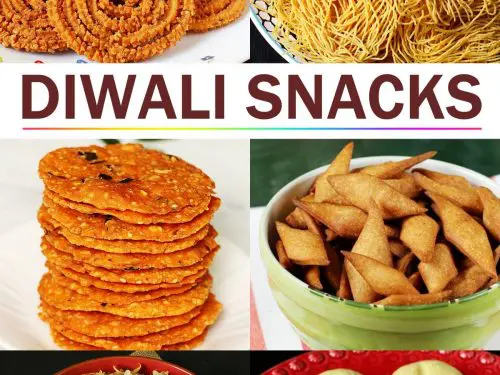
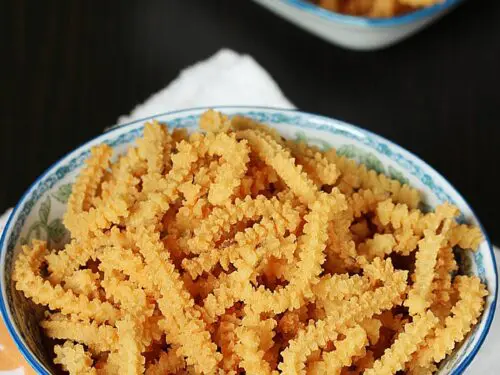
More Diwali Snacks Recipes,
Butter murukku
Ribbon pakoda
Murukku
Chakli
How to Make Thattai (Stepwise Photos)
Preaparation
1. Wash and soak 1 tablespoon chana dal for 1 hour. Drain it completely to a small strainer like a tea strainer and set aside.
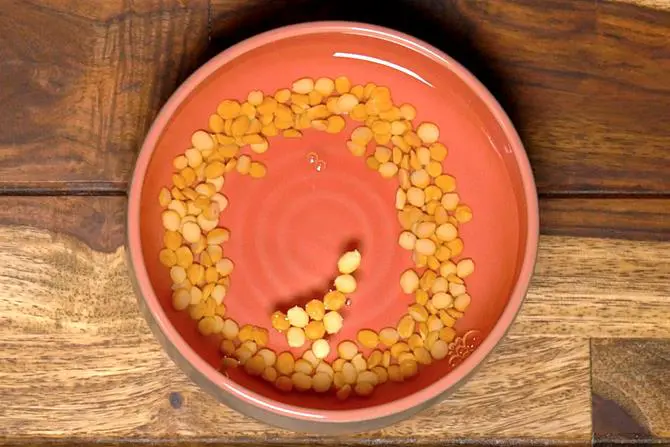
2. Roast 1½ teaspoons urad dal or peanuts on a low to medium flame till golden & aromatic. Keep stirring while roasting as you want to roast them evenly. Cool completely. If using peanuts, then remove the skin.

3. Add roasted & cooled dal and 2 tablespoons fried gram to a blender jar. If using peanuts, first powder the roasted urad dal very fine. Then add peanuts and make a coarse powder. You can also powder 1 tablespoon sesame seeds called for in the recipe. This is optional.
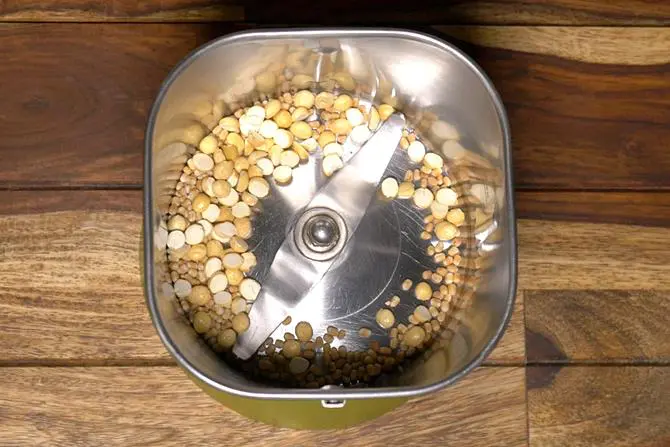
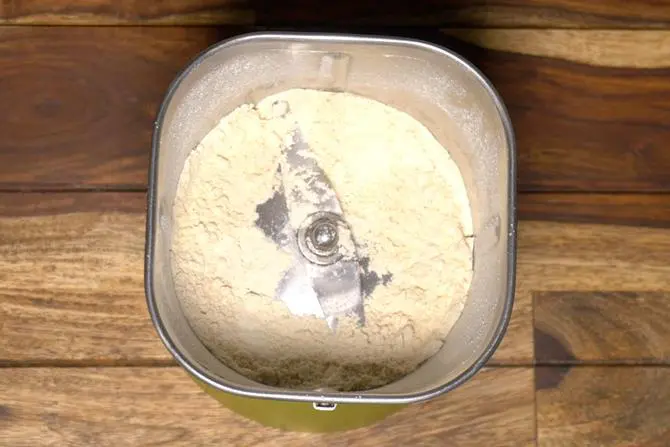
4. Grind to a fine powder.
Make Dough
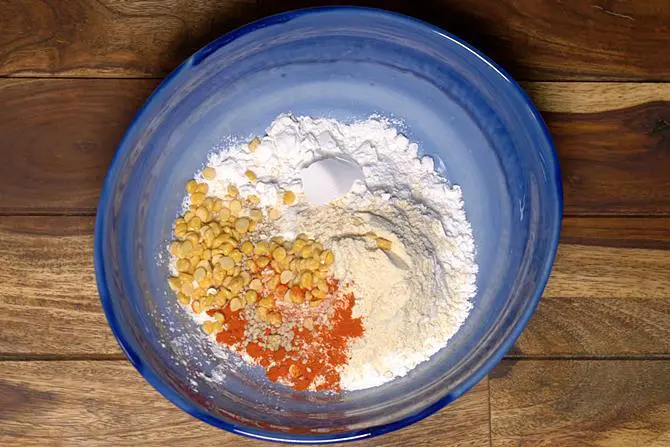
5. Add 1 cup rice flour, urad dal and fried gram flour, ½ teaspoon salt, ½ teaspoon red chili powder, drained soaked chana dal and 1 tablespoon crushed sesame seeds. Sometimes sesame seeds splutter while frying, so make sure they are lightly crushed with a rolling pin before adding.
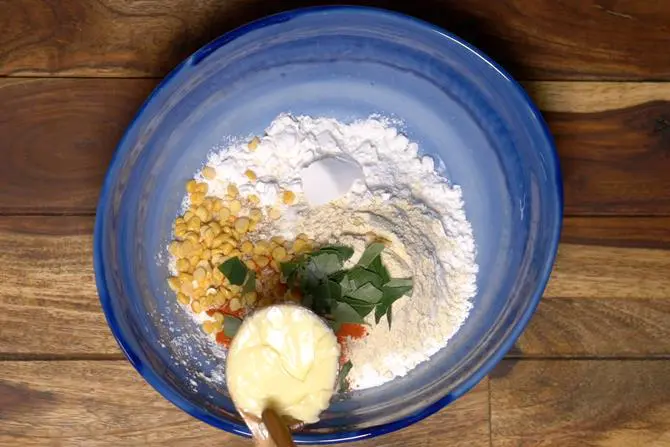
6. Add 1 sprig finely chopped curry leaves and 1 tablespoon unsalted butter.
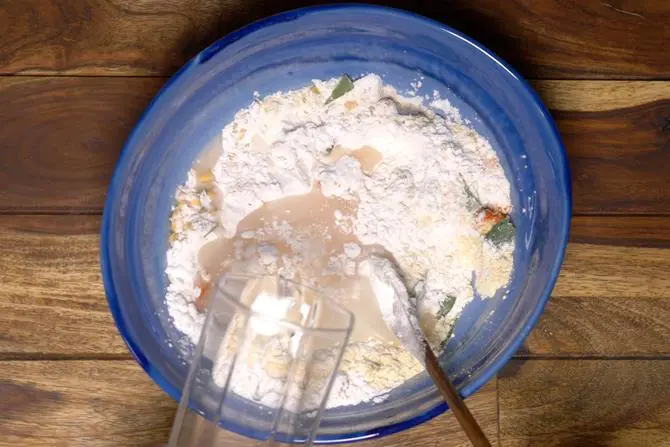
7. Mix up gently to incorporate the butter and then add ¼ cup water. Do not pour lot of water at one time. Keep mixing and add more water only as required to make a stiff dough.
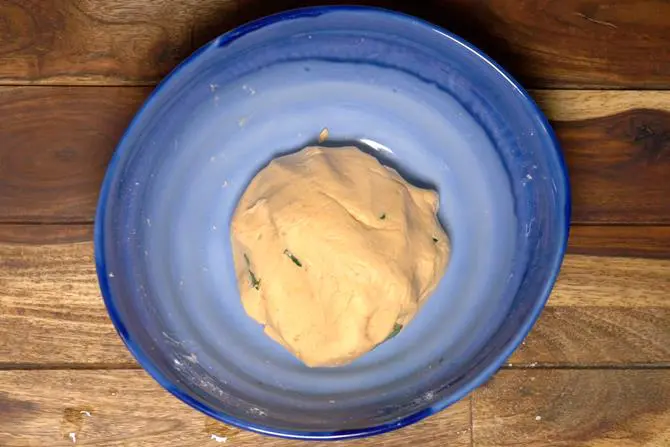
8. Make a stiff and non sticky soft dough.
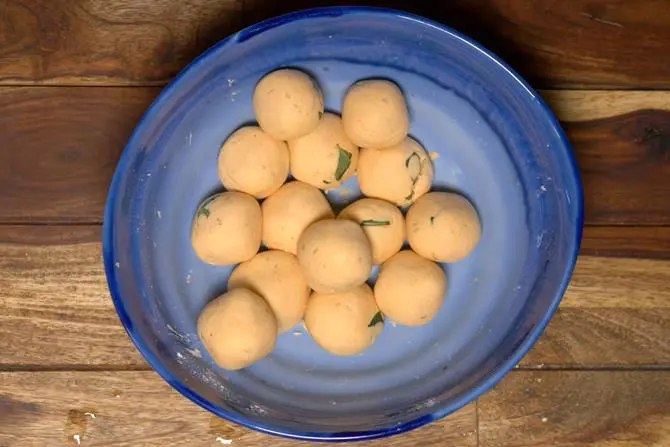
9. Divide the dough to 14 to 16 balls. Keep these balls covered as we don’t want them to dry out.
Make Thattai
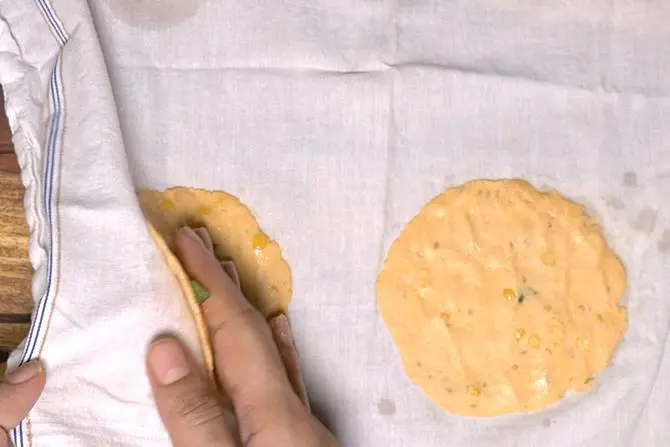
10. Spread a dry cloth. Grease your fingers. Begin to make thattai by flattening the dough ball.

11. Flatten the dough as much as possible. You will see the balls begin to crack towards the edges. That is just fine, join up the cracks. Grease your fingers as needed. You can also flatten these with the base of a greased steel bowl or a greased lid. I am comfortable making these with fingers as the thattai turns out even with fingers.
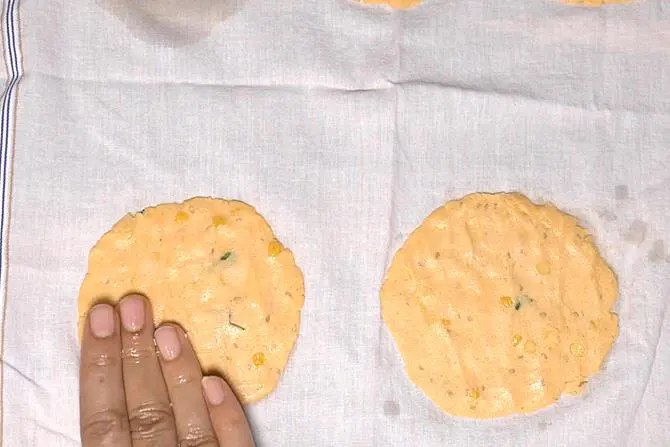
12. Make these thin as shown in the picture. Too thin thattai will break while you lift and too thick ones will not turn crisp. So make them moderately thin. Keep these covered with a cloth or parchment papper so they don’t dry out.
13. Heat oil in a deep kadai on a medium heat. When the oil is hot enough, drop a small flat piece of dough to check if the oil is hot enough. The dough should come up to the surface and not sink to the bottom.
Slide thattai in the hot oil from the sides. Take cake while you slide it. Do not disturb for 2 minutes after adding. Turn them to the other side and fry on both sides until golden & crisp. You can fry more than one thattai at one time if there is enough space in the kadai.
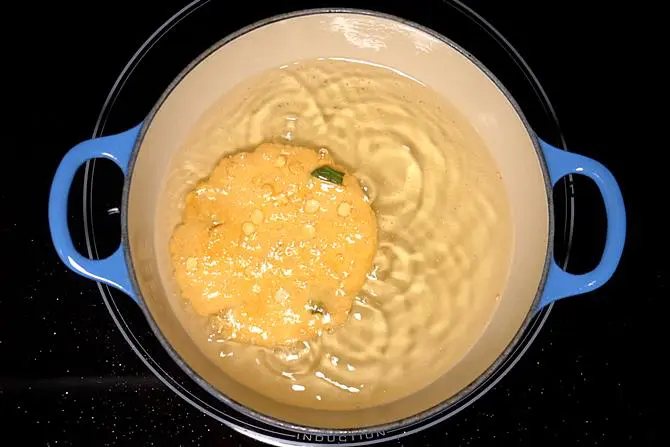
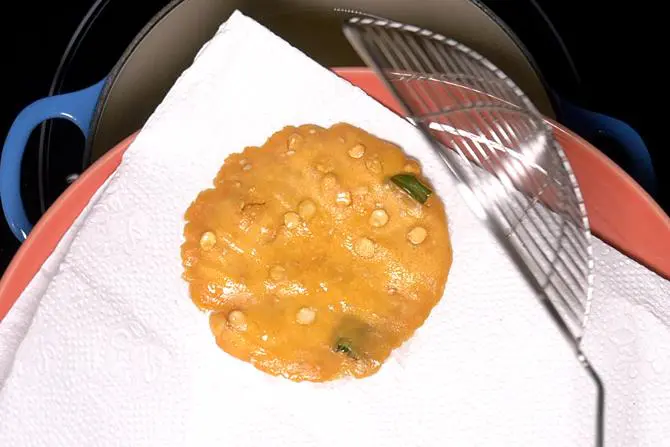
14. The bubbles begin to reduce when they are well fried. Drain them to a cooling rack or a steel colander. Cool them completely. They will look very oil as soon as you remove them from oil but then nothing much would be on the surface or in the thattai later after cooling.
Storing Thattai
Now comes the very important part of storing them well. Not only the method of preparing thattai even the way they are stored is very important to keep them fresh and crispy for many days.
Do use a clean and moisture free air tight container. I use air tight stainless steel containers to store thattai, chakli, murukku.
Do not leave them too long to the air/fan/ air con once they are cooled down. As soon as you notice them cooled transfer them to the jar.
Thattai should be completely cool before moving to the jar. These keep good for 2 weeks.

Related Recipes
Recipe Card
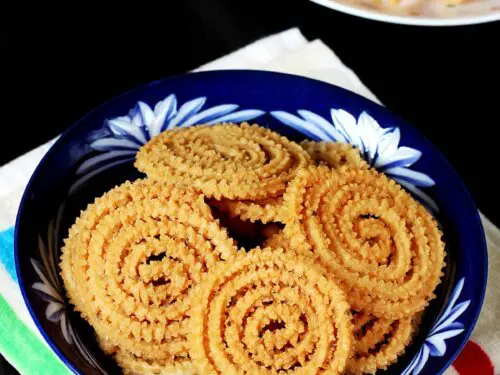
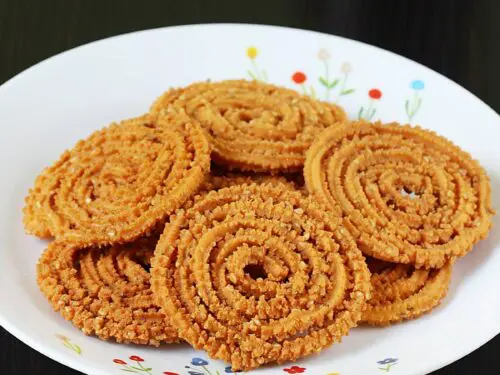
Thattai Recipe
For best results follow the step-by-step photos above the recipe card
Ingredients (US cup = 240ml )
To roast and powder
- 1½ teaspoon urad dal or 1½ tbsp peanuts
Other Ingredients
- 1 cup rice flour
- 1 tablespoon butter (unsalted)
- 2 tablespoon fried gram or roasted gram or pottukadalai
- 1 tablespoon chana dal or bengal gram (soaked for 1 hour)
- 1 tablespoon sesame seeds (crushed, optional, use fresh)
- ½ teaspoon red chilli powder (use 1 tsp for spicy)
- ¼ teaspoon asafoetida (hing)
- ½ teaspoon Salt (adjust to taste)
- 1 sprig curry leaves chopped finely
- Water as needed
- Oil for deep frying as needed
Instructions
Preparation
- Wash and soak chana dal for 1 hour. Drain and set aside.
- Dry roast urad dal or peanuts until lightly golden and cool them. If using peanuts, remove the skin.
- Add urad dal to a blender jar along with fried gram. Make a fine powder. If using peanuts, then powder fried gram very fine, then add skinned peanuts and make a coarse powder. You can also powder sesame seeds.
Make Dough
- To a mixing bowl, add rice flour, urad dal & fried gram powder, red chili powder, hing, salt, sesame seeds & chopped curry leaves.
- Drain the soaked chana dal and add it to the bowl.
- Also add soft butter & mix all of them well to incorporate the butter.
- Pour little water and begin to mix everything to make thattai dough.
- Add more water as needed and make the dough. Dough has to be non sticky, stiff and smooth.
- Too moist dough will make your thattai greasy as the excess moisture will soak up oil.
- Next too little moisture in the dough will make the thattai crack a lot while spreading the dough and make them hard.
- Taste the dough and add more salt if required. Divide the dough to 14 to 16 balls. Keep them covered.
How to Make Thattai
- Heat oil on a medium flame in a wide kadai.
- Spread a dry cloth, grease your fingers. Place a ball on the cloth or greased sheet.
- Begin to spread them moderately thin. Very thin thattai will break when you remove from the cloth. Very thick ones will not turn crisp.
- If the edges begin to crack then join them together. Make as many thattai as possible till the oil heats up.
- Check if the oil is hot by dropping a tiny flat piece of dough. It should rise and not sink.
- Transfer one thattai at one time to the hot oil.
- You can fry more than one thattai at one time if there is space in your kadai. But do not crowd them as they will not fry properly.
- Make sure the flame is set to medium high. Low flame will make them oily and high flame will brown them.
- Flip them when fried on one side. Flip as needed to both the sides and fry until evenly golden & crisp.
- When they are fried fully, bubbles will begin to reduce in the oil. Remove them to a cooling rack or colander. Repeat frying them in batches.
- When they cool down, transfer them immediately to a tight air tight container.
- Serve thattai as a snack. They keep good for about 2 weeks if fried in fresh oil.
Notes
Alternative quantities provided in the recipe card are for 1x only, original recipe.
For best results follow my detailed step-by-step photo instructions and tips above the recipe card.
Video
NUTRITION INFO (estimation only)
© Swasthi’s Recipes
Thattai Recipe first published in July 2017. Updated & Republished in October 2022.

About Swasthi
I’m Swasthi Shreekanth, the recipe developer, food photographer & food writer behind Swasthi’s Recipes. My aim is to help you cook great Indian food with my time-tested recipes. After 2 decades of experience in practical Indian cooking I started this blog to help people cook better & more often at home. Whether you are a novice or an experienced cook I am sure Swasthi’s Recipes will assist you to enhance your cooking skills. More about me
Follow Swasthi’s Recipes
Comments
I love thattai and this recipe helped me. They came out good. Thank you
Hi Swathi , I dono what mistake I have done but thattai becomes soft instead of being crispy, can you suggest what mistake I have to correct ?
Hi Saranya,
It is the kind of flour that affects the texture. You should use raw rice flour and not parboiled rice flour. Try adding a little more rice flour to the same dough and see.
My Thattai broken into tiny pieces once put in oil. What is the mistake I have done ?
If the oil is not hot they will break. Also it depends on the kind of rice flour. Parboiled rice flour can also break them.
Hi Swati , I have always made Thatais numerous times, using your recipe with 1 cup measure. Turns out perfect ????
Hi Hamsa,
Glad the recipe works well for you! Thank you so much!
This recipe was amazing! Made thattai for the first time ever this Diwali and my family really enjoyed it. Thank you for sharing!
Welcome Meena
Glad to know!
Thanks for leaving a comment
This recipe was amazing! Made thattai for the very first time this diwali and the family enjoyed it. Thank you for sharing!
Hi swasthi the thattai is very good thank you so much ?❤?
Hi Tamilselvi
Glad to know. You are welcome!
Hi swasthi the thattai is great thanks you ❤?
Hi swasthi the thattai is good.
Your recipies are great. Your recipies helped me learn cooking. Thank you very much for inspiring me to cook better!
Welcome Soundarya
Glad to know!
Thank you
Tried this thattai! Came out well , super recipe thanks Swasthi..
Welcome Sujatha
Glad to know
🙂
Can pottukadalai be replaced with something else? Pottukadalai is not available in the place I stay.
Hi Preethy
I haven’t tried with substitutes. Fried gram makes them light. I have a similar recipe you can check it Chekkalu. These are more crispier than thattai
Thank you
Can i use ghee instead of butter?
You can use hot oil instead of butter.
Is there a particular reason why one shouldn’t use ghee?
I haven’t tried it
Your Thathai recipe seems interesting. Going to make tomorrow. Thank you!
Welcome Ranjini
Hope you like them!
Can I bake these thattai. I would like to try baked version. please suggest.
Hi Manisha
I haven’t tried them baking.
Thank you so much for the thattai recipe. I made them and turned out very good. Making another batch today. Good work.
Welcome Revathi
Glad to know! Thanks for the comment.
Hi,
I tried the recipe for making Thattai at home.The test was good but it lost crispness within 2 hours of storage in airtight container.
All steps were taken religiously.
Kindly suggest any precaution(s) to ensure that thattai remains crisp for many more days and enjoyable :
Prakash Iyer
Hi,
As I mentioned in the post, thattai turns soft for several reasons.
1. Frying them in oil that isn’t hot enough.
2. The quality of flour.
3. Not frying thattai for long enough.
4. Frying them on a high flame will brown them too quickly but they don’t stay crisp for longer.
If you have followed all these steps and yet your thattai isn’t crisp for longer then i would say it should be the flour. I suggest refrying them in oil to make them edible.
Hope this helps.
Very practical.
Perfect recipe,it came out really well,texture was so nice
It looked crunchy but was very comfortable to eat
Really a big thanks and wishes
Hi Krithika
You are welcome. Glad to know thattai turned out good. Thanks for the comment.
🙂
Hi Swasthi,
I tried this thattai today. Perfect recipe. Came out very well. Thank you for the recipe.
You are welcome Aswini,
Glad your thattai turned out good. Thank you so much!
Very nice and explained very clearly.well done
Thank you
When i make thaatai it to soft but not crispy what should I do please tell me the recipe
Hi Jayanthi,
Thattai becomes soft if you fry them when the oil is not hot enough or if you make them thick. They must be as thin as possible and must be fried in hot oil on a medium high flame. Try this recipe it will turn out good.
Fantastic recipe, Very easy nicely explained.
Tried it and it came very well. Thank you for the recipe.